Adding Devices to DEP Retroactively
Introduction
This guide describes how to retroactively add iOS, iPadOS, and tvOS devices to the Apple Business Manager (ABM) or Apple School Manager (ASM) using Apple Configurator 2 so they can be managed via the Device Enrollment Program (DEP) with Relution.
What is Apple Configurator 2 used for?
Apple Configurator 2 is a free Mac app used for the manual configuration of Apple devices via USB. It enables:
- Creating and deploying configuration profiles.
- Retroactively adding devices to DEP that were not already assigned by an authorized reseller.
Preparations
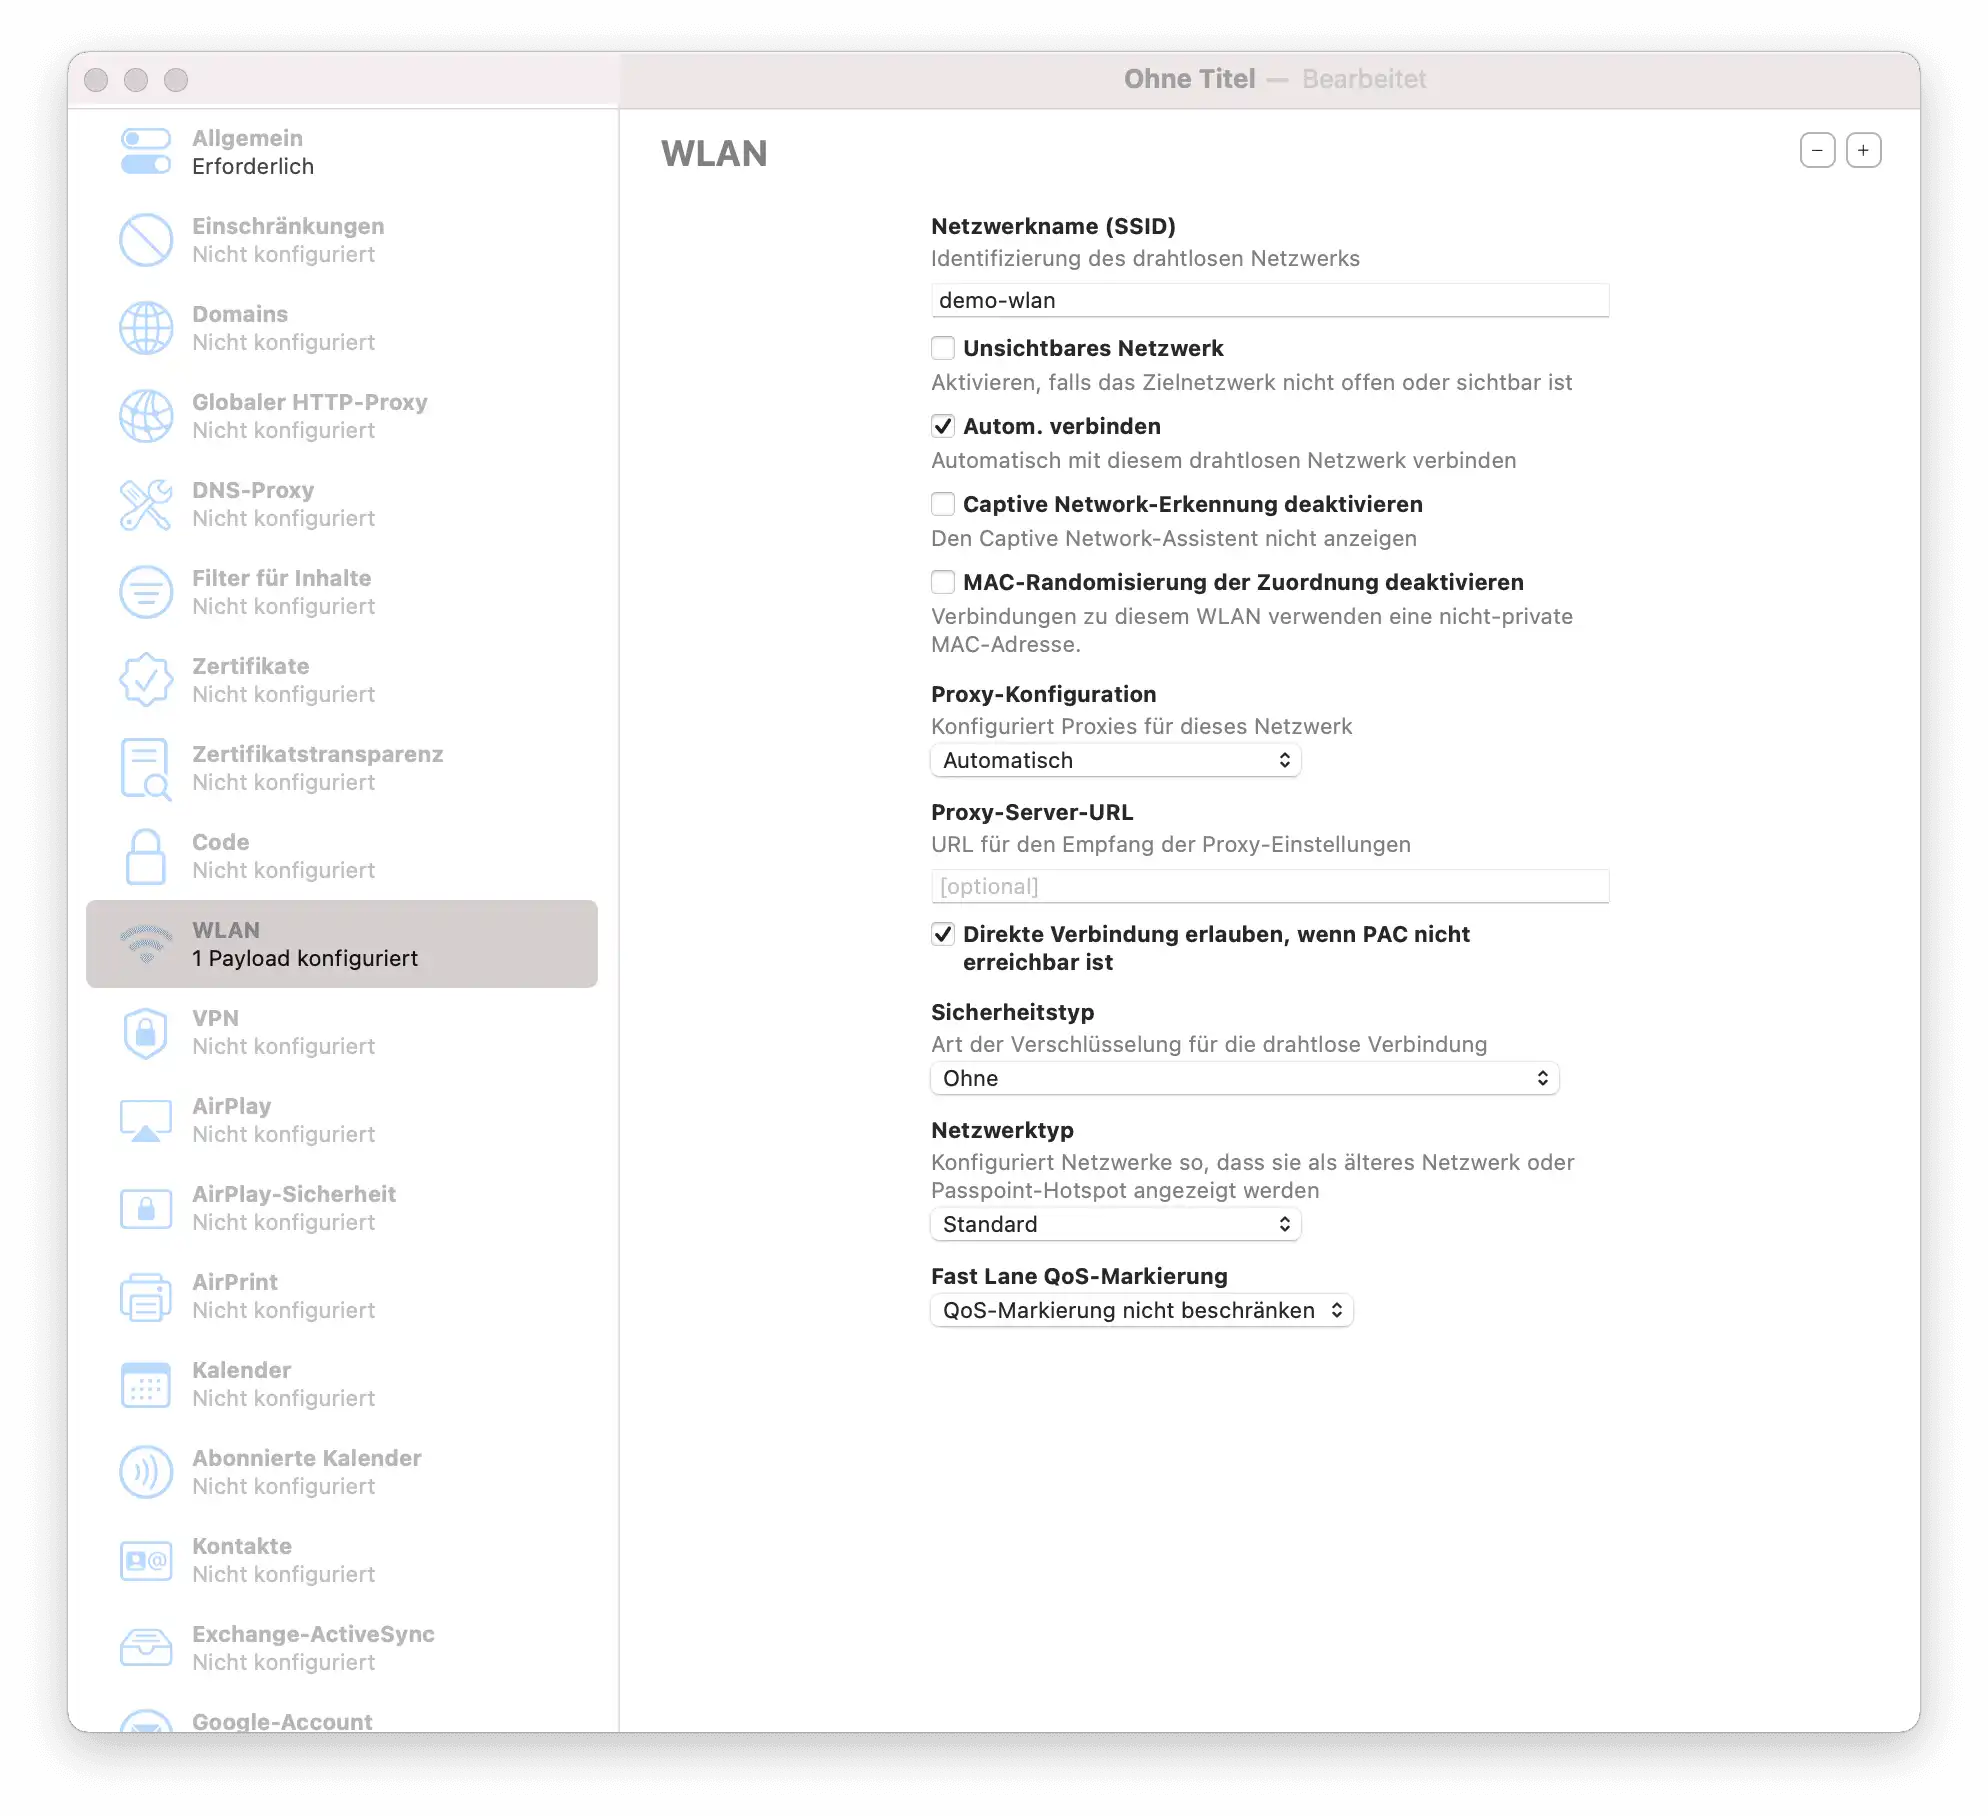
To ensure smooth automatic registration, you should create a Wi-Fi profile in advance:
- In Apple Configurator: Go to File -> New Profile -> Wi-Fi.
- Enter your network credentials.
- Save the profile as a file on your Mac.
Ensure that the entered credentials are correct and functional.
Execution: Adding Devices to DEP
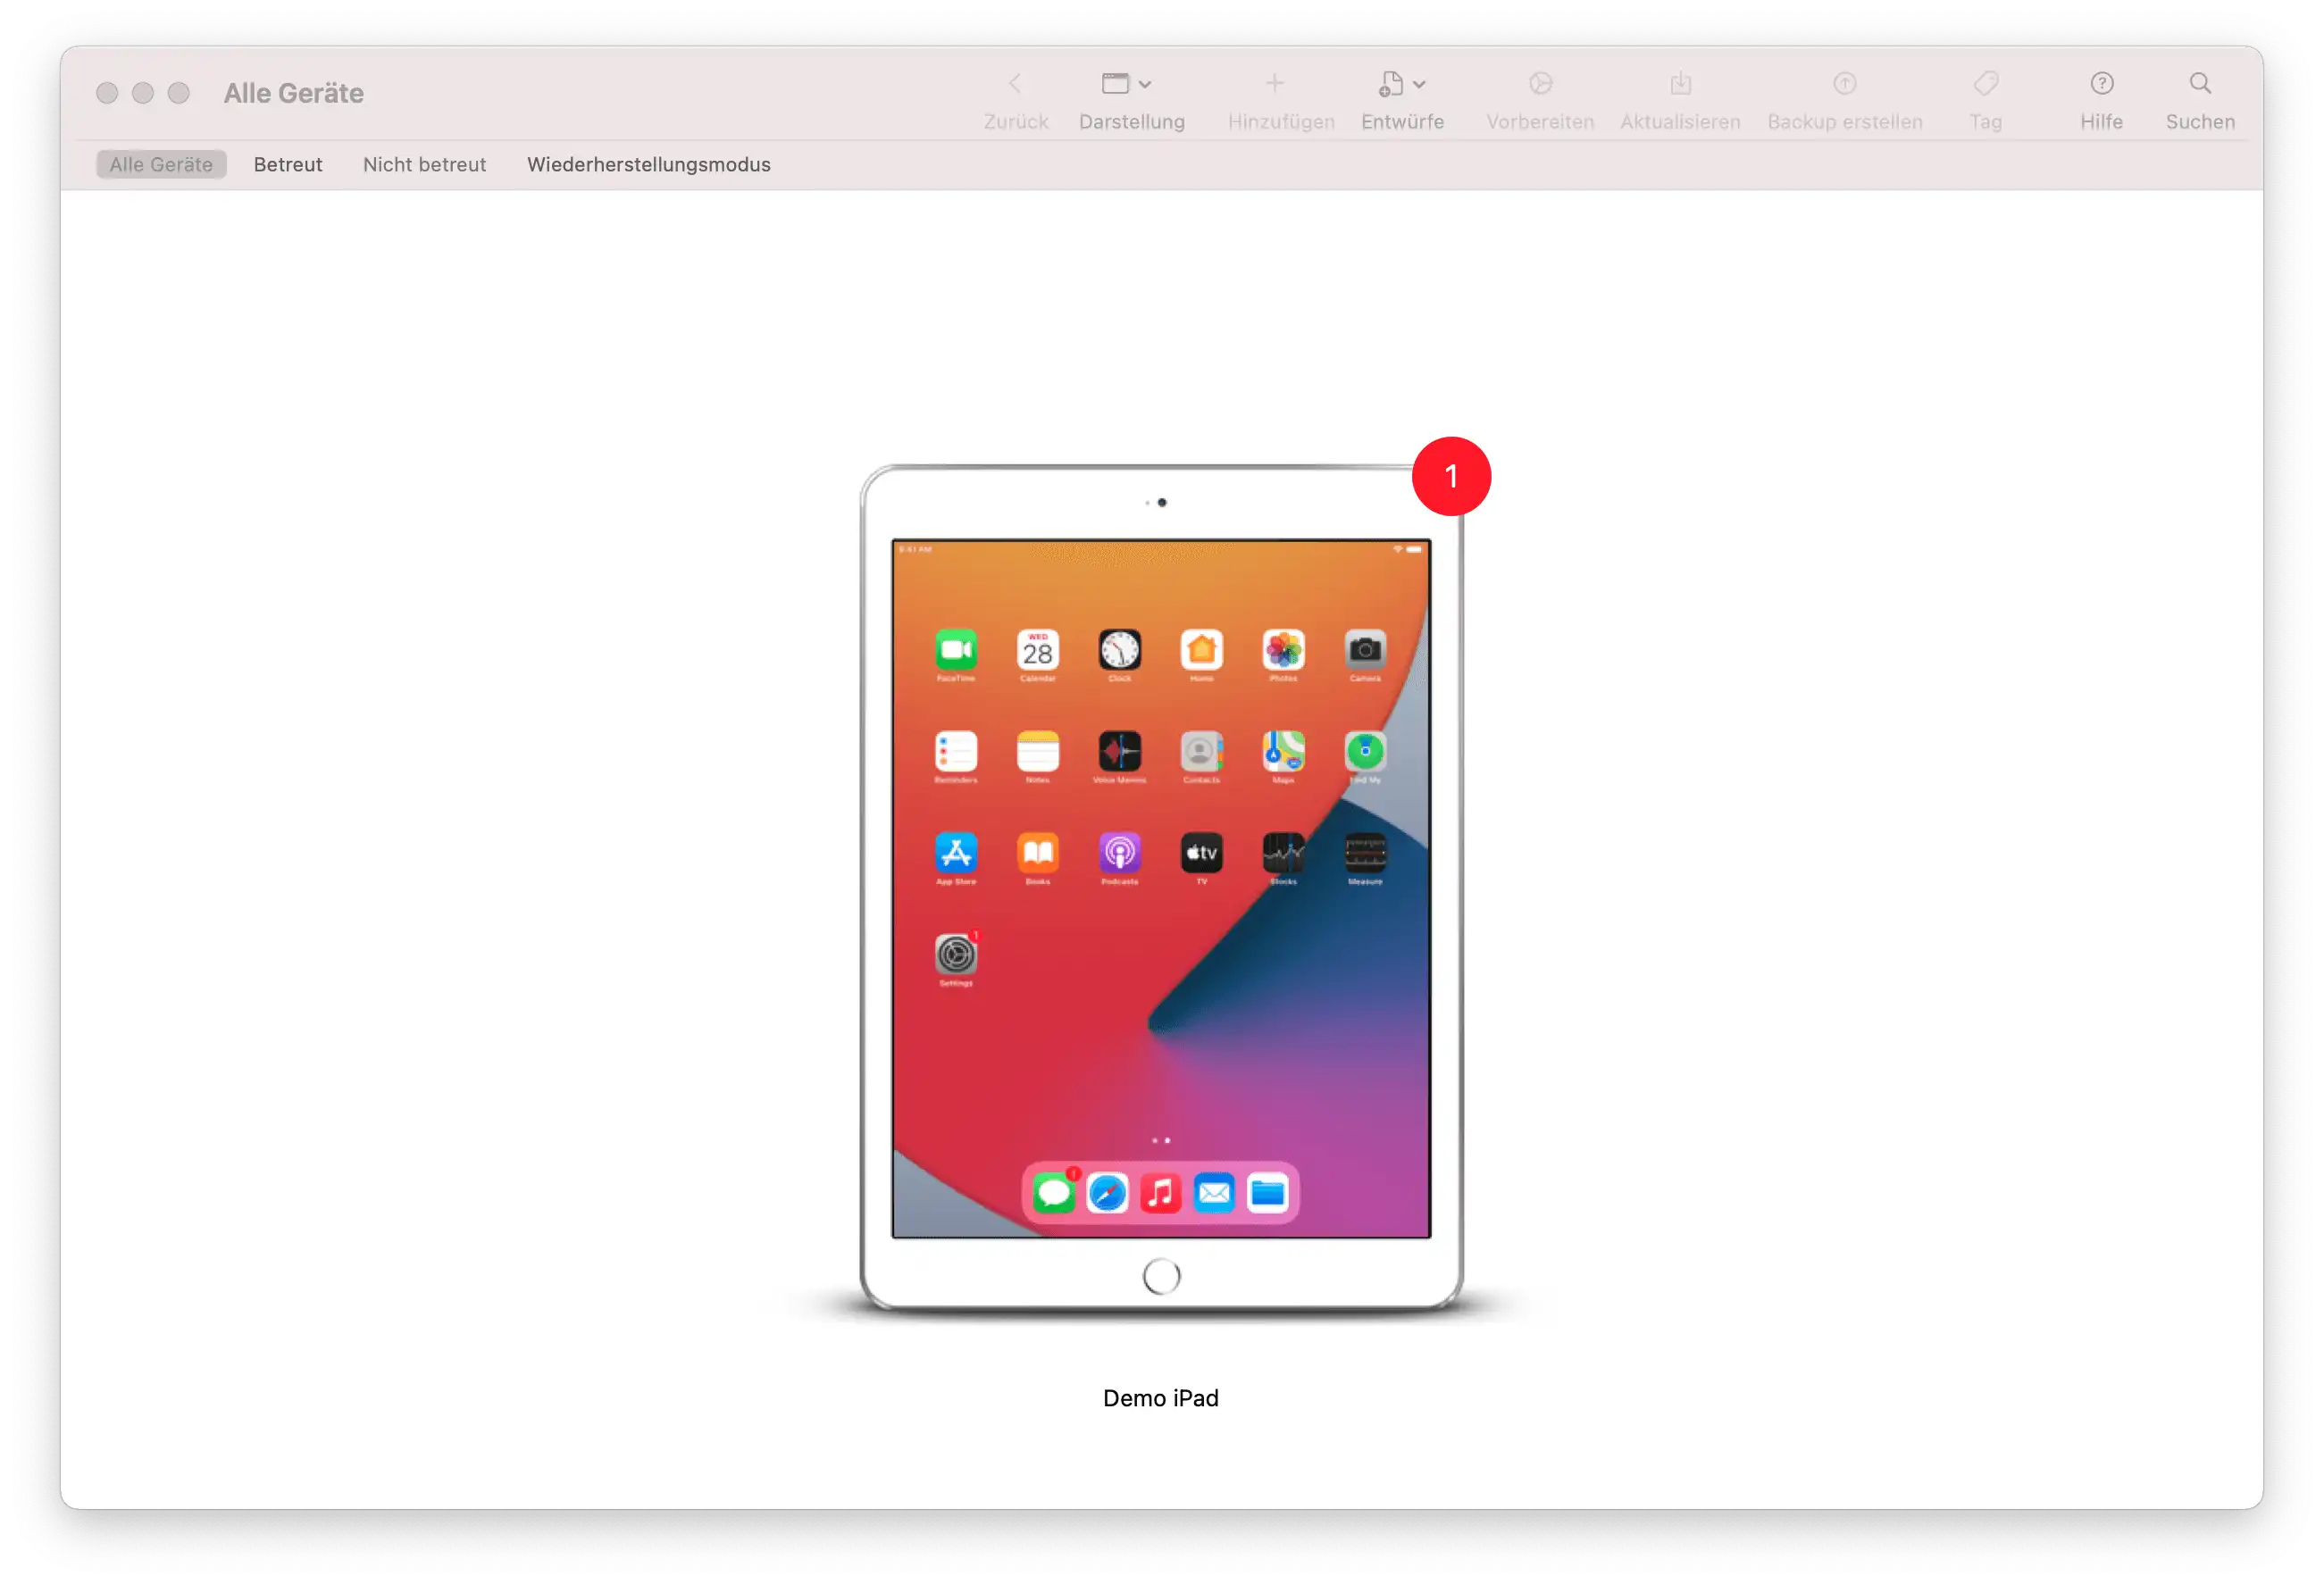
- Connect Device: Connect the Apple device to your Mac via USB and launch Apple Configurator 2.
- Factory Reset: Right-click the device and select Advanced → Erase All Content and Settings.
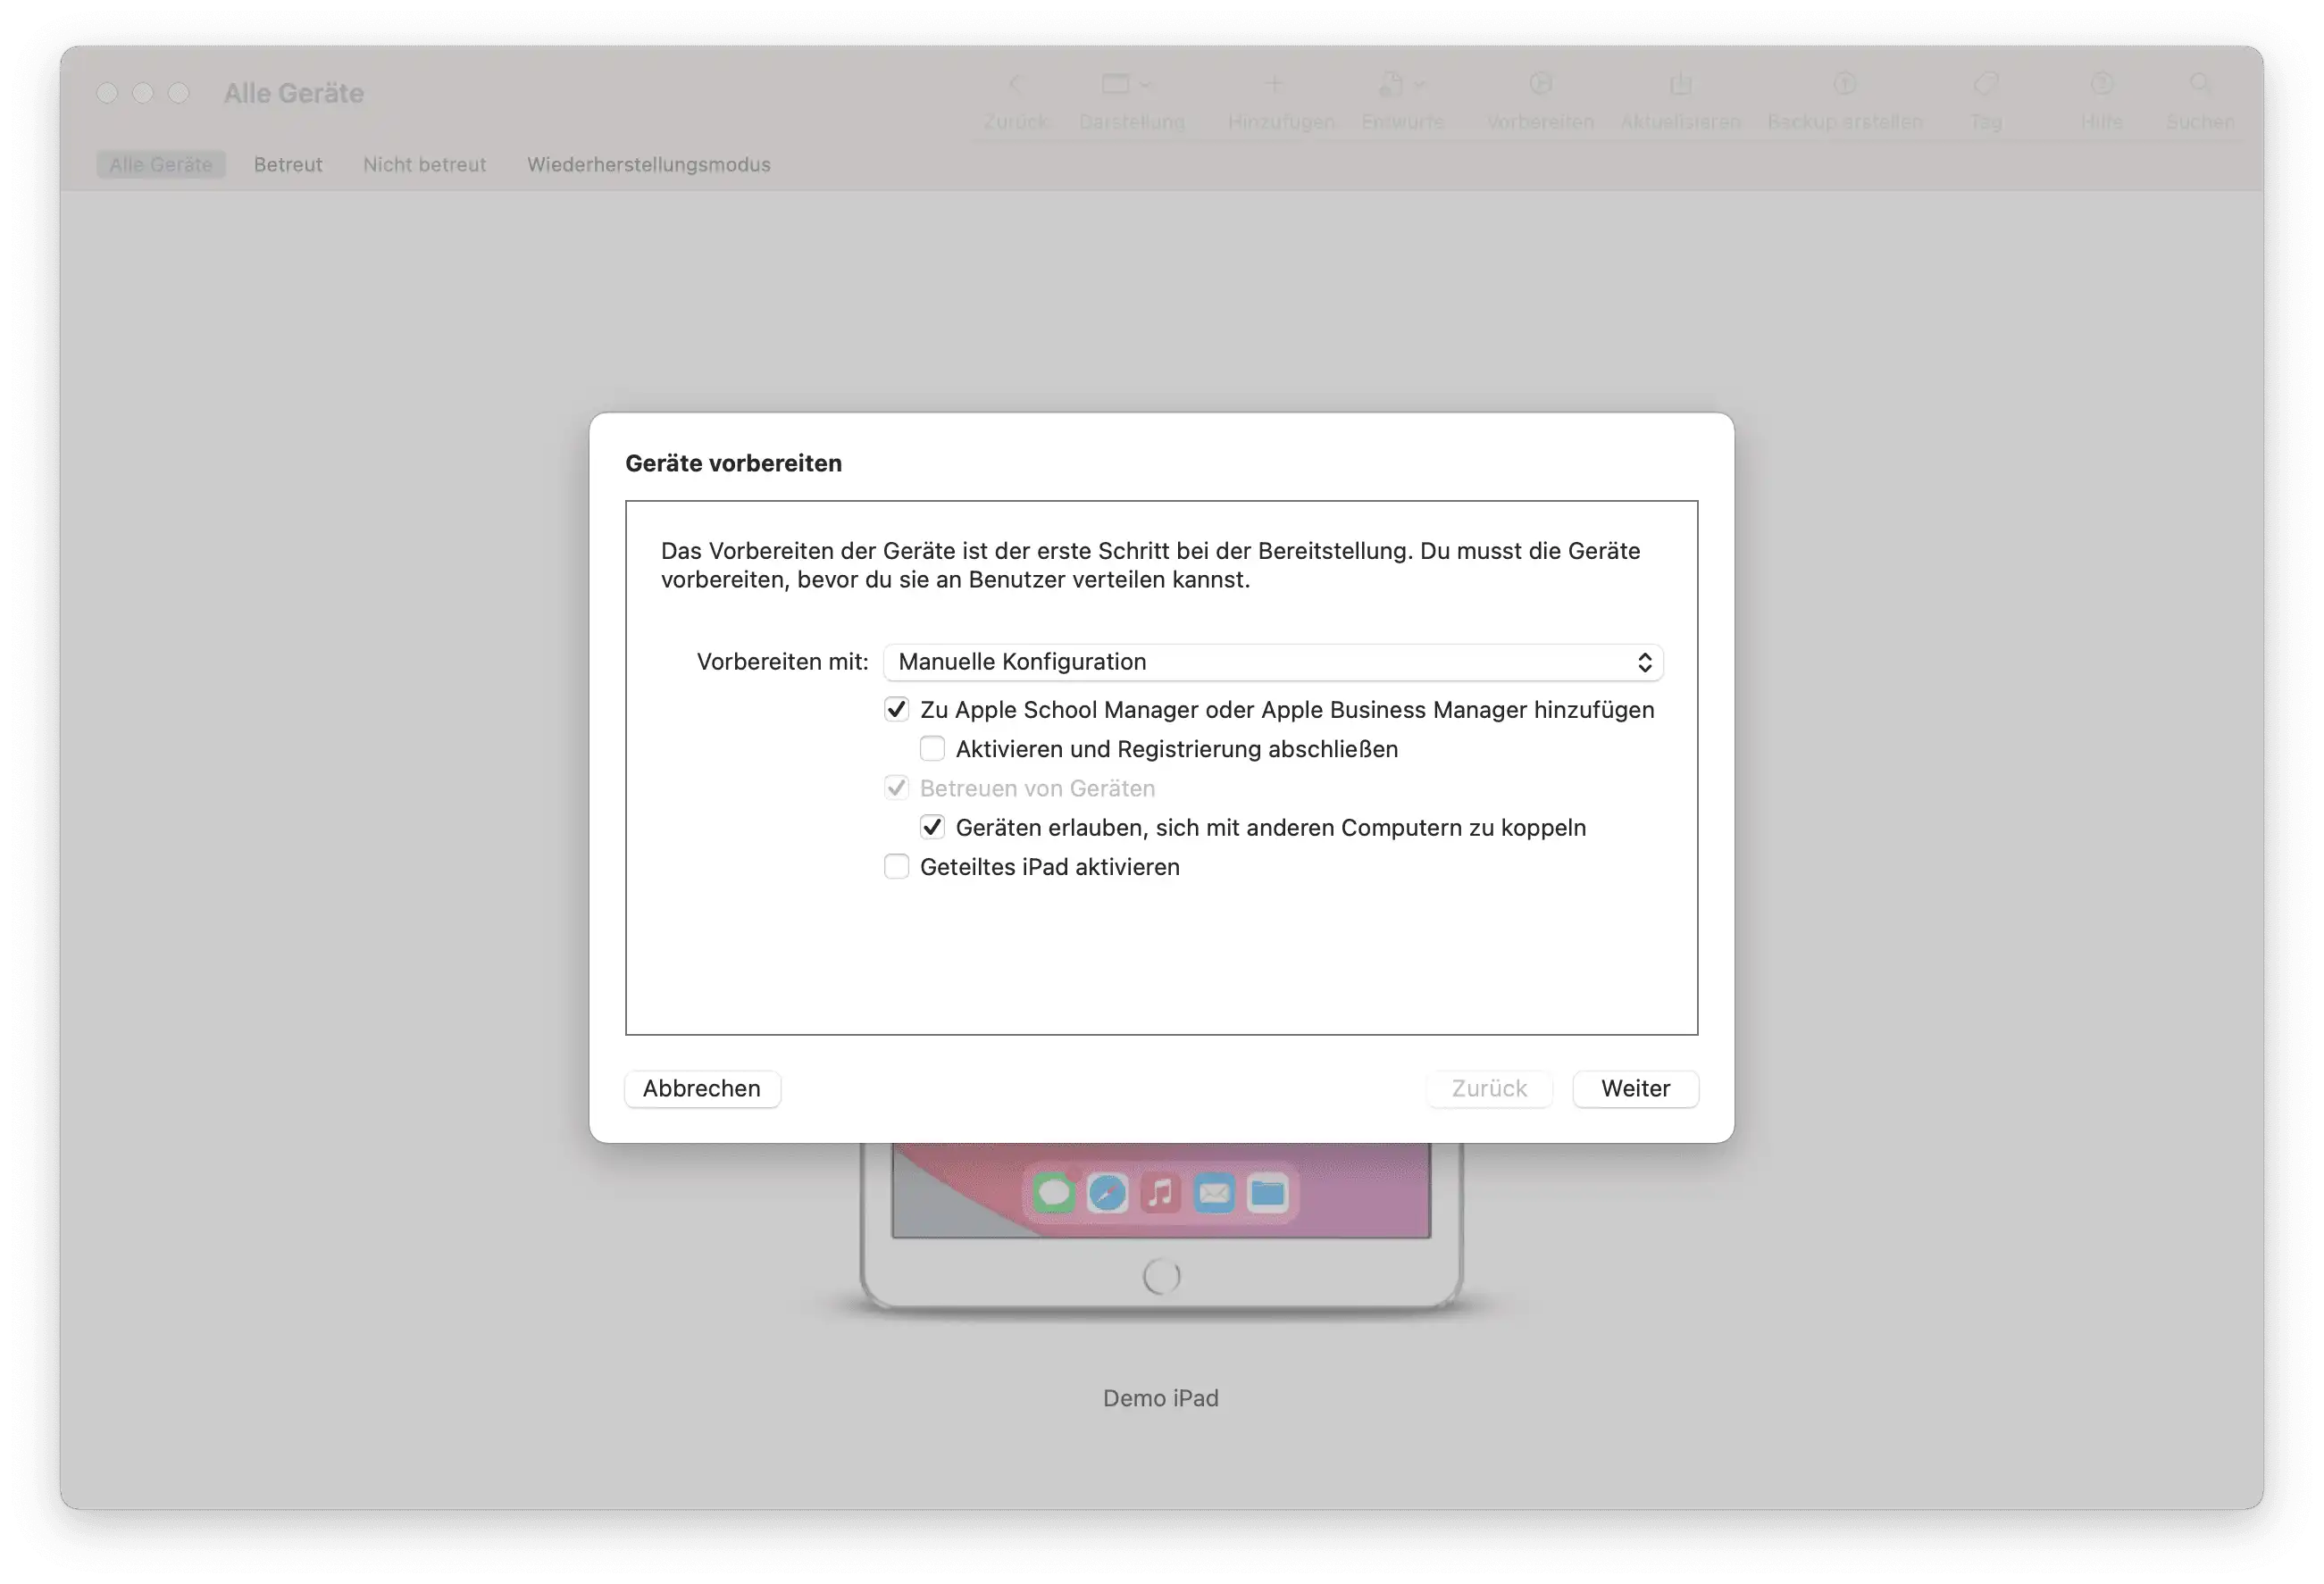
- Prepare: Right-click the device and select Prepare….
- Select Options:
- Add to Apple Business Manager or Apple School Manager.
- Allow devices to pair with other computers (enable).
- Important: The option “Activate and complete enrollment” must NOT be selected.
- Server Configuration: Select New Server and enter your Relution URL:
- Standard (iOS/iPadOS):
https://live.relution.io/ - For tvOS:
https://live.relution.io/api/v1/devices/appleMdm/depenroll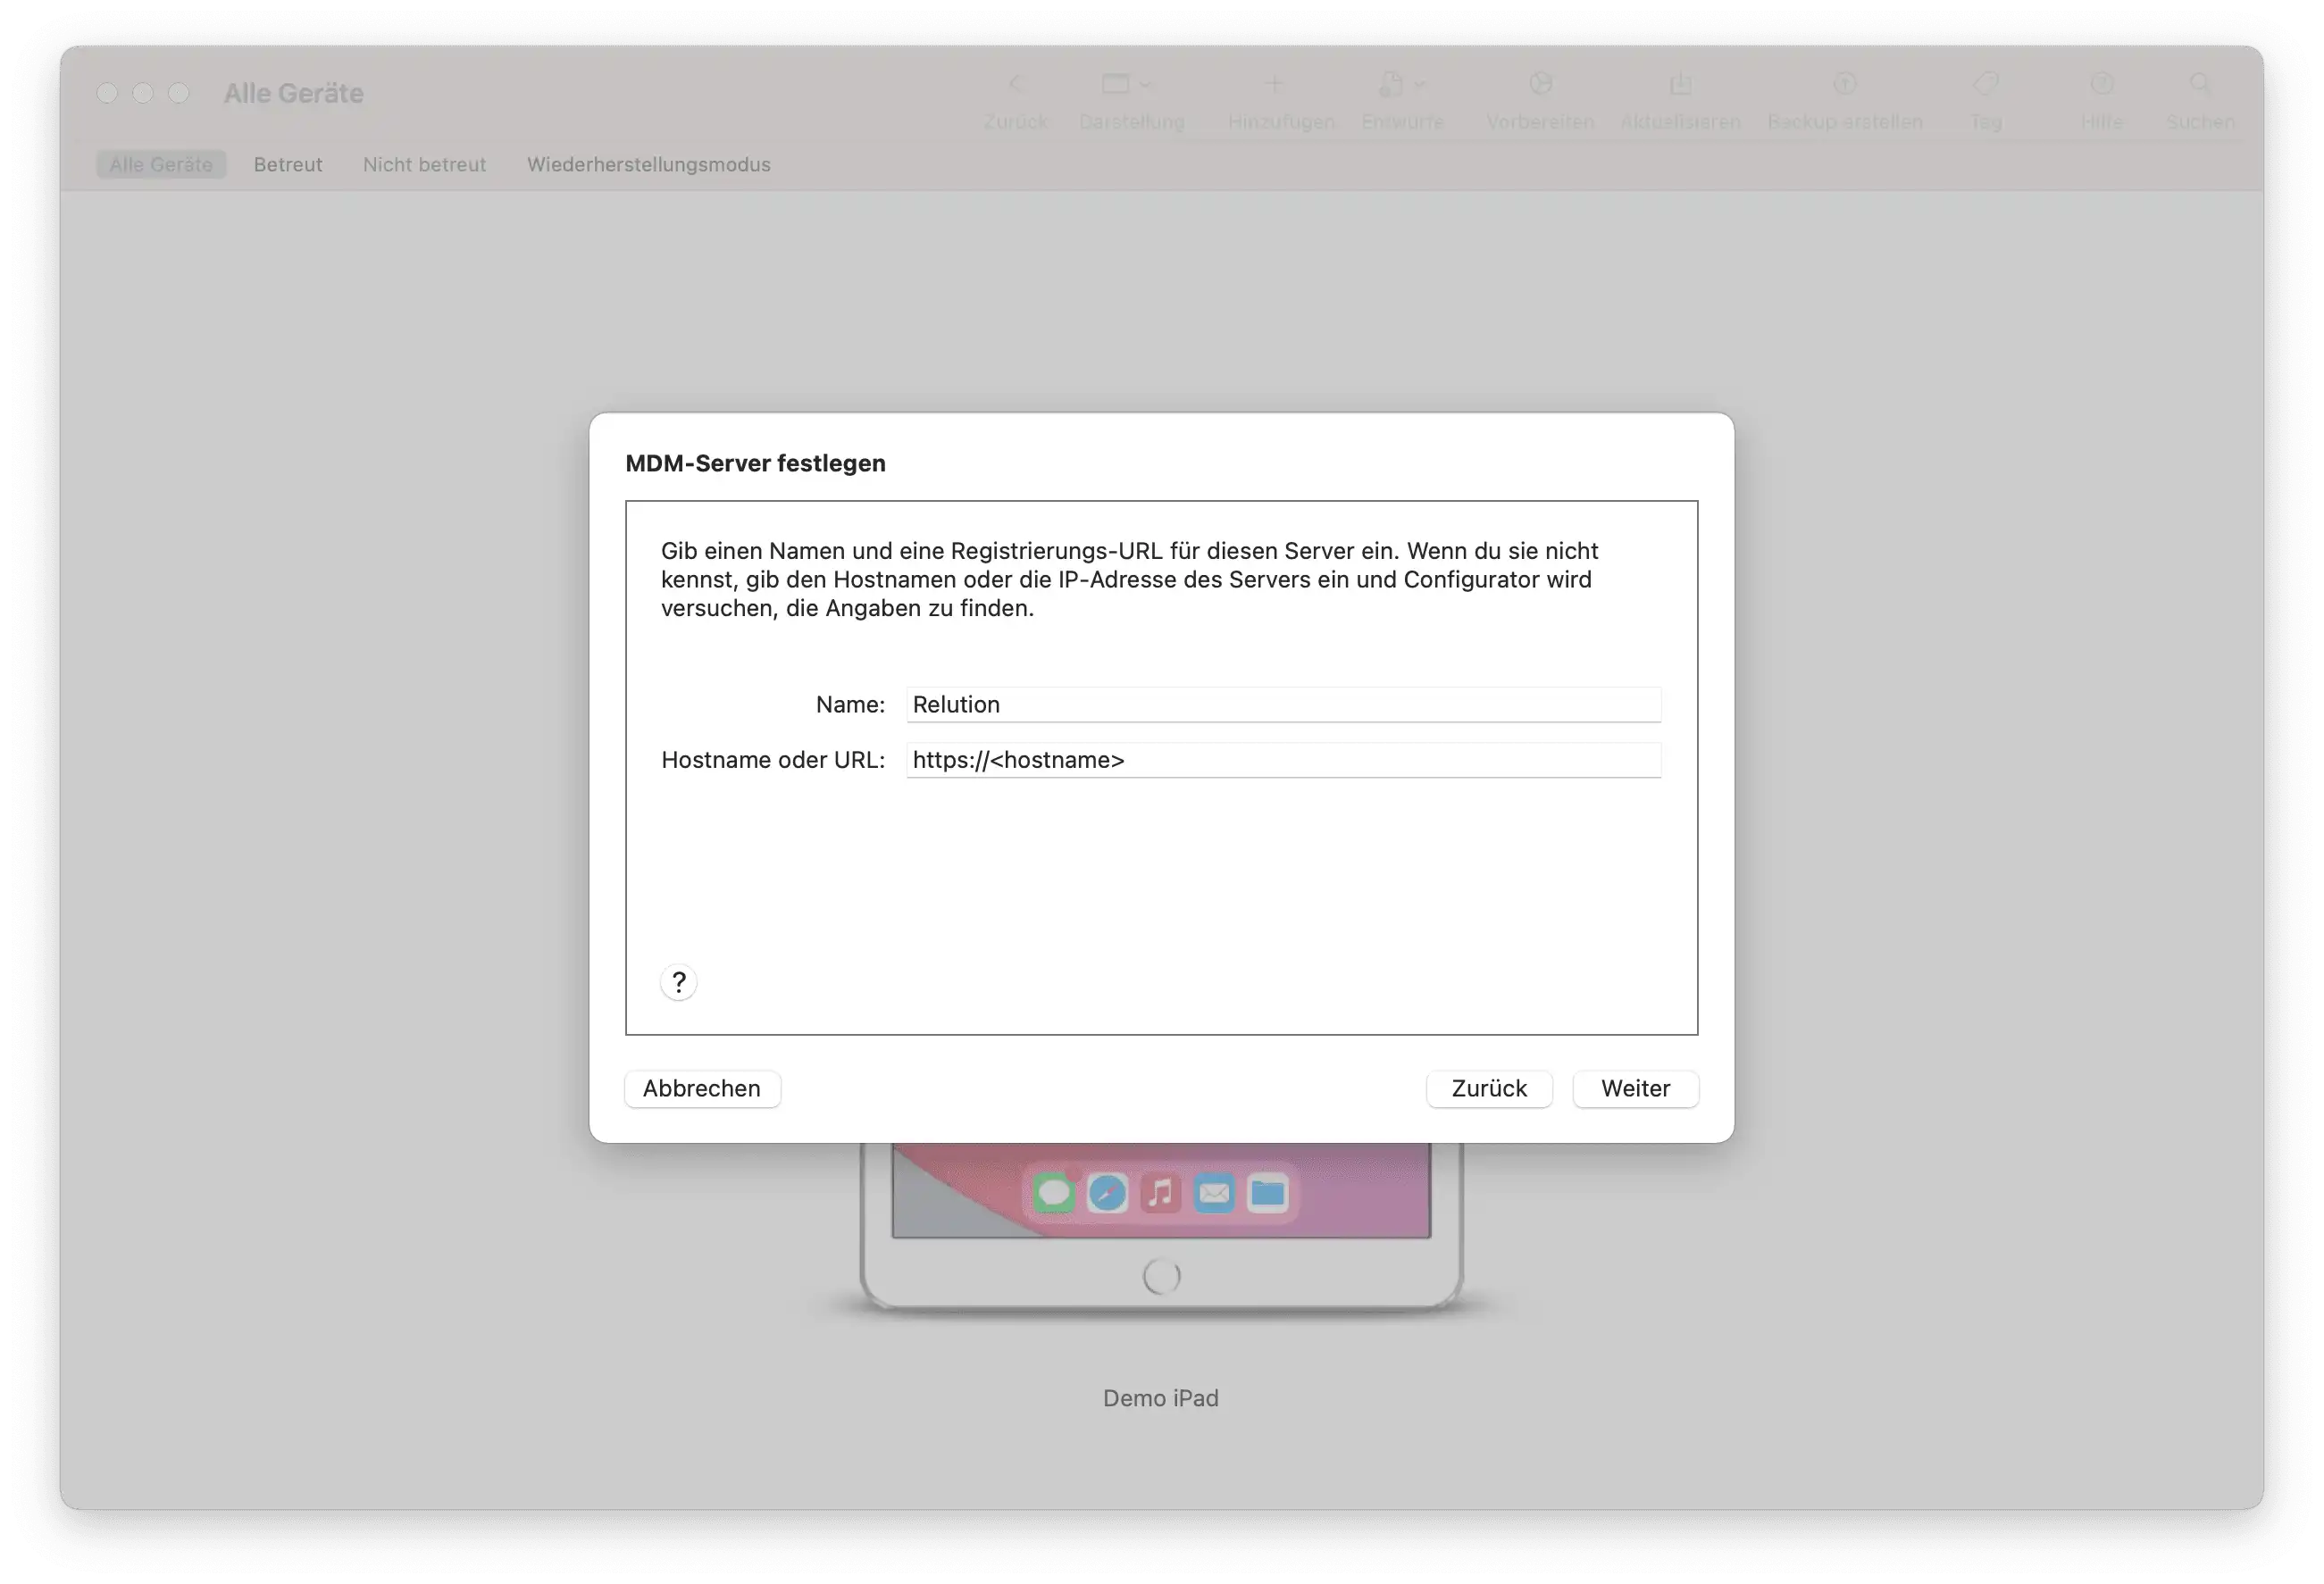
- Standard (iOS/iPadOS):
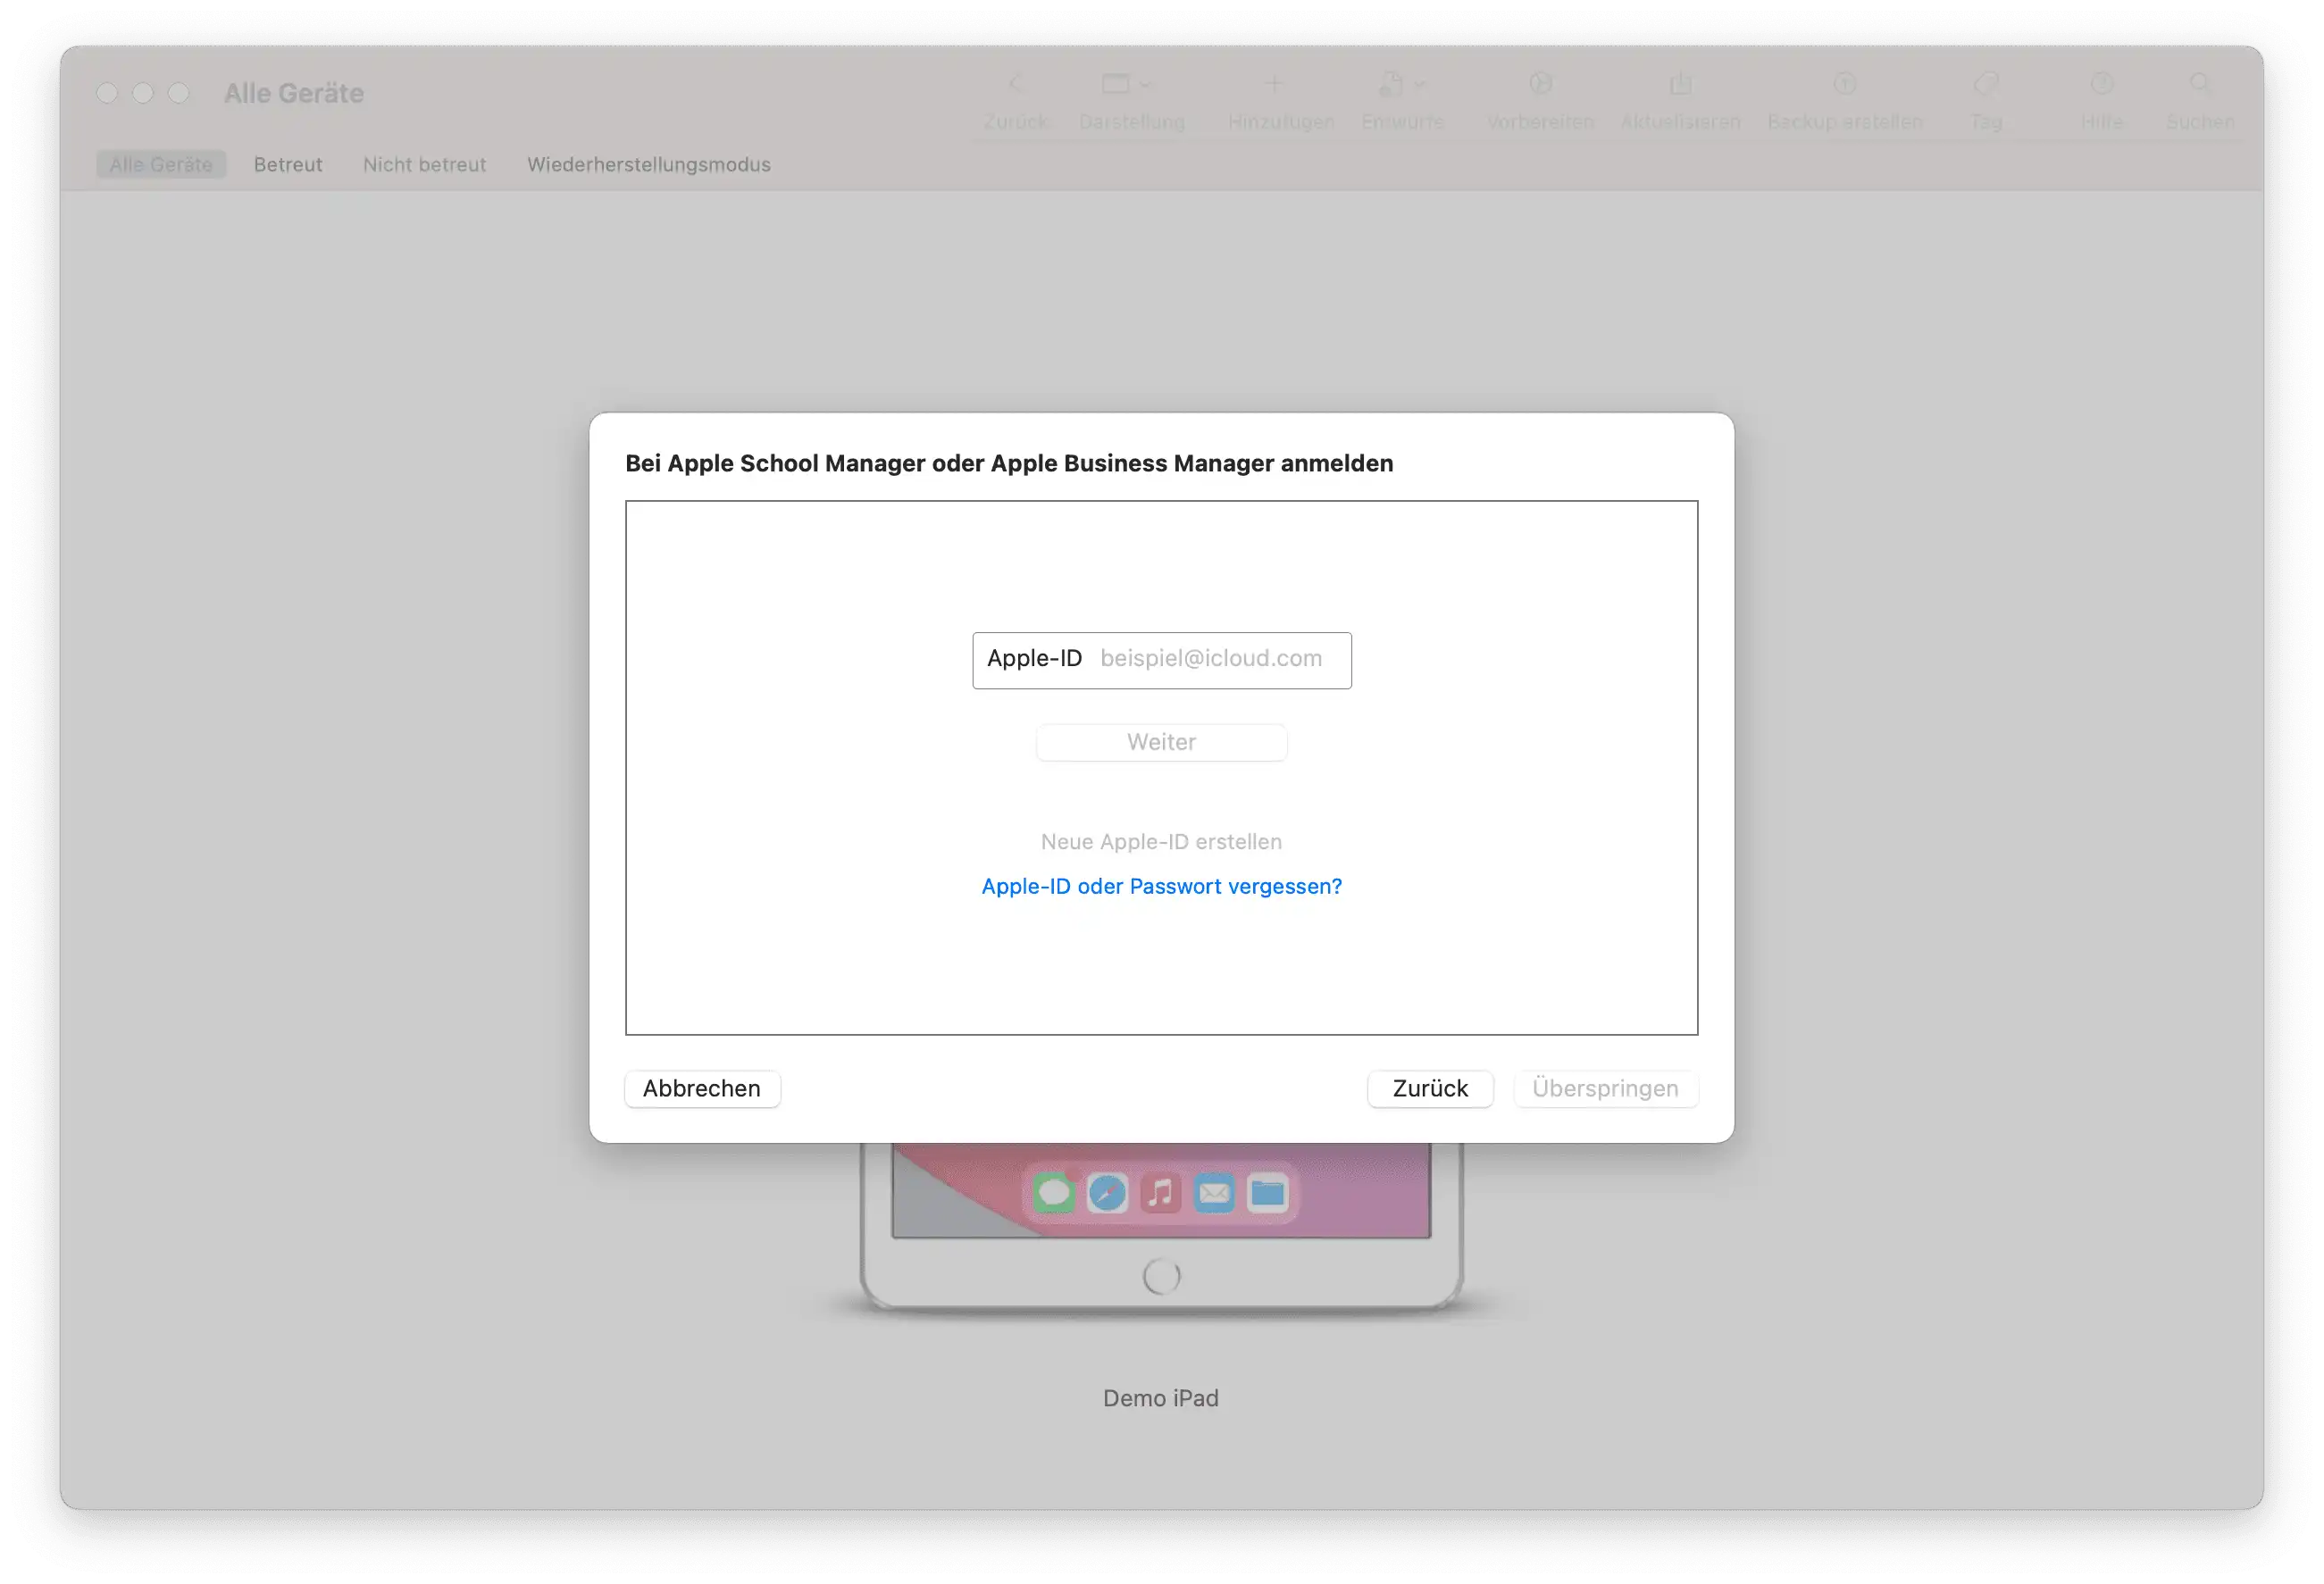
- Organization: Select New Organization and sign in with the Apple ID of your ABM/ASM account (2-factor authentication required).
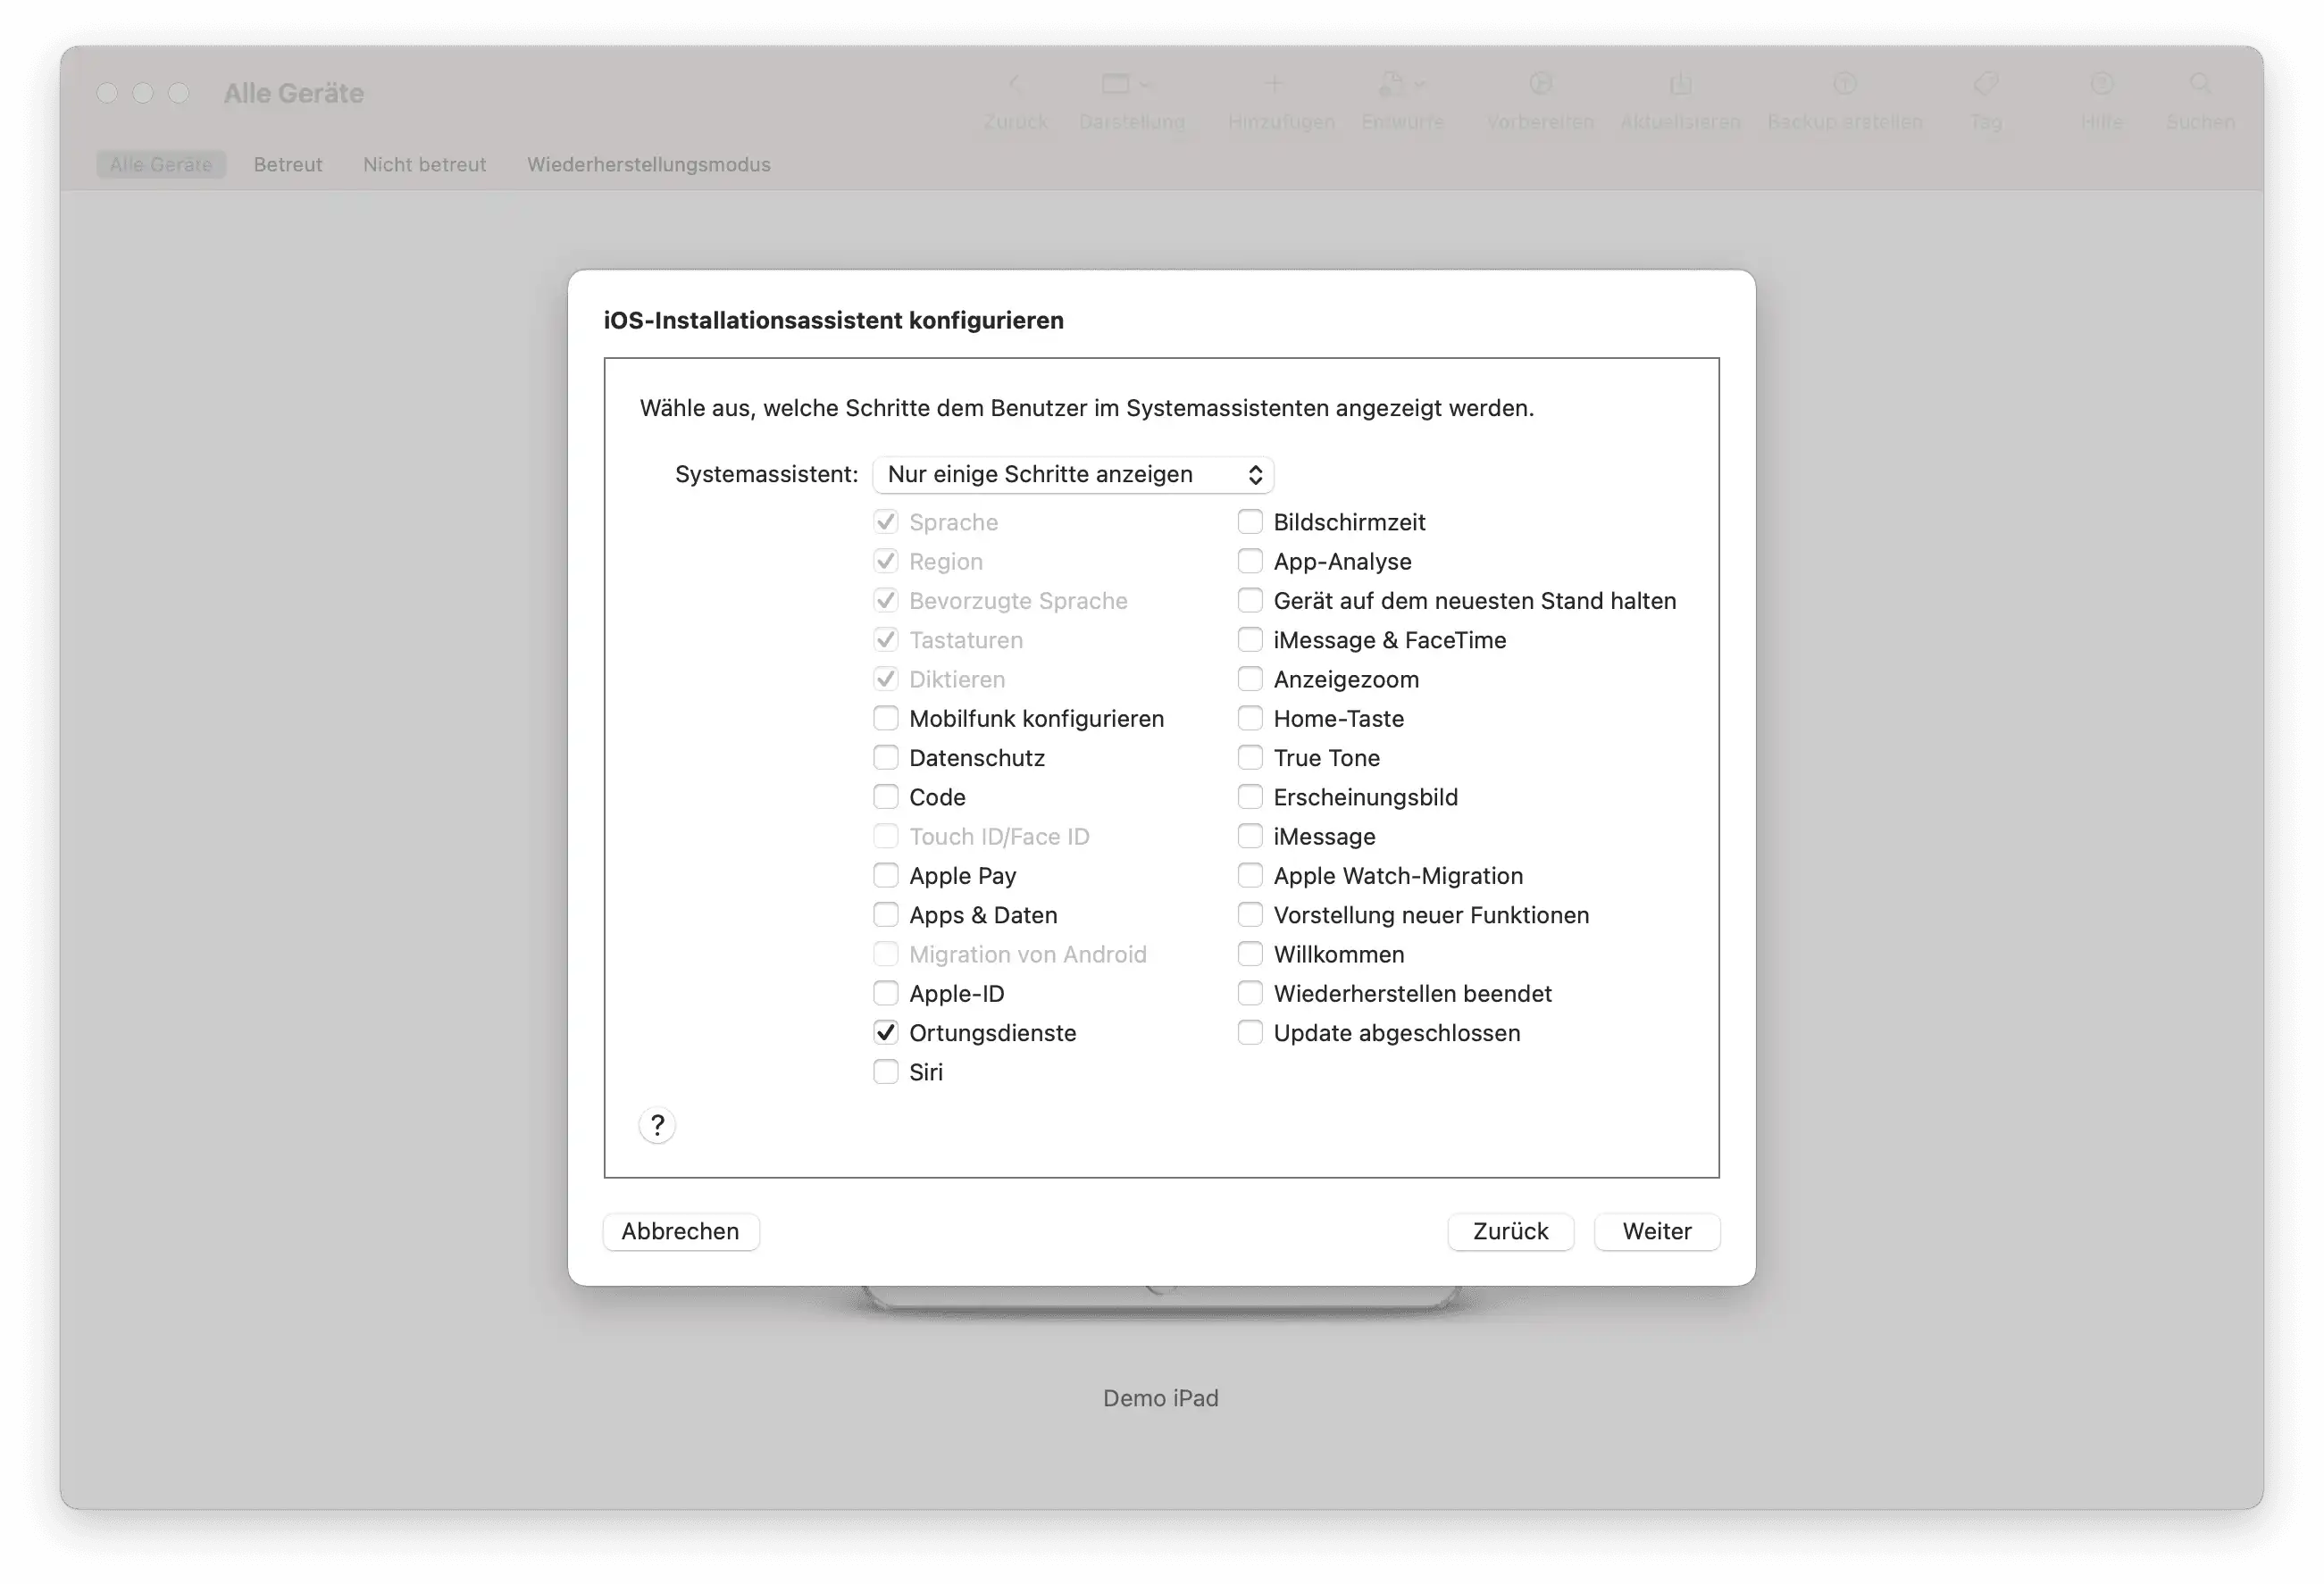
- Setup Steps: Choose the steps that should not be skipped on the device (Recommendation: Location Services for correct time zone assignment).
- Network Assignment: Select the previously created
Wi-Fi configuration profile. This allows the device to transmit the DEP registration to Apple’s servers after the restart.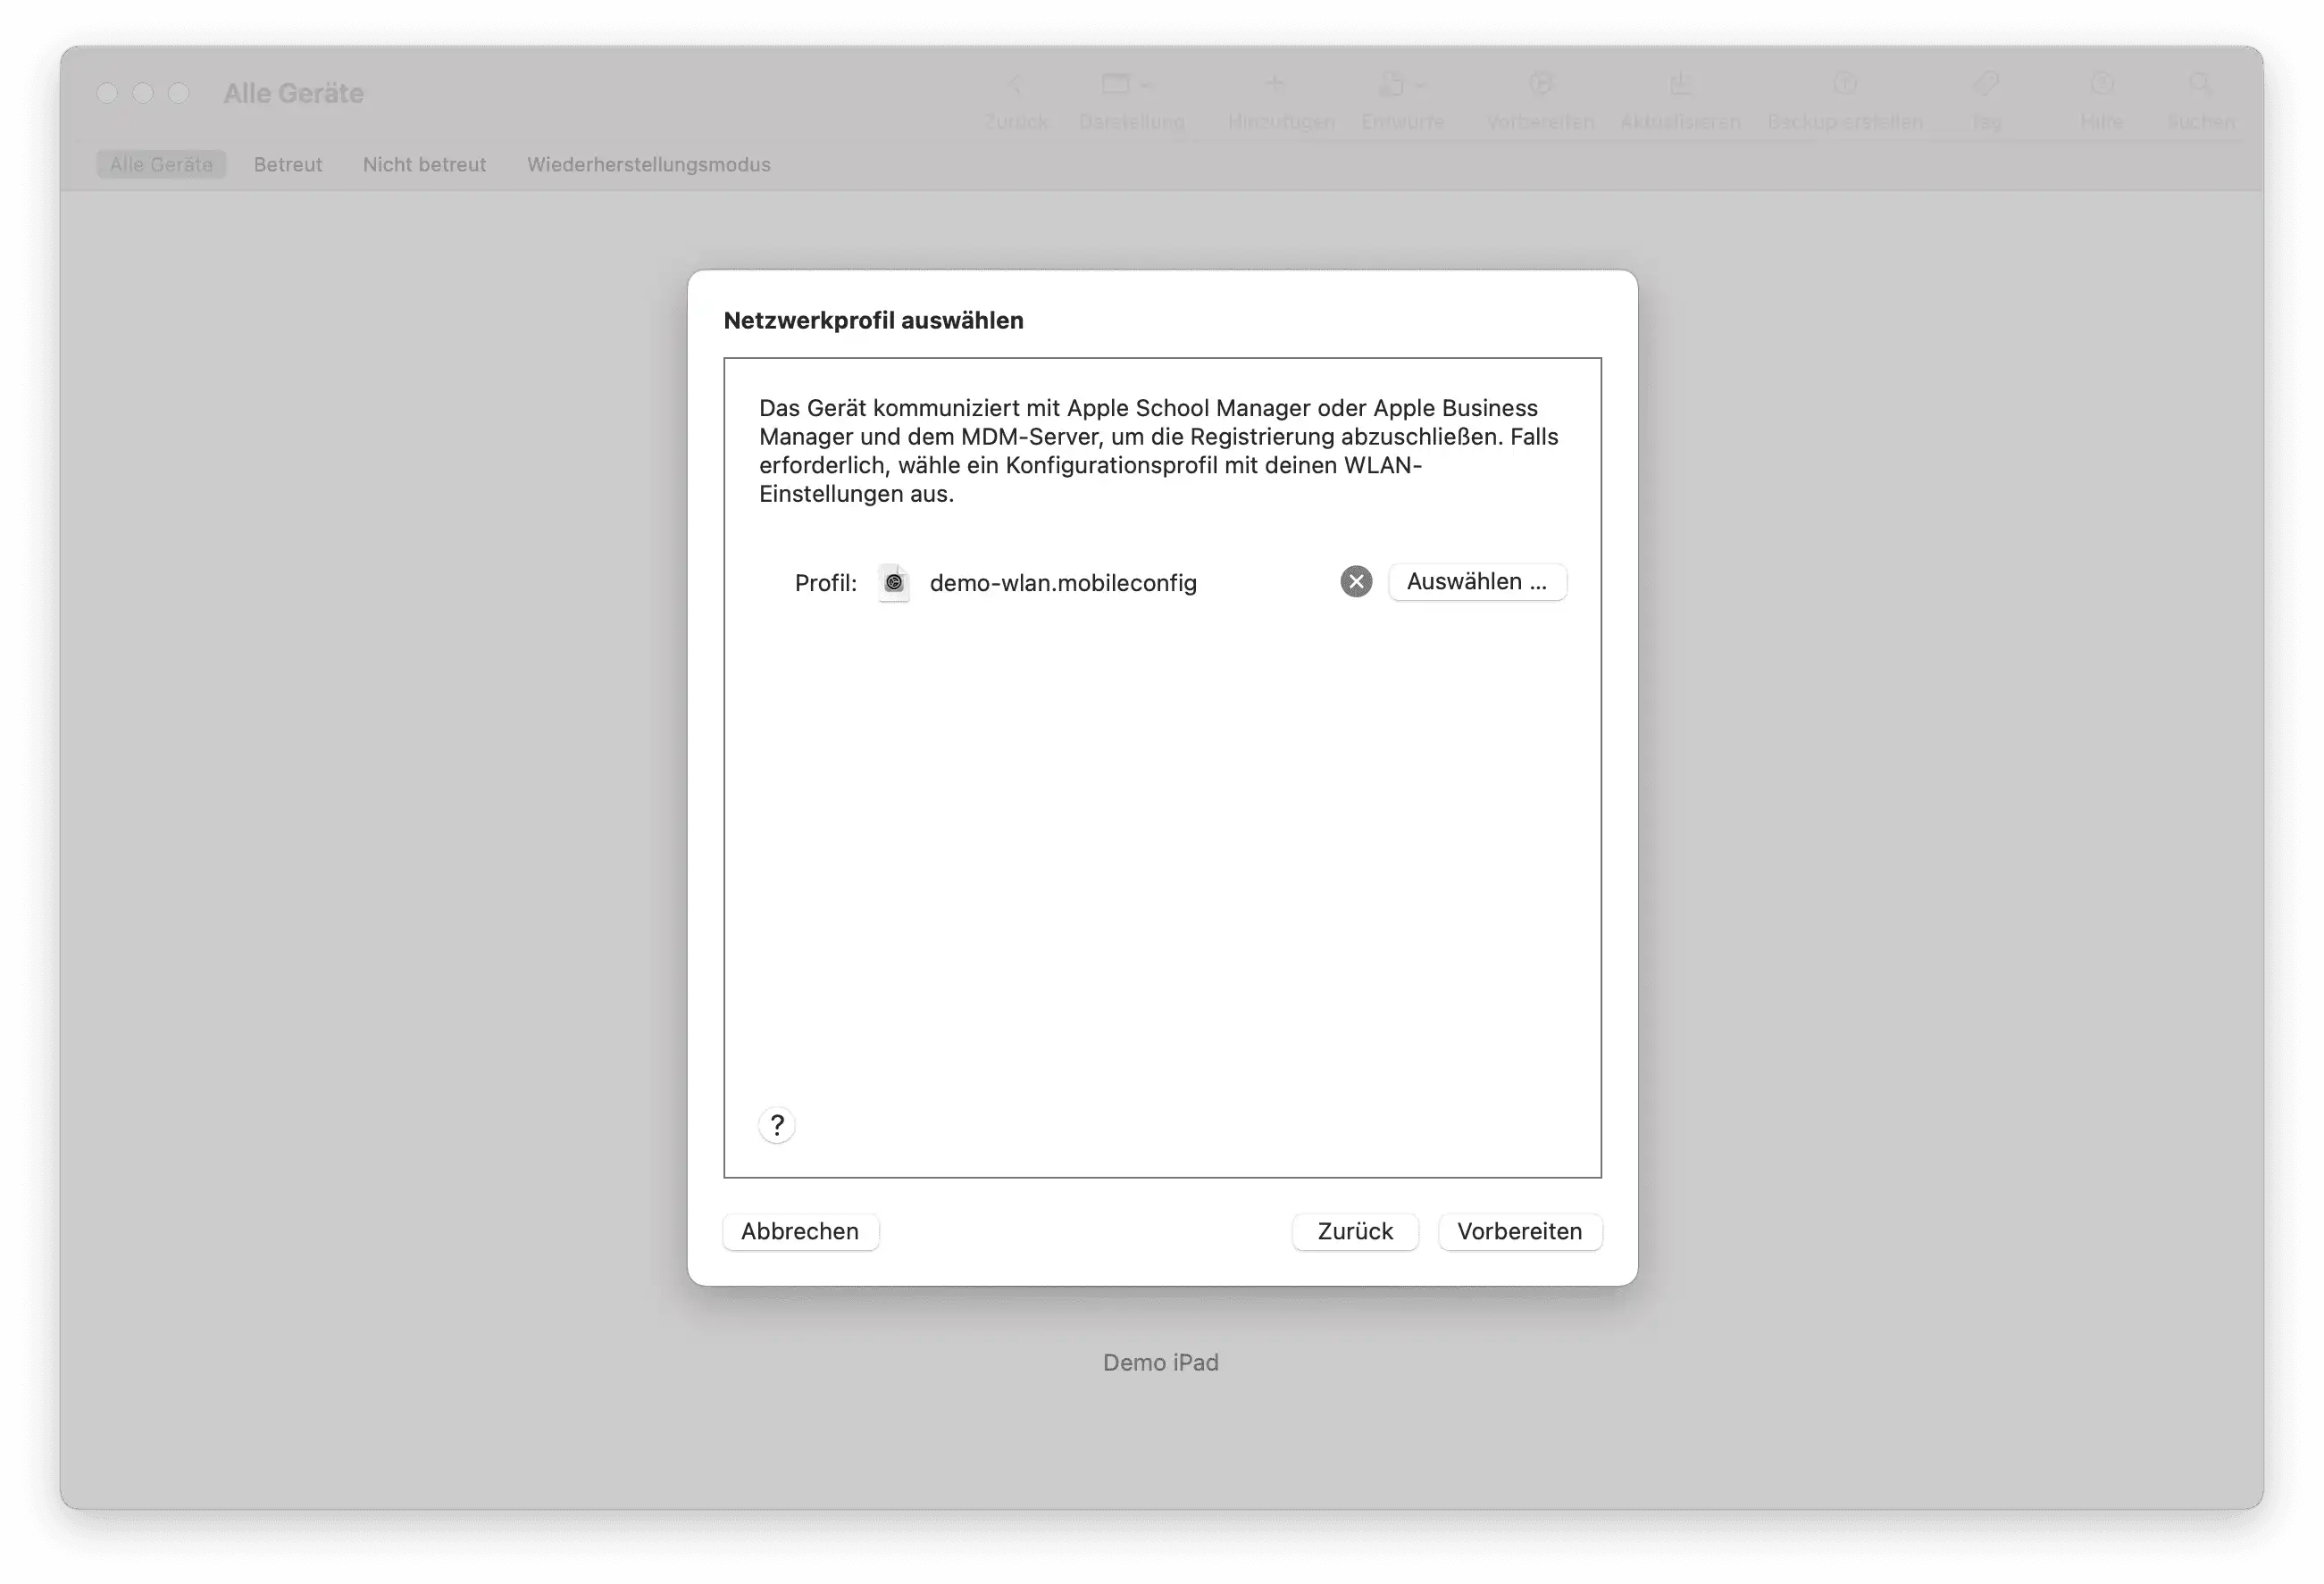
- Completion: Click Prepare. The device will restart and be registered in ABM/ASM.
Completing Enrollment
- Assignment in Portal: Log in to the Apple Business/School Manager. Assign the new devices to your Relution MDM server.
- Synchronization: In Relution, go to Devices -> Auto-Enrollments and refresh the list.
- Profile Assignment: Ensure that a DEP profile is assigned and synchronized to the devices in Relution.
- Activation: Restart the device and follow the Setup Assistant until the automatic configuration is applied.
Note on Grace Period: For devices added retroactively to DEP, there is a 30-day provisional period. During this time, the MDM management can be manually removed by the user in the settings. The management becomes permanent only after this period expires.
Known Errors and Troubleshooting
Troubleshooting: Unexpected Error 33007
If the error message “Provisional Enrollment failed. Network communication error [MCCloudConfigErrorDomain – 0x80EF (33007)]” appears during the process, it is usually due to one of the following reasons:
1. The device is still managed by another MDM
A device cannot be added to a new DEP system (ABM/ASM) as long as it is still registered or locked in another MDM instance.
- Solution: Completely remove the device from the previous MDM system and, if necessary, reset it to factory settings before restarting the process in Apple Configurator.
2. Missing internet connection during preparation
The device strictly requires access to Apple’s servers during the “Provisional Enrollment” phase.
- Solution: Ensure that a Wi-Fi profile is assigned to the device during the preparation step so it can go online immediately after the restart. Without an active internet connection, communication with the Cloud Config Domain will fail.