Supervision without data loss
Although Supervised Mode has many advantages, there are also disadvantages. First of all, it is important to understand that devices need to be reset to enable Supervised Mode. This means that all data on the devices will be lost. For newly purchased devices, this is not a problem as there is no user data on the devices yet. For devices that are already in use in an organization, the inevitable loss of data is a critical factor that must be addressed.
Prevent data loss
Additional steps can be taken to prevent data loss in advance when establishing Monitored Mode, regardless of whether the devices are already enrolled in Relution or not.
Prerequisites
- A
primarydevice that is to be made supervised and enrolled in Relution. - A
temporarydevice that is used to keep the backup. - The version of the operating system of both devices must be identical.
- A Mac (macOS Catalina 10.15 or higher) with
Apple Configurator 2. - Make sure that
Search My iPhoneis disabled on both devices.
Perform backup with a Mac computer
create a backup of the
primarydevice.Connect the
primarydevice to the Mac.Open the
Finder.Under
locationsthe device should be visible.Both the Mac and the
primarydevice should display a trust message. ClickTruston both devices.After the devices trust each other, detailed information about the mobile device will be displayed on the Mac.
Enable the
Create a backup of all your iPad data on this Macfeature on theGeneraltab.Click on
Create backup now.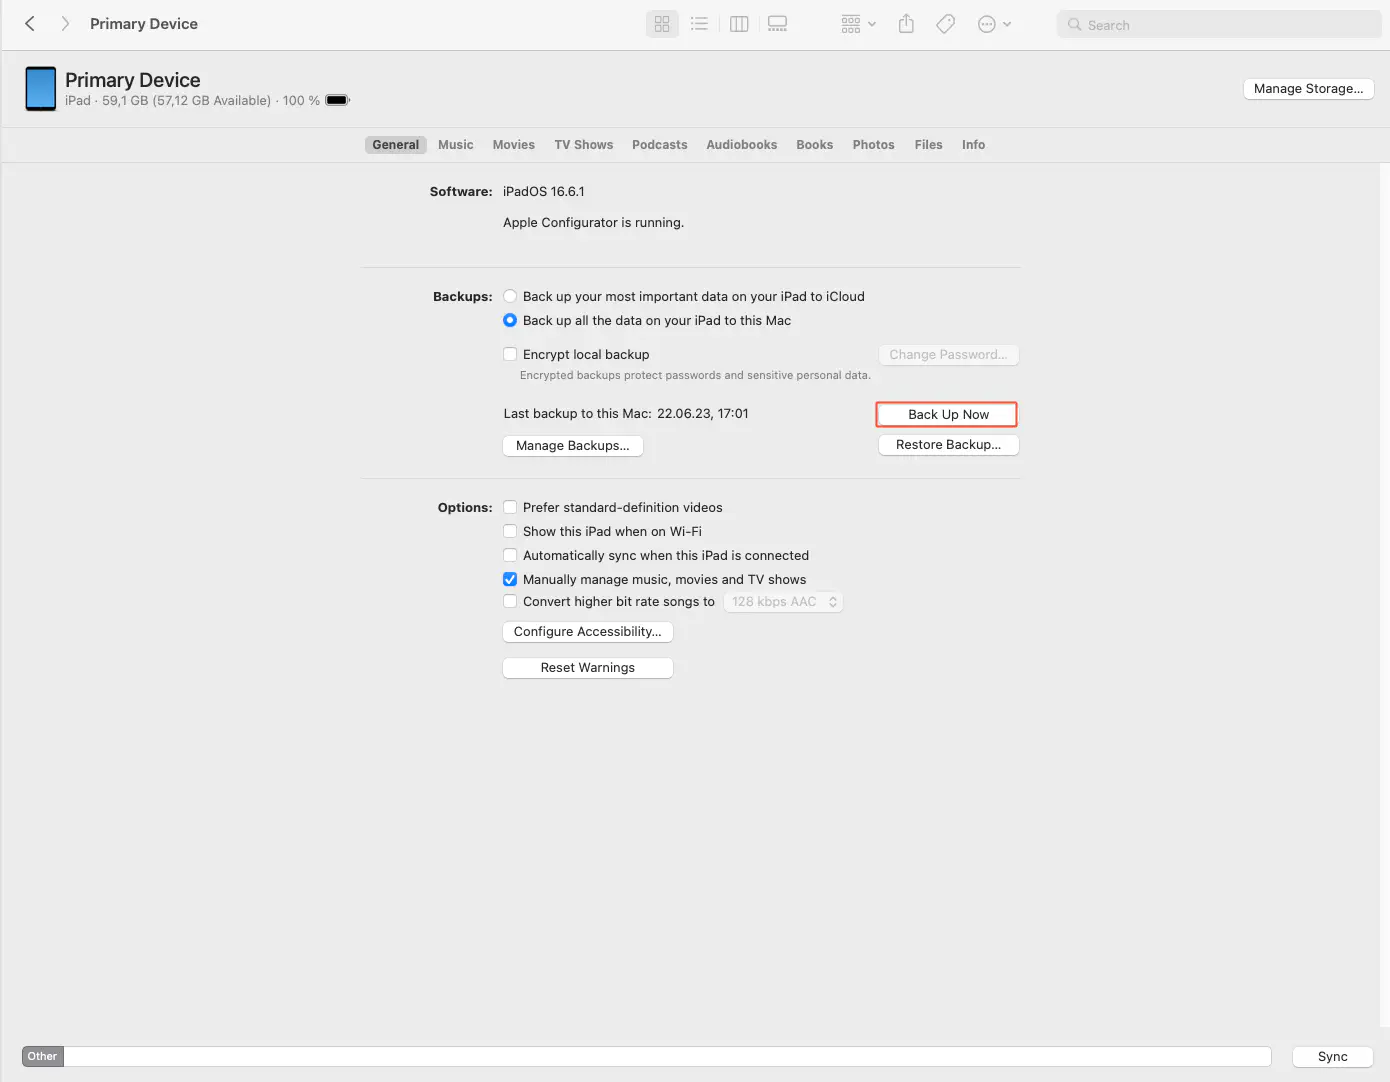
Make a note of the date and time of the backup to make it easier to find later.
Restore the backup to the
temporarydevice.Connect the
temporarydevice to the Mac.Open the
Finder.Click
Truston both the Mac and thetemporarydevice.Select the
temporarydevice underLocations.Under the
Generaltab, click onRestore Backup.From the list of backups, select the previously created one based on the timestamp.
Click on
Restore.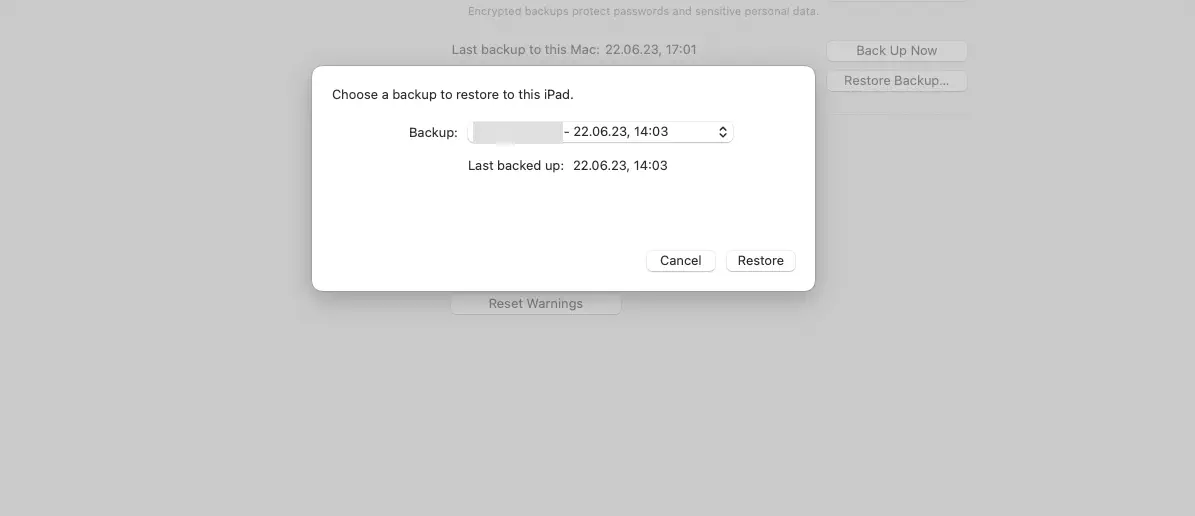
Wait until the backup is restored. After that you can disconnect the Mac and the mobile device.
Now backup the
temporarydevice the same way. Again, make a note of the time.If you use the
Apple Configuratorto put theprimarydevice into monitored modeconnect the
primarydevice to the Mac.Open the Finder and backup the
temporarydevice to theprimarydevice (as described in step 2).If you enroll the device with
Apple Configurator:Create and save a new
profilein which you store the WiFi information of your network.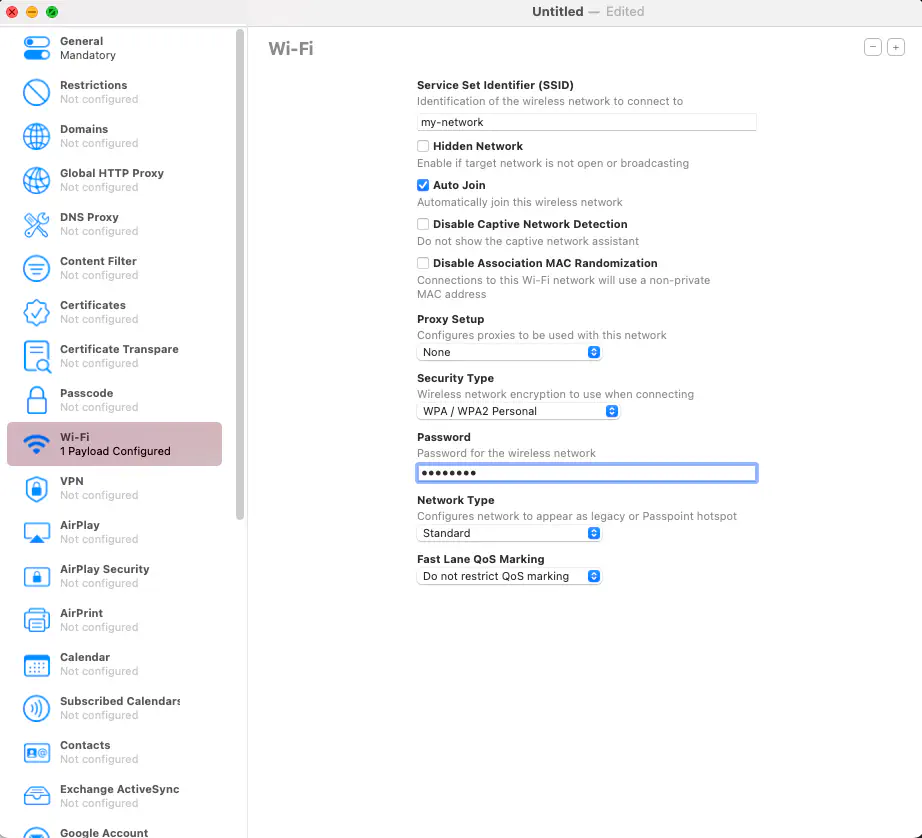
Create a new
profileand add there the profile you created before.
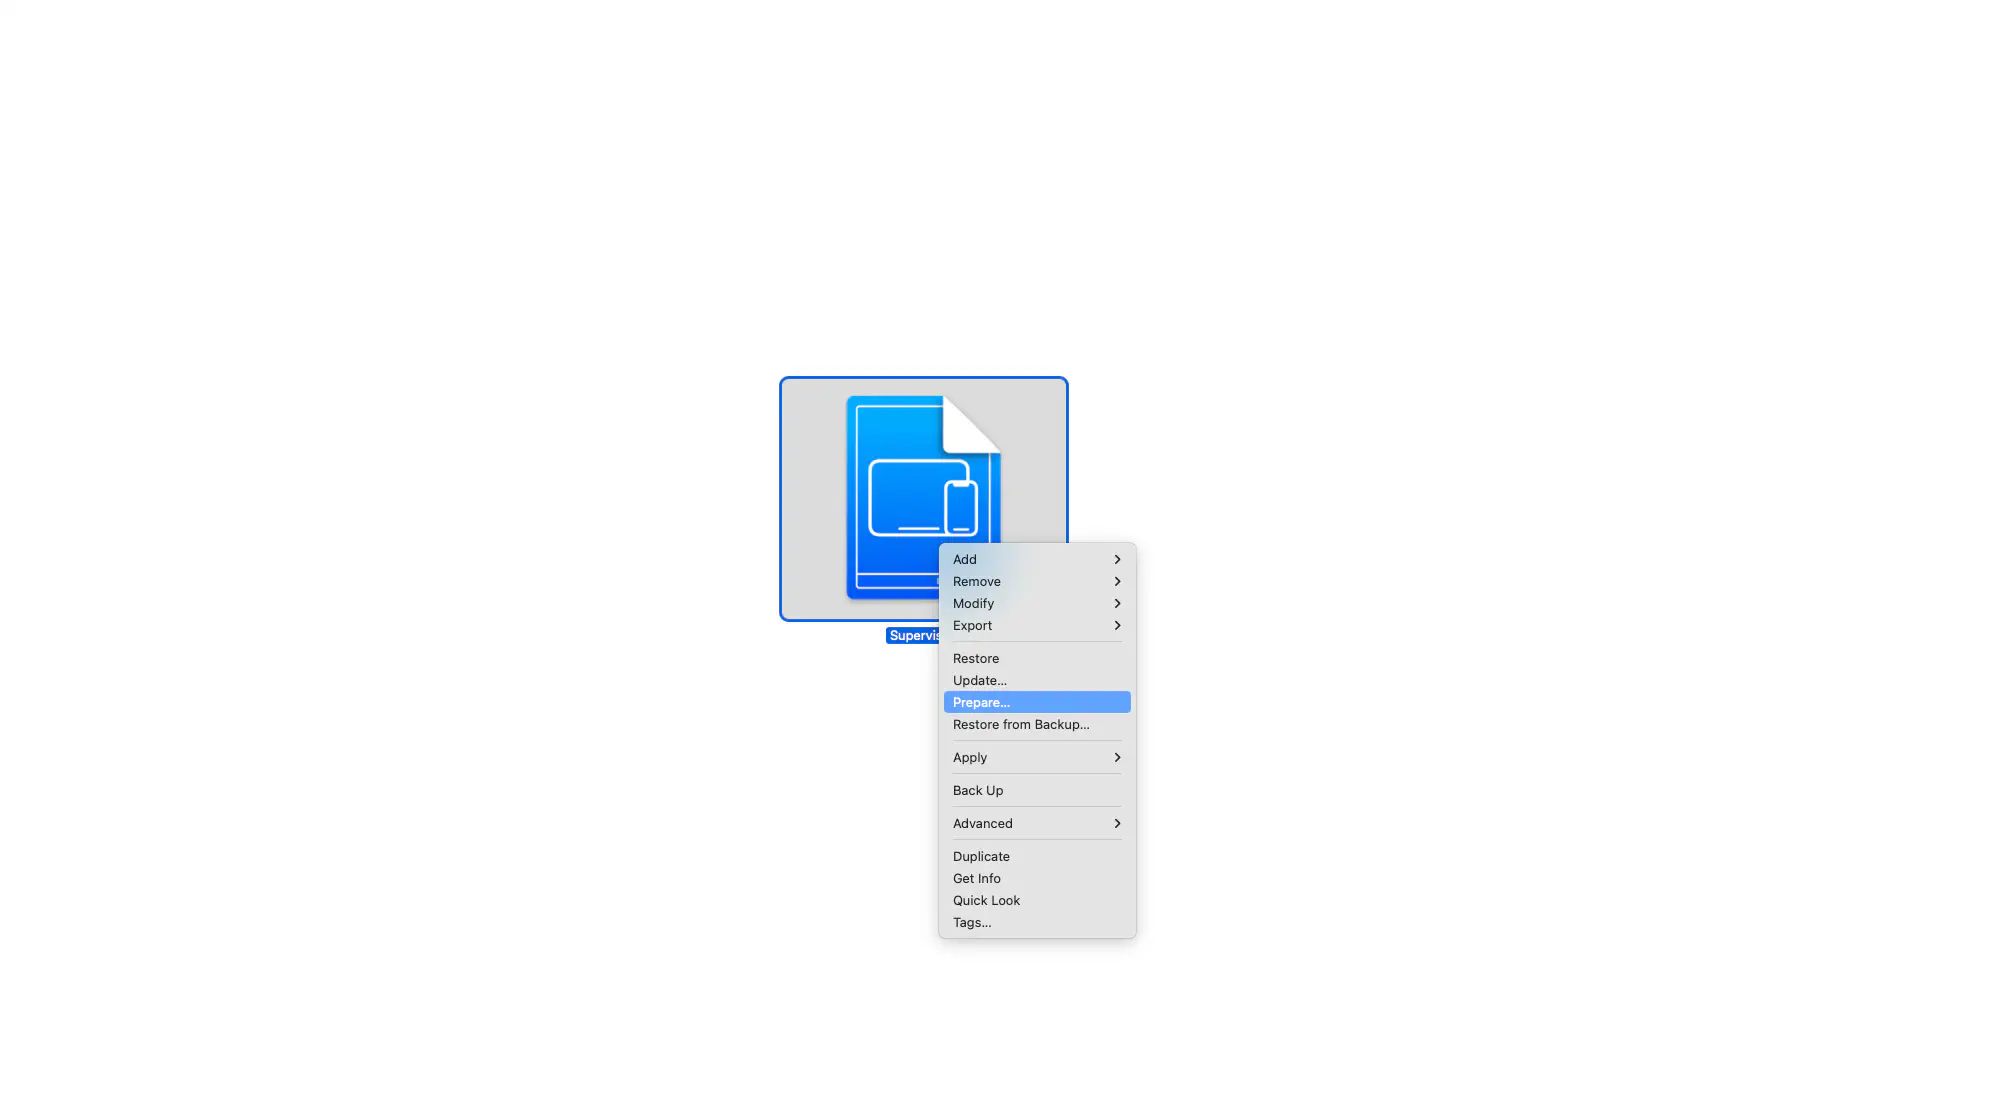
Prepare the
Draftas if you would add a device to the DE.- To do this, right click on the
Draftand selectPrepare.
- To do this, right click on the
Assign the
primarydevice to thedraft.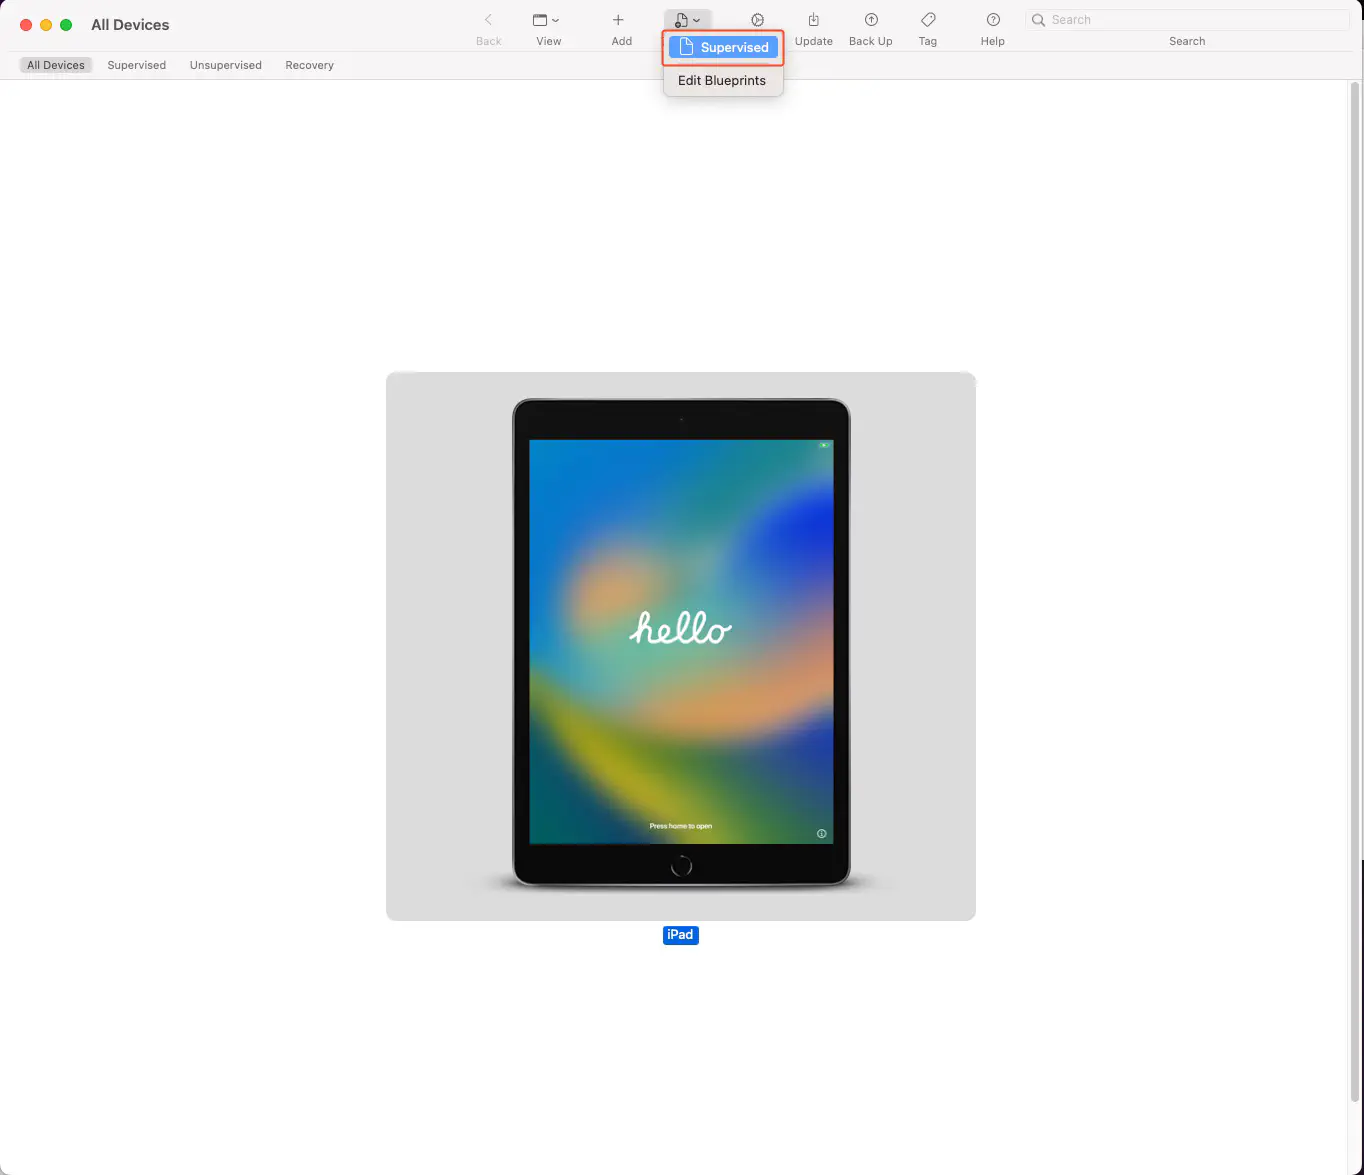
Re-establish the connection between
primarydevice and Mac if necessary, in case it was interrupted.Once the
draftis applied, themonitoring profilewill be associated with the device.If the device asks you to accept or confirm configurations, do so.
The device should now be enrolled and monitored in Relution. In addition, the backup data should be present on the device.
if you enroll the device via Apple DEP:
- In Apple School / Business Manager, assign the device to the appropriate MDM server.
- In Relution, perform a sync under
Auto Enrollmentand ensure that a DEP profile has been associated. - Connect the
primarydevice to the Mac. - Open the
Finder. - Click on
Restore Backupand select the last created backup of thetemporarydevice here. - The data will be restored and the device will be re-enrolled in Relution.
Backup iOS via iCloud
Create a backup of the
primarydevice.- Connect the
primarydevice to a WiFi. - On the
primarydevice, navigate toSettings > {username} > iCloud > iCloud Backup. - Select
Create backup.
- Connect the
Use a
temporarydevice to restore the backup.- There, navigate to
Settings > General > Transfer/Restore iPad. - Select
Erase all content & settings. - Put the device back into operation.
- Select
Restore from iCloud backup, when theApps & Datascreen appears.
- There, navigate to
Once the restore is complete, back up the
temporarydevice in the same way.Now reset the
primarydevice.- There, navigate to
Settings > General > Transfer/Reset iPad. There, selectErase all content & settings
- There, navigate to
Add the
primarydevice to the DEP usingApple Configuratoras described in the chapterSupervised Mode for Apple Devices. Be sure to enable the following steps:Apps & DataApple IDRestore finished.
Start up the
primarydevice. UnderApps & Data, selectRestore from iCloud Backup. Enter the Apple ID you used to create the backup on the old device.
If you are migrating iOS devices that were previously enrolled in another MDM system, make sure to remove the devices from the current MDM system as well as the corresponding monitoring. This ensures that backup and restore activities can be performed on the devices without dependency on the existing management profile.
Performing backup and restore activities on the same devices may not produce the desired result. When you back up devices, the Apple School /Business Manager configurations present on the devices are also backed up. Therefore, if you restore the backup to the same devices, the management profiles are also restored.
Restore inventory data from an enrolled DEP device to a new device.
You may already be using Relution to provision iOS devices with DEP. However, if you just purchased a new iOS device and want to restore the data from a previously enrolled device and enroll the new device, follow these steps:
Back up the enrolled device’s data to iCloud.
- Navigate to
Preferences > {username} > iCloud > iCloud Backup. - Select
Create Backup.
- Navigate to
In Apple School / Business Manager, assign the new device to the Relution MDM server.
Make sure you have created a DEP profile in Relution where the setup steps
Import BackupandLog in with Apple IDare unchecked, i.e. not skipped.Under
Auto enrollment, synchronize the DEP devices from Apple School / Business Manager.Make sure you assign the DEP profile to the new device.
Switch to the new device and follow the setup steps. Select the
Restore backup from iCloudoption once theApps and Datasection appears. Enter the Apple ID you used to back up the old device to iCloud.
After the initial setup, the data should have been restored and the device enrolled in Relution.