Policies explained
Introduction
A policy is a collection of one or more configurations. Each policy can be applied to one or more devices at the same time. In addition, one or more policies can be associated with each device.
Create
Policies are platform dependent. When creating them, care must be taken to determine which platform a policy is created for. For example, an iOS policy cannot be subsequently changed to an Android or Windows policy. Within the Apple operating systems, a distinction is also made between iOS, macOS or tvOS policies and likewise cannot be subsequently changed over.
In the side menu under Devices > Policies, there will be the overview of the policies that have already been created. One can create a new policy via the Add button. At this point, a target system must be specified and a name has to be given.
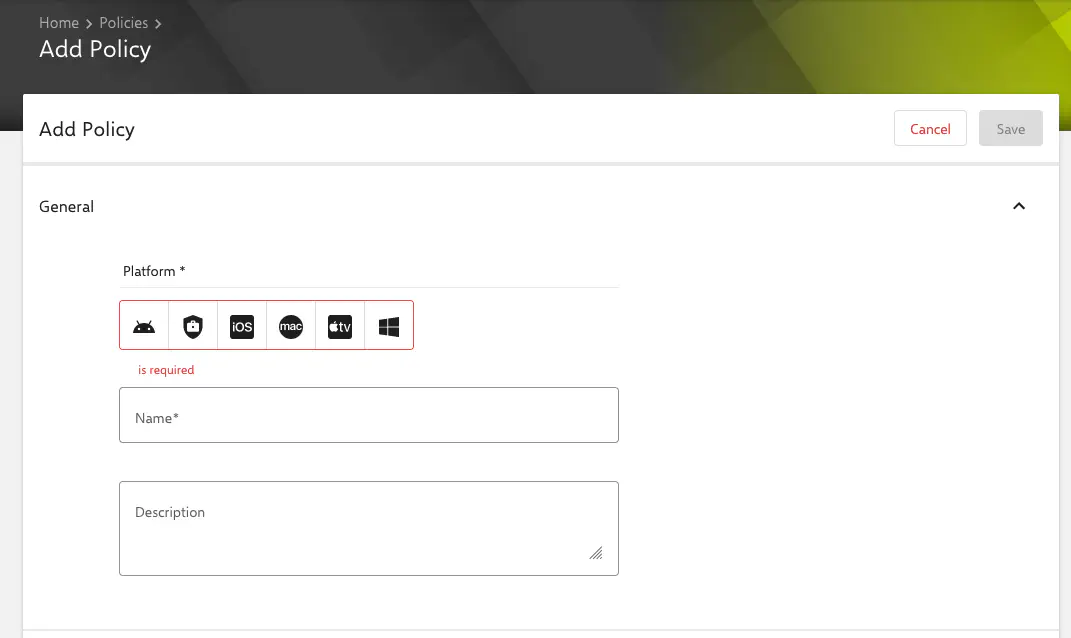
Then click Save to create a new policy.
Policy Versioning
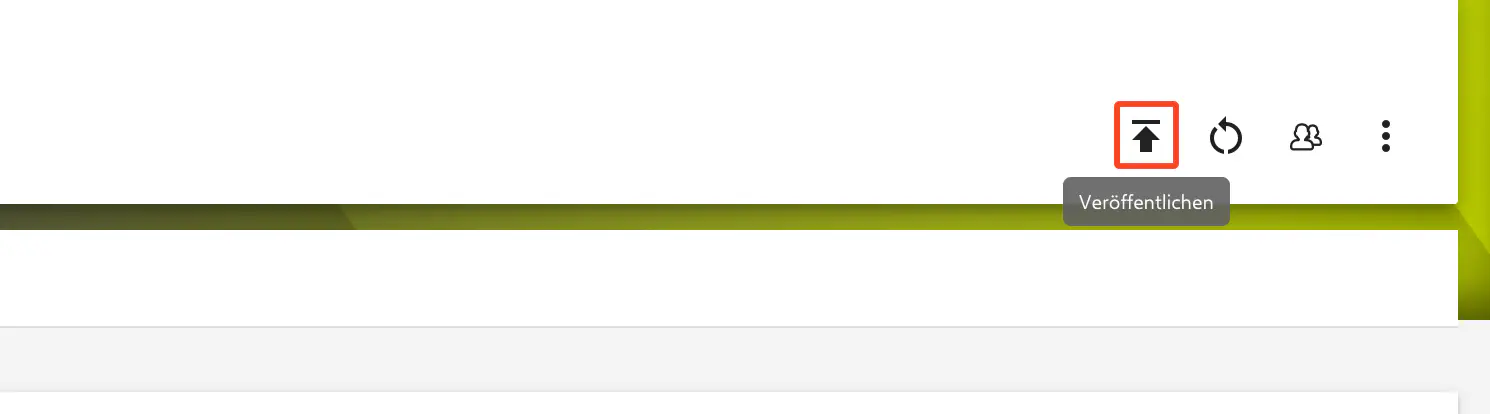
All changes to a policy only take effect after a Publication. This process allows you to make all configurations and check them for completeness without the changes becoming active directly on linked devices.
As soon as you have made all changes and want them to be applied to the devices, click the Publish button:
The Versions Sidebar
The Versions Sidebar is used for a quick view of already published policies.
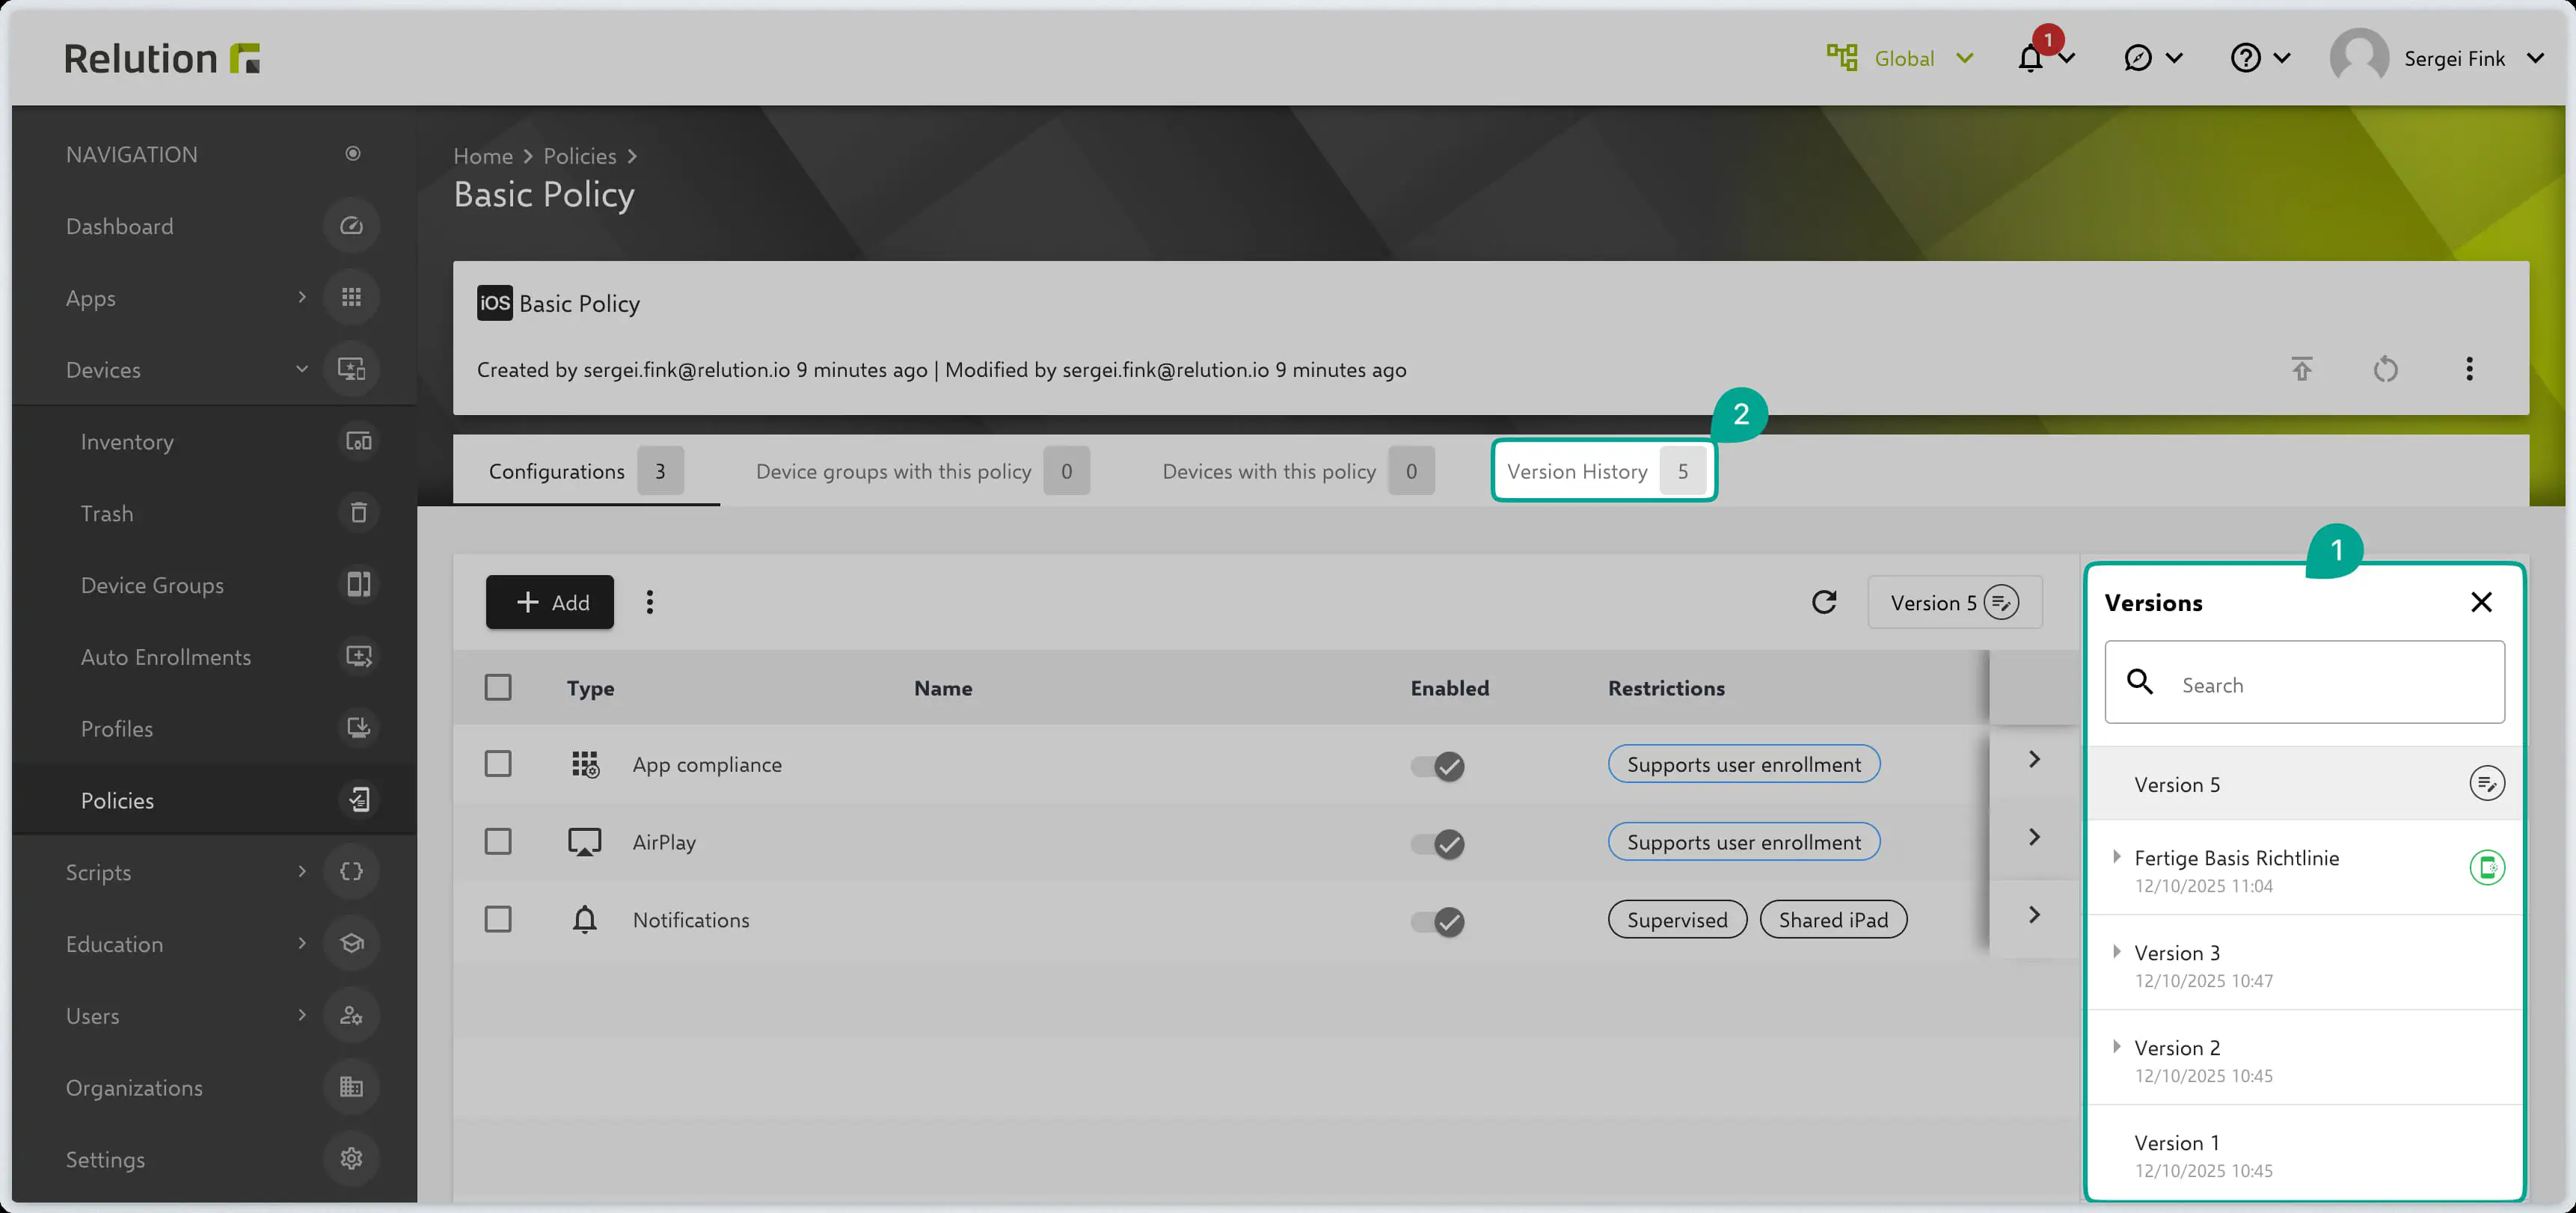
Here you will find the following indicators:
- Pencil Icon (Pen): Marks the current Template – this is the latest, but still unpublished version of the policy.
- Green Mobile Phone Icon: Identifies the currently published policy and thus the one applied to the devices.
- Version Information: When publishing a new version, a Name and a Note (Description) can be specified. These are displayed directly in the sidebar to quickly document and track changes.
Version History
For detailed tracking of all changes, there is also the Version History tab.
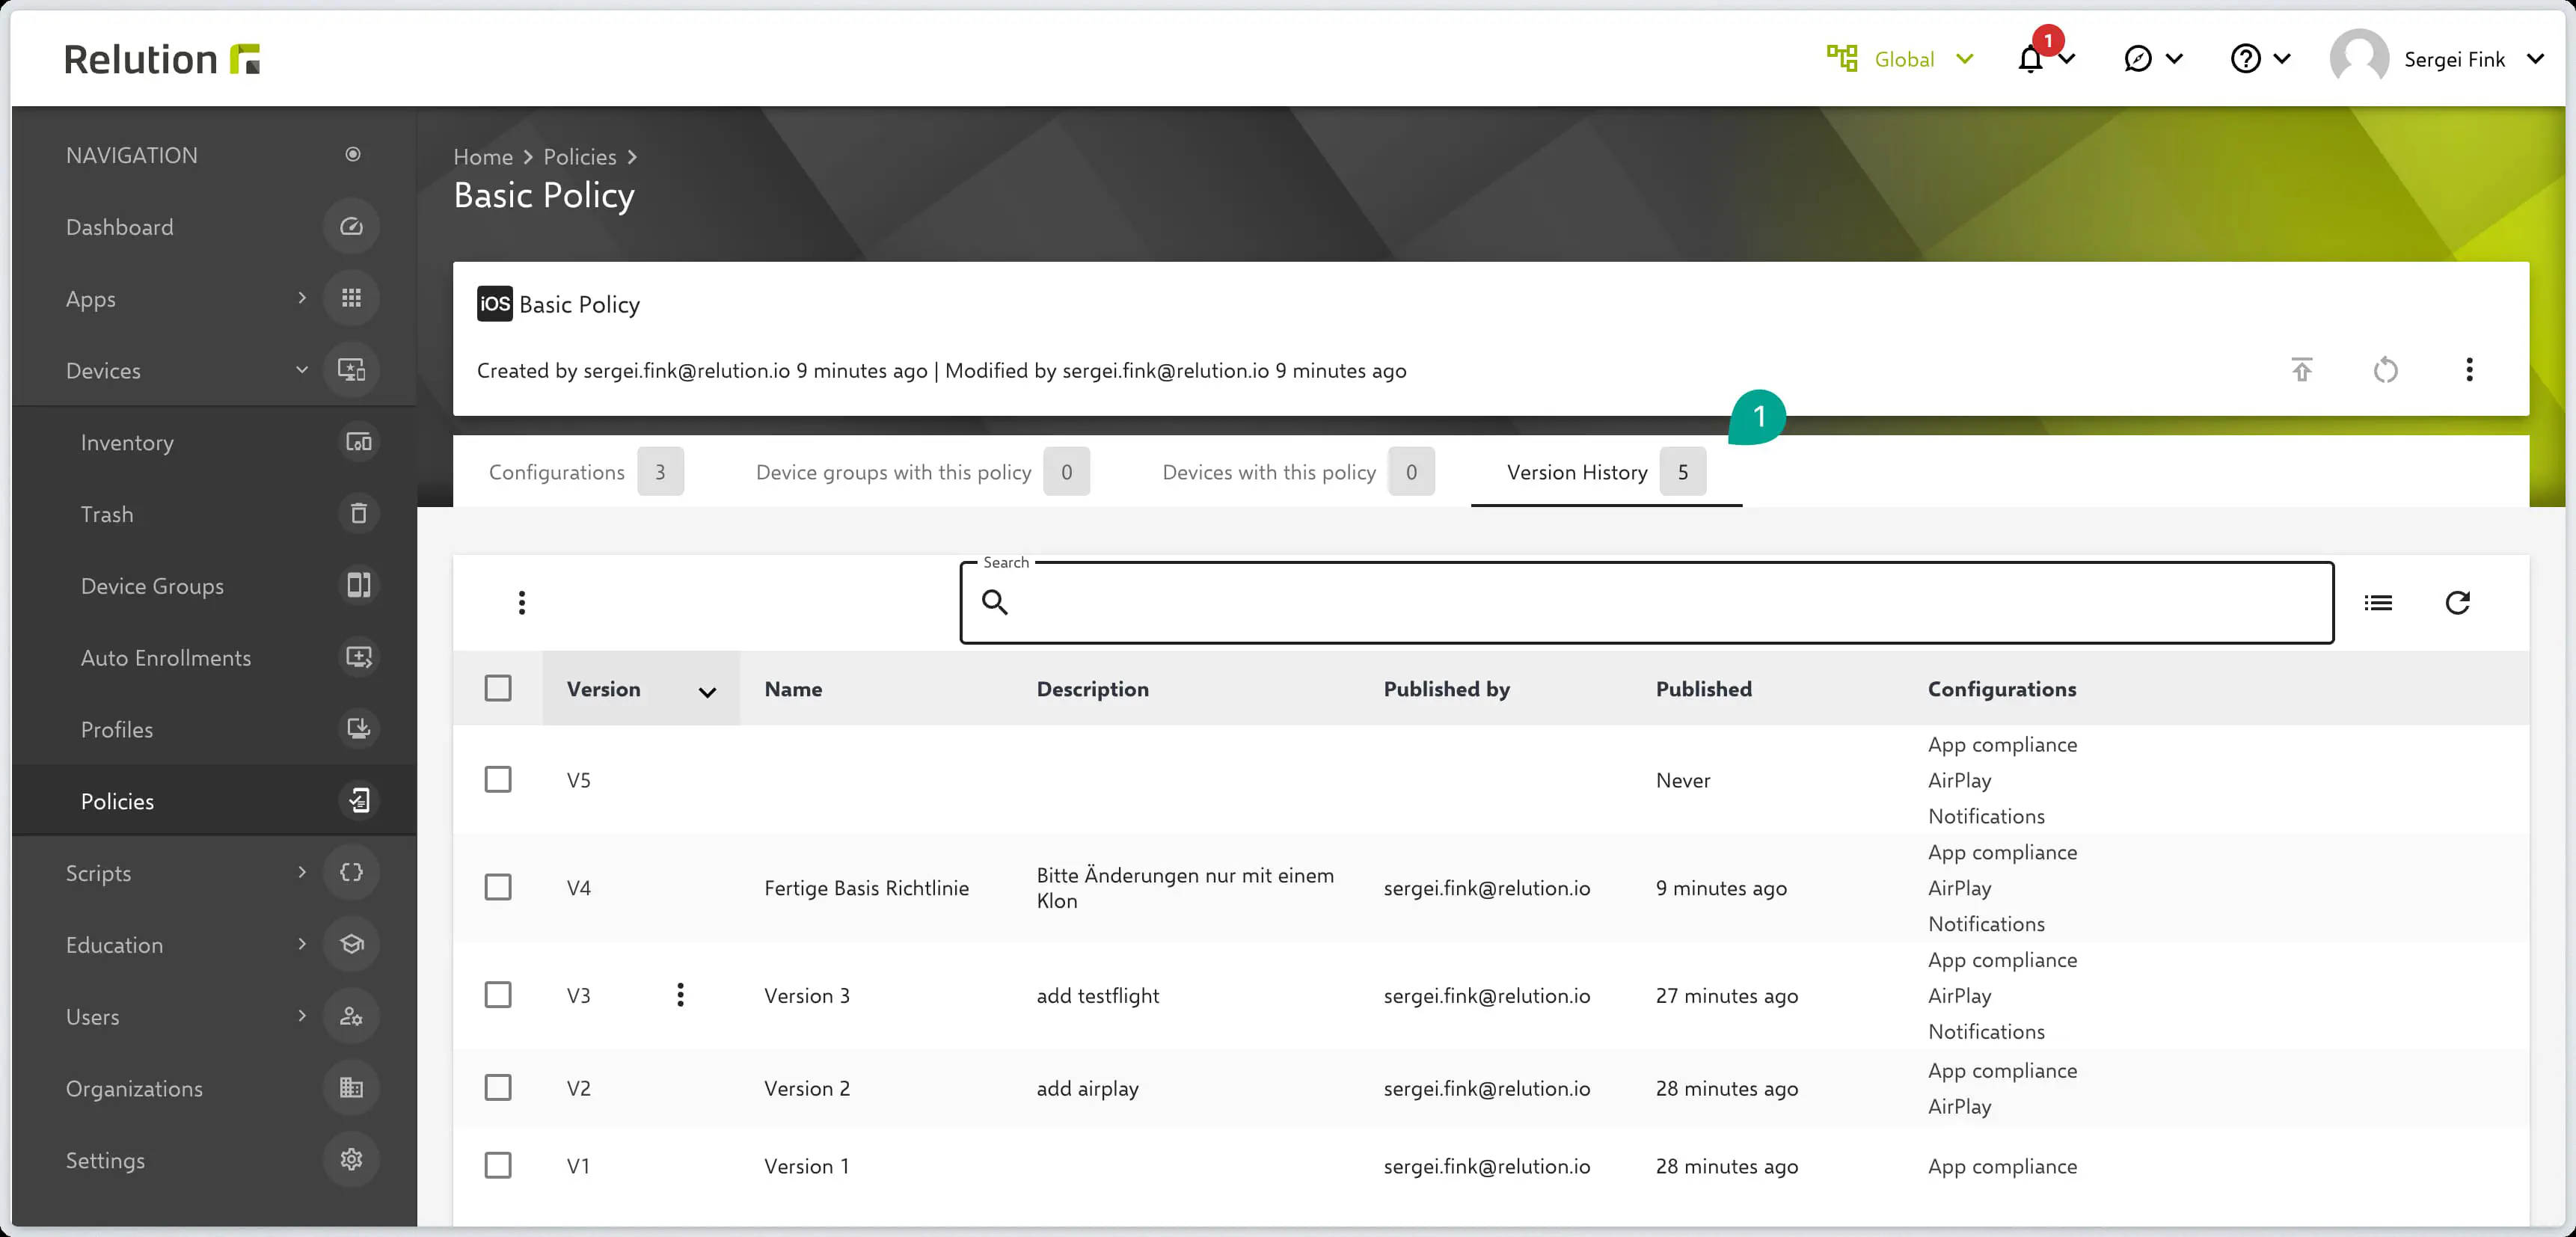
In this overview, all policy versions are clearly listed, including the following details:
| Column | Description |
|---|---|
| Version | The unique identifier of the version (e.g., V4). |
| Name | The assigned version name. |
| Description | The note/comment added upon publication regarding the changes. |
| Published by | The user who published the version. |
| Published | Date and time of publication. |
| Configurations | A list of configurations changed or added in this version. |
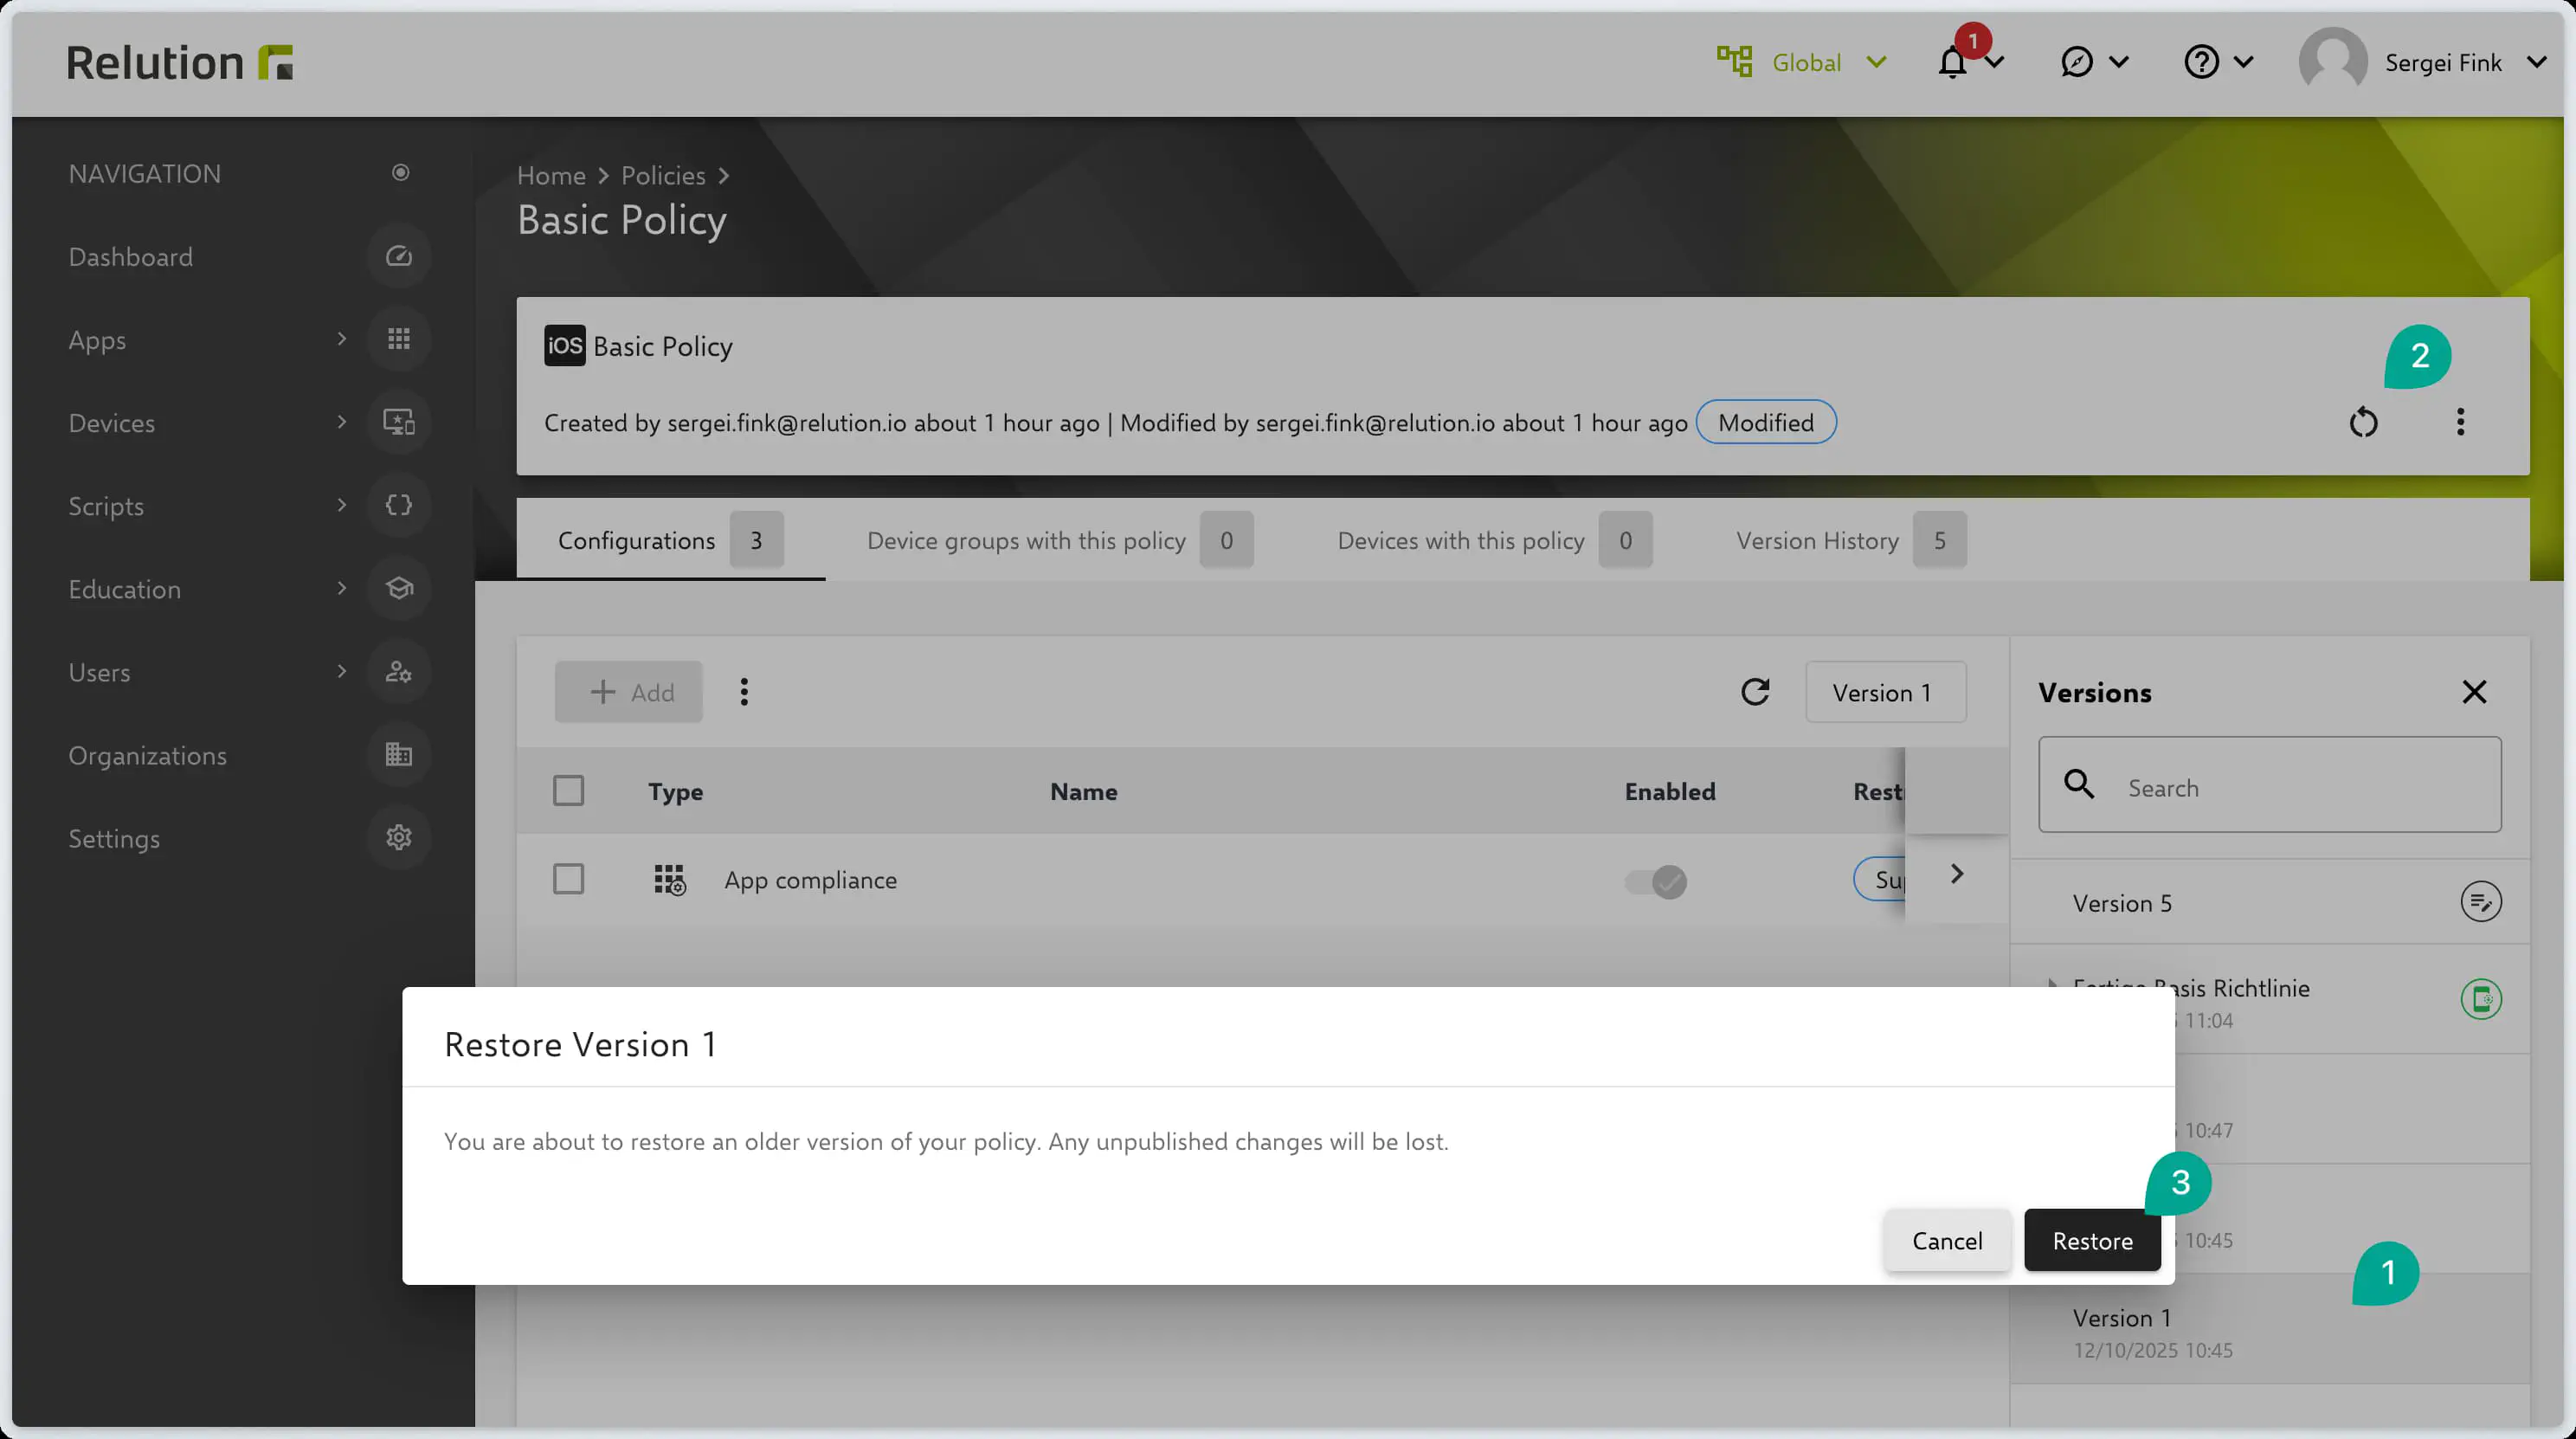
Restoring Policies
A past, older version of a policy can be selected in the Versions Sidebar and restored as a new template in a higher version (e.g., Version 5, if the current template was Version 1) using the Restore (2) button.
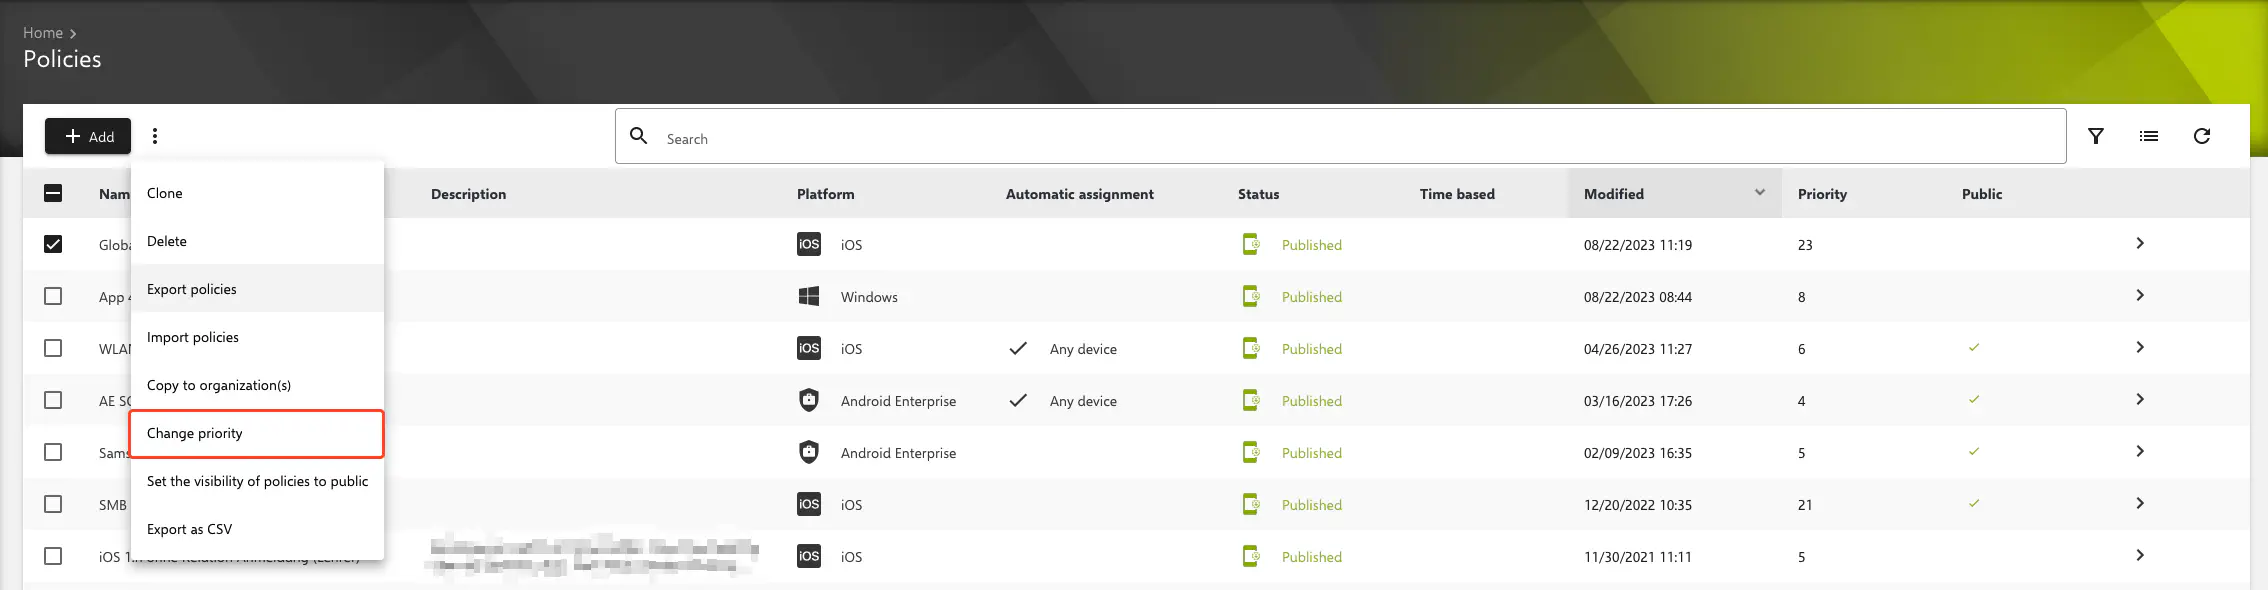
Priorities
Directives have priorities. The lower number trumps the higher one. So priority 2 wins against priority 3. Each platform has its own priority list. So there can be policies with priority 1 multiple times - each for iOS, macOS, tvOS, Android Classic/ Legacy, Android Enterprise and Windows.
If a configuration, such as that of the restrictions, is created in different policies with different priorities, they complement each other, provided they are not mutually exclusive. If a function is allowed in the restrictions of a policy with priority 4, but prohibited in one with priority 2, it remains prohibited.
To change the priorities, click on the three small dots in the policy overview and select the corresponding menu item.
Global policies
Now and then, it can be useful to be able to apply identical configurations in several organizations of Relution. To do this, global policies can be created and shared in the Global-Organisation →. These policies can be edited normally in the Global-Organisation, but are only available read-only in the other organizations. To make a policy globally available, it must be published. This process cannot be undone.
Global policies are not available for Android Enterprise.

Public policies are marked with a check mark in the overview.
Deactivate Policies
As of Relution 5.33, it is possible to deactivate policies for individual devices. Previously, device groups always had to be cloned and adjusted to temporarily remove a device from a policy assignment. This is now easily possible via Navigation → Devices → Inventory → Your device → Policy. To do this, the corresponding policy must be selected and can be deactivated/activated via the 3-dot menu.
Notes
Policy Status
The policy status is displayed in the header box on the device details page. The following statuses can occur:
UNKNOWN = Problem- The status of the device policy is unknown
NONE- No policy is applied to the device
SENT- A policy has been assigned to the device, but it has not yet been applied
APPLIED = Active- A policy is being applied to the device
UPDATE = Active- A new version of the policy has been sent to the device, but the device has not yet updated it
CHANGE = Info- Another policy has been sent to the device, but the device has not yet changed the policy
REMOVED = Info- The policy has been unassigned from the device, but the device has not yet removed the policy