 Customer Hub
OIDC with Entra
OpenID Connect OIDC is an identity protocol built on top of OAuth 2.0 that enables secure authentication and authorization for web and mobile applications. It allows users to log in securely to various services while enabling service providers to access verified identity information.
This guide describes how to configure OpenID Connect in Relution using Microsoft Azure as the identity provider.
Settings in Relution
OIDC can be configured in the Relution portal under Settings → OpenID Connect.
The following screenshots include a working configuration example with Microsoft Azure.
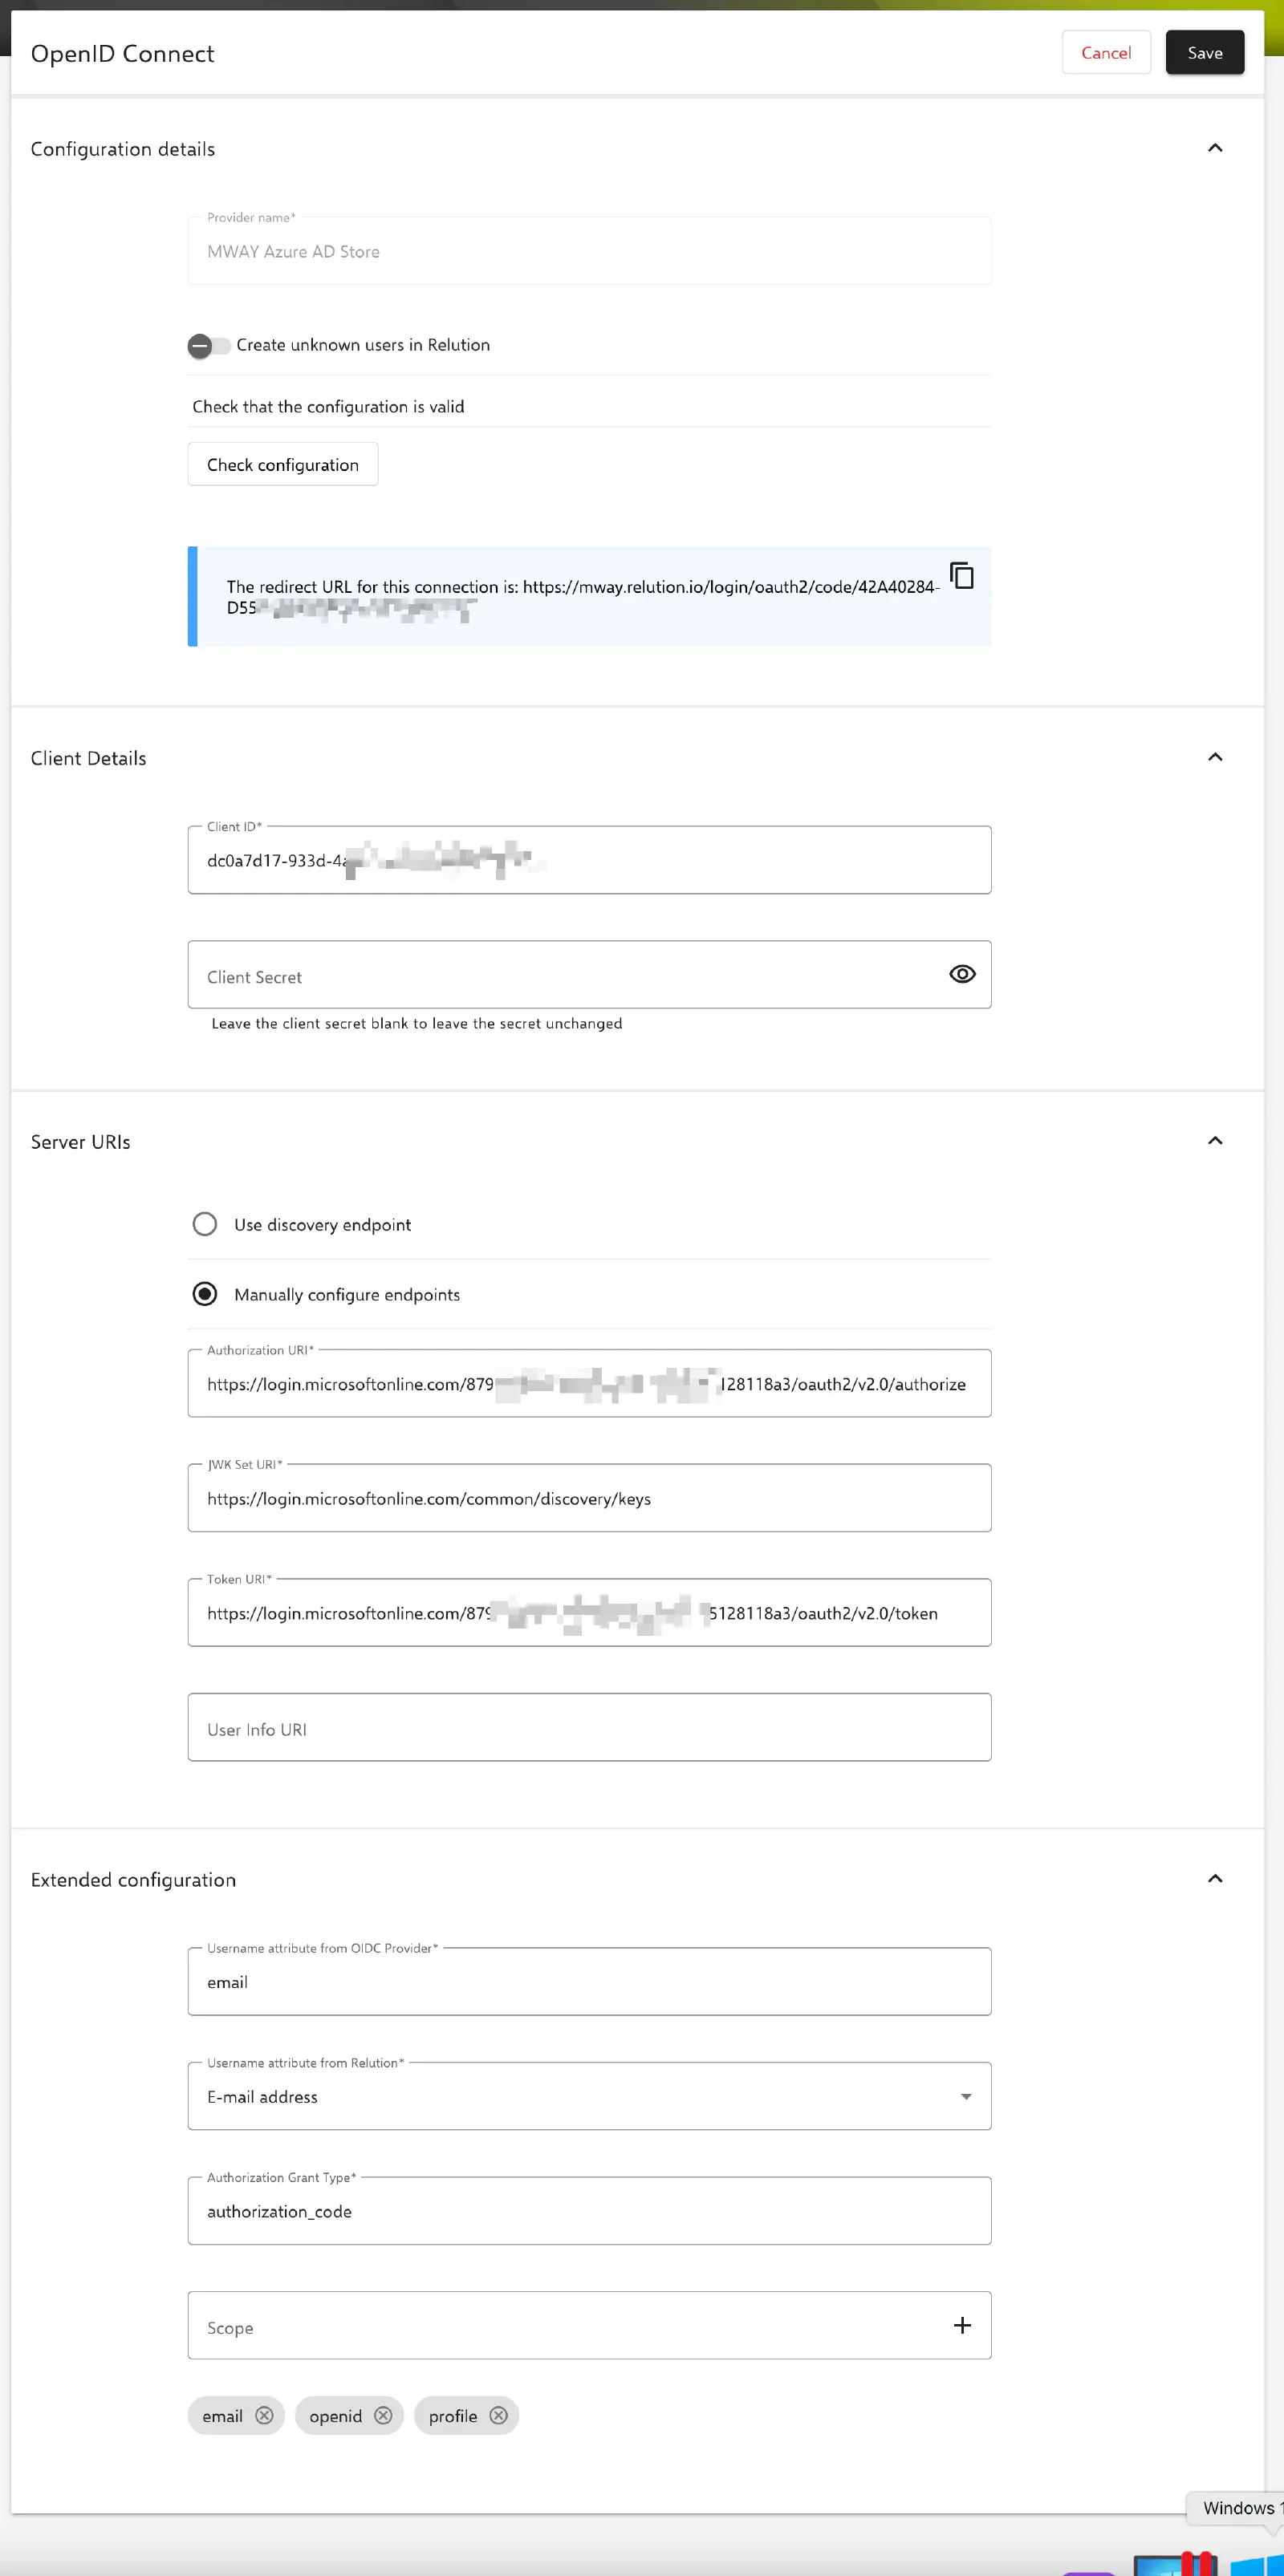
Configuration details
Name of the provider: Displayed as the label on the login button in the Relution portal. Create unknown users in Relution: Relution creates new users automatically upon successful login with valid OIDC credentials.
If a login is done with an unknown user on the store organization with OIDC configured, it will be created in the store organization. In the case of multiple clients with OIDC configuration, the login must be made via the organization URL so that the unknown user is created in the corresponding organization. This URL is displayed in the portal in the OIDC connections.
Client Details
Client ID: Corresponds to the application ID in Azure. Client Secret: Corresponds to the client secret key to the application ID in Azure.
Server URIs
Use Discovery Endpoint: If supported by the provider, an automatic configuration of the required URIs is performed. Manual configuration of endpoints: Necessary as soon as automatic discovery does not work.
If using Microsoft Azure, endpoints must be entered manually.
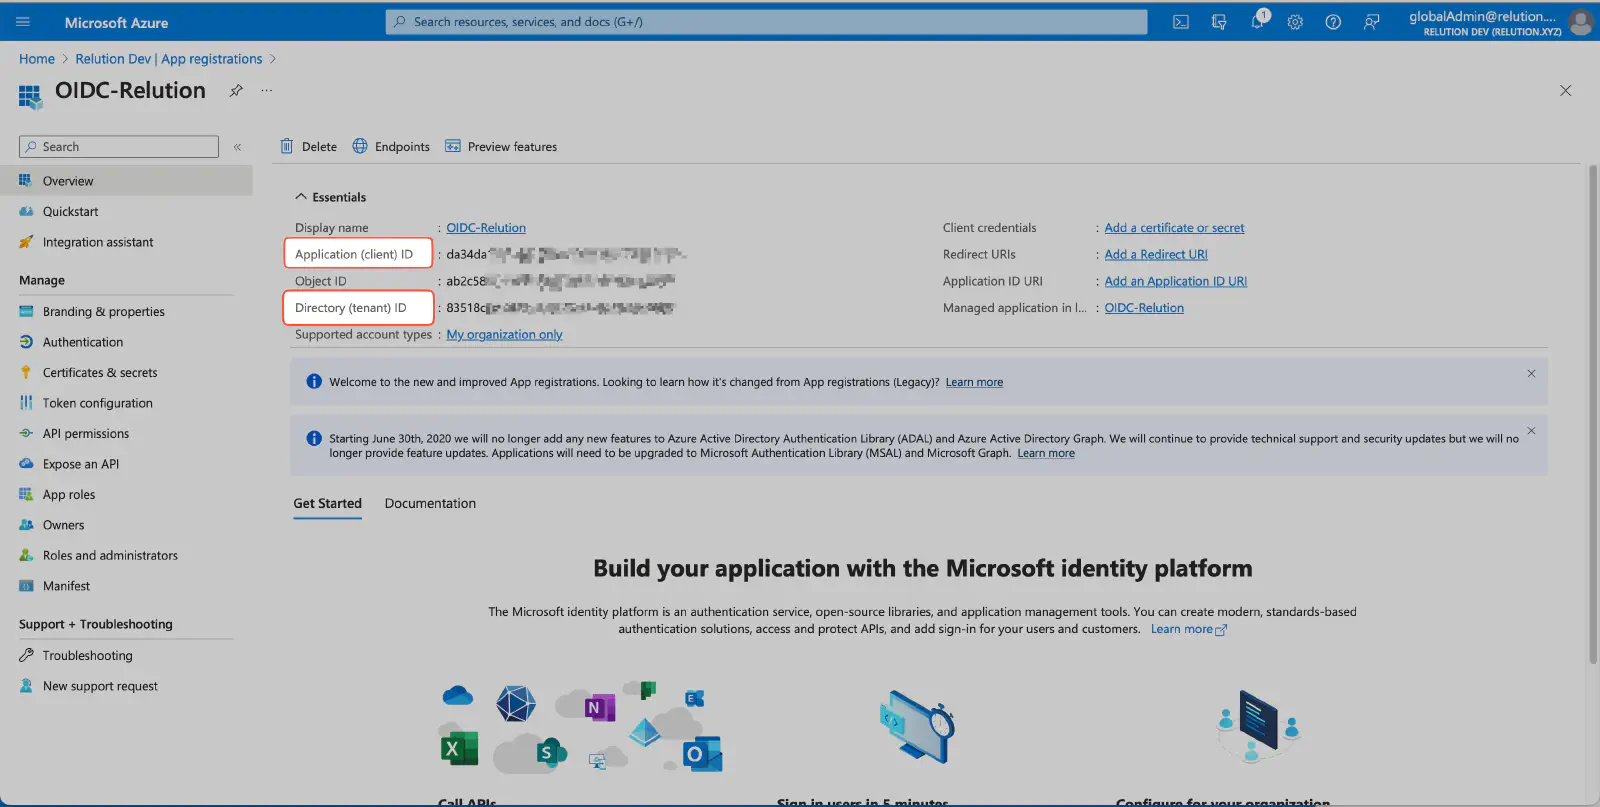
Authorization URI:
https://login.microsoftonline.com/$-your-client-ID/oauth2/v2.0/authorizeJWK Set URI:
https://login.microsoftonline.com/$-your-client-ID/discovery/v2.0/keysToken URI:
https://login.microsoftonline.com/$-your-client-ID/oauth2/v2.0/tokenUser Info URI:
https://graph.microsoft.com/oidc/userinfo
Advanced configuration
The username attribute from the OIDC provider: Specifies the attribute that contains the unique user ID from the identity provider.
The username attribute in Relution: Contains the unique username of the authenticated user.
Authorization Grant Type: The Authorization Grant Type is an OAuth mechanism that specifies how an application obtains access permissions from a user.
Scope: Scopes specifies the identity information or resources the application can request from the OIDC provider.
Creating a new app registration
- Logging in in Azure Portal, continuing on Azure Active Directory.
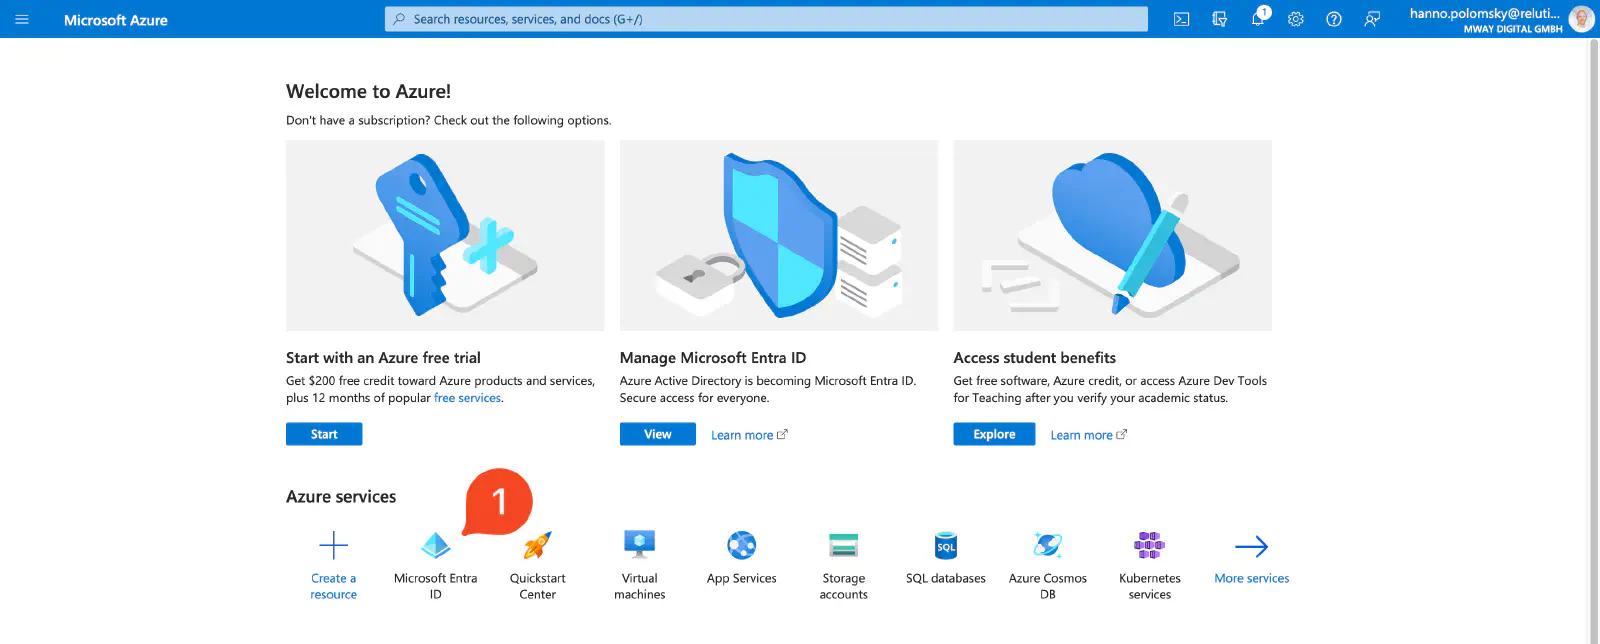
- Creating new
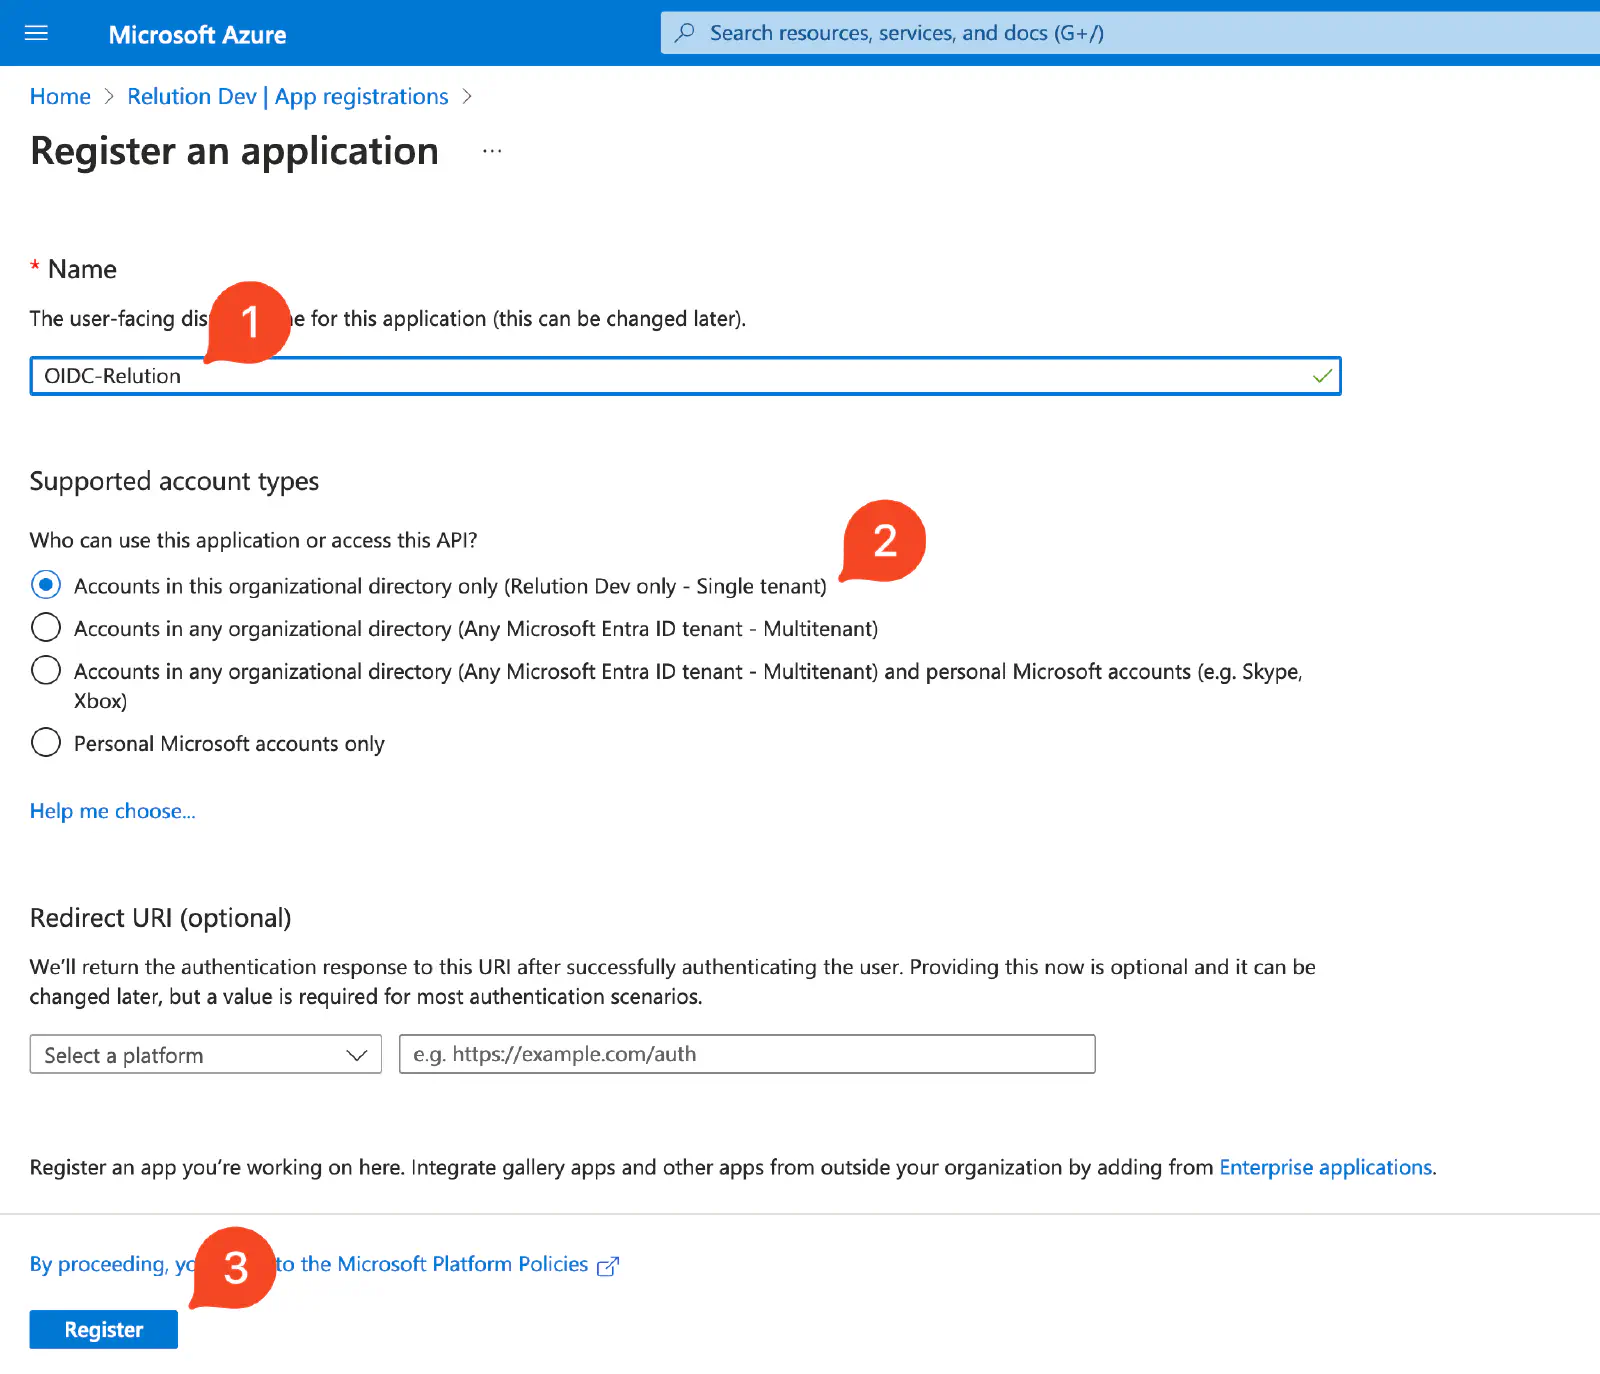
App registry→Create new registryfor OIDC.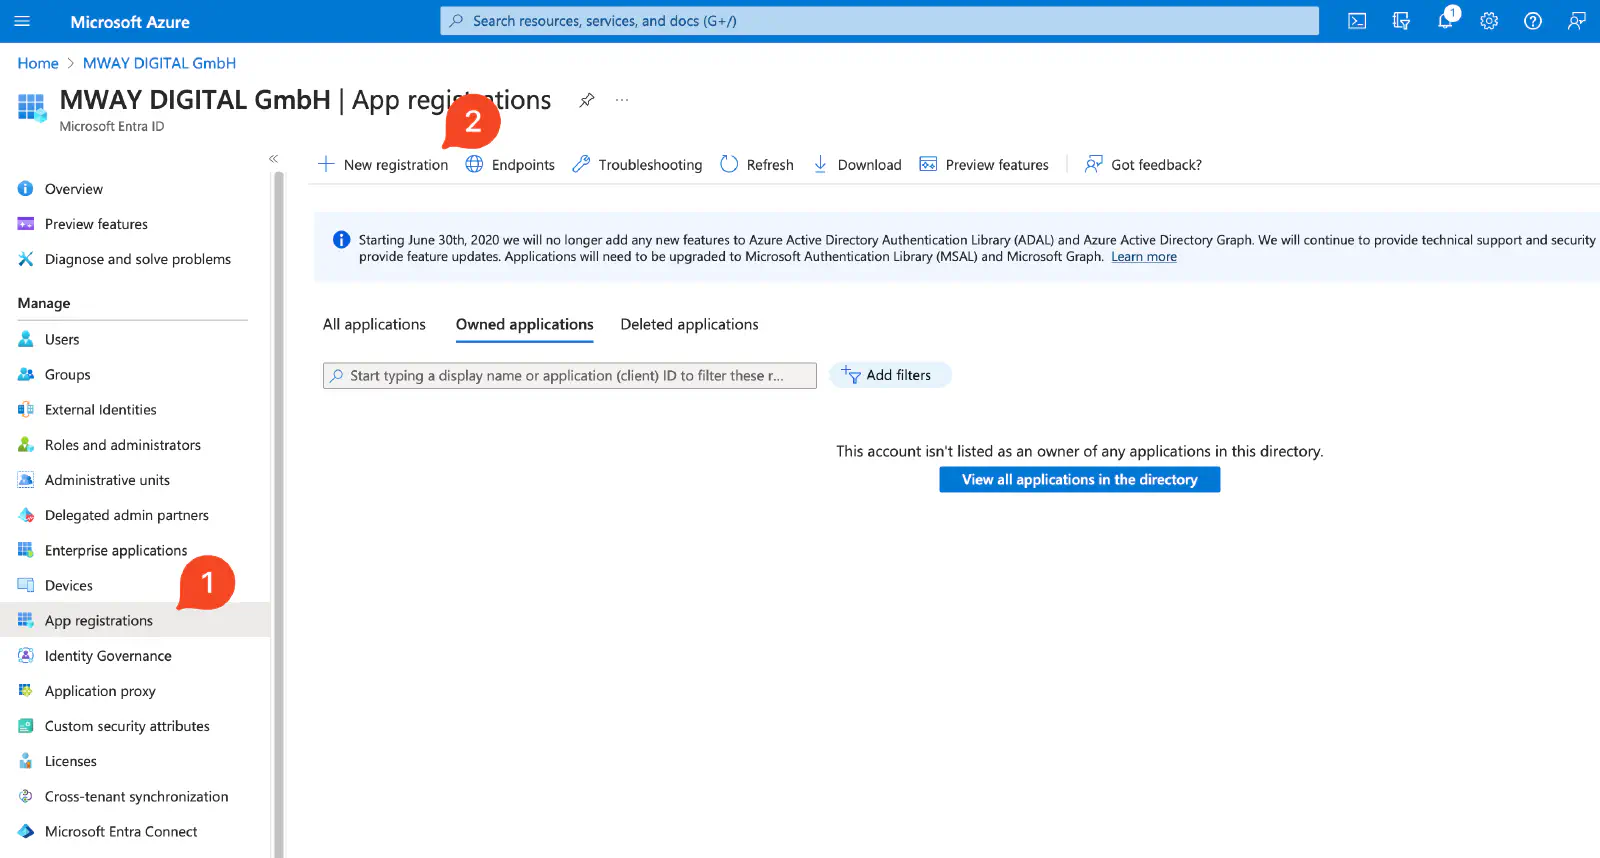
- Provide a name, select account type Only accounts in this organization directory and register it.
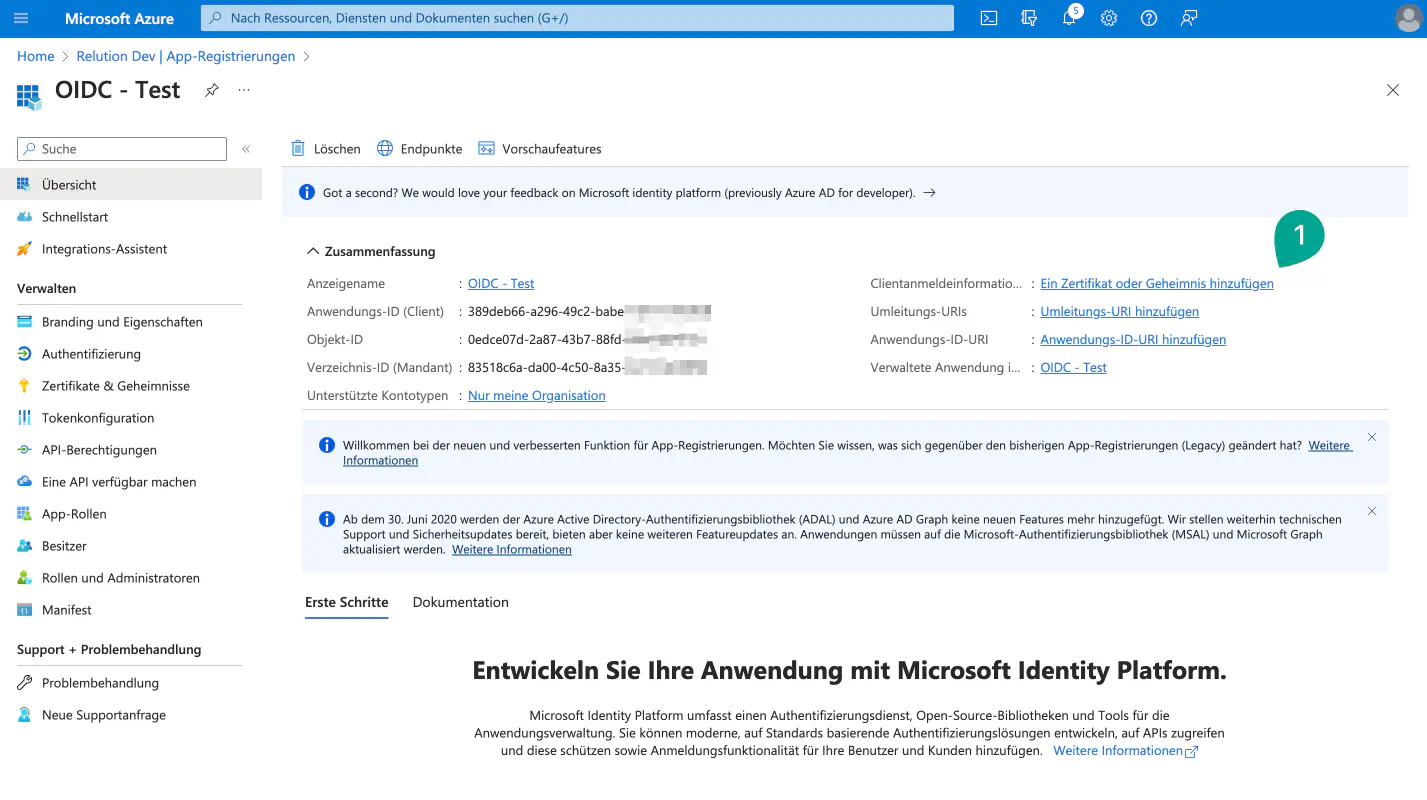
Adding secret client key (Client Secret) under Certificates & Secrets
- The required client secret is created under Add a certificate or secret.
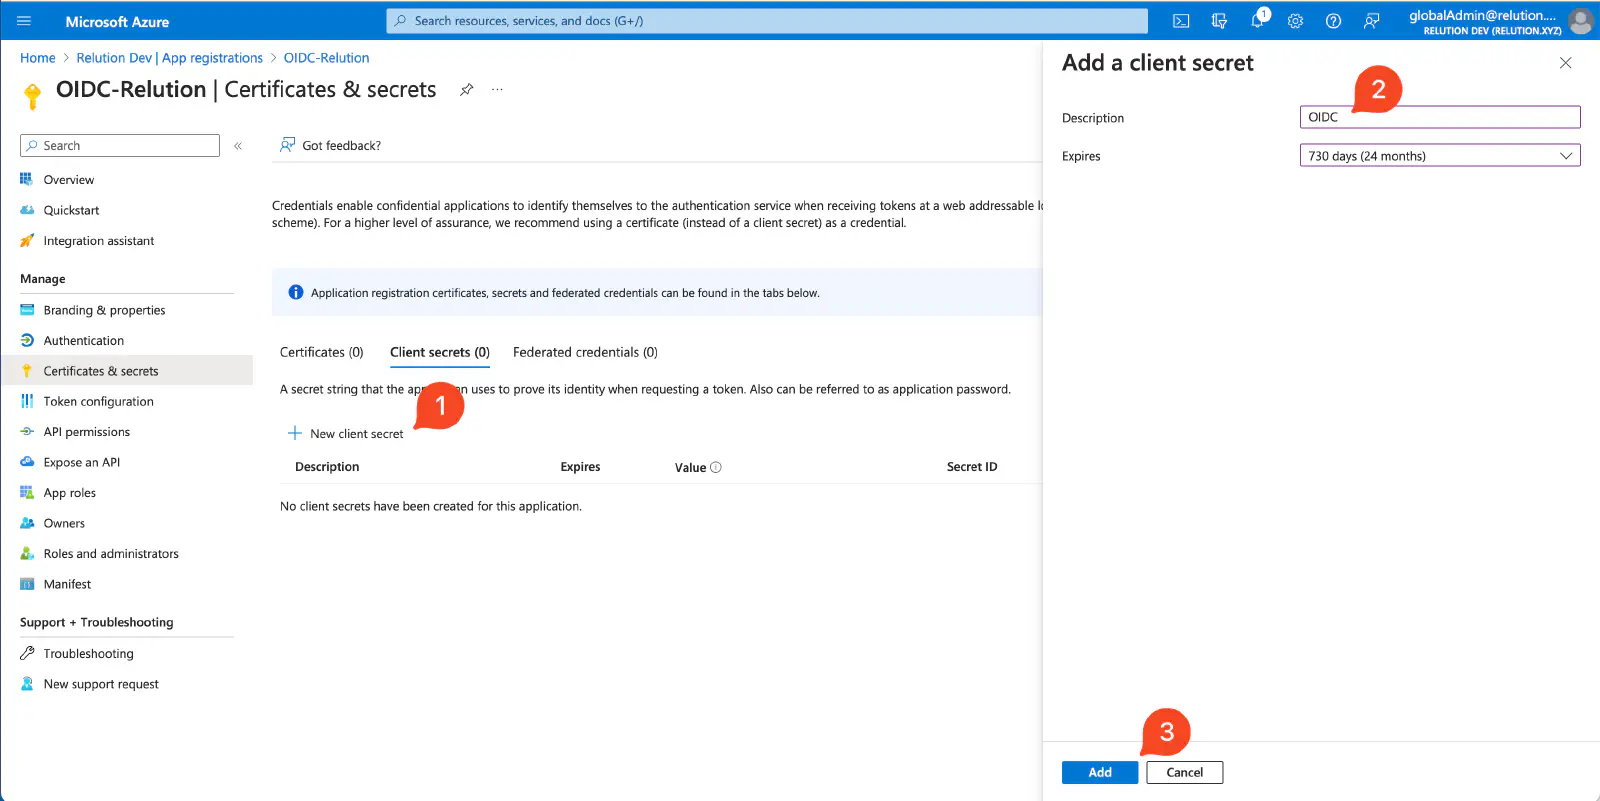
- Via New secret client key the Description and validity period Valid until can be set.
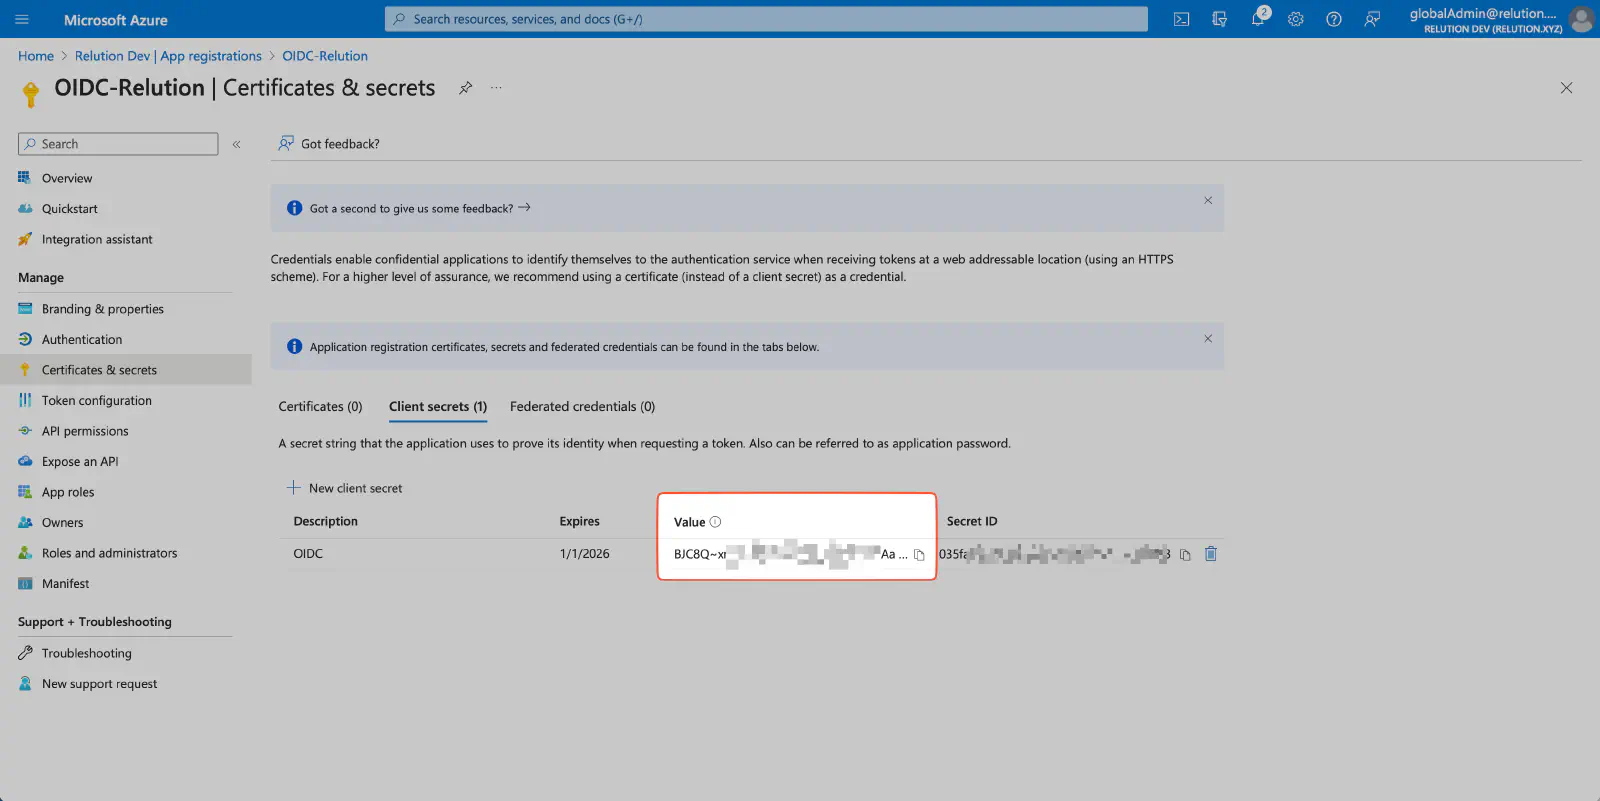
- The client key can be copied directly.
Configure API permissions
- Under
API Permissions→Configured Permissions, Add Permission should be clicked. - The Microsoft Graph should be selected under Microsoft APIs in the Request API Permissions dialogue box.
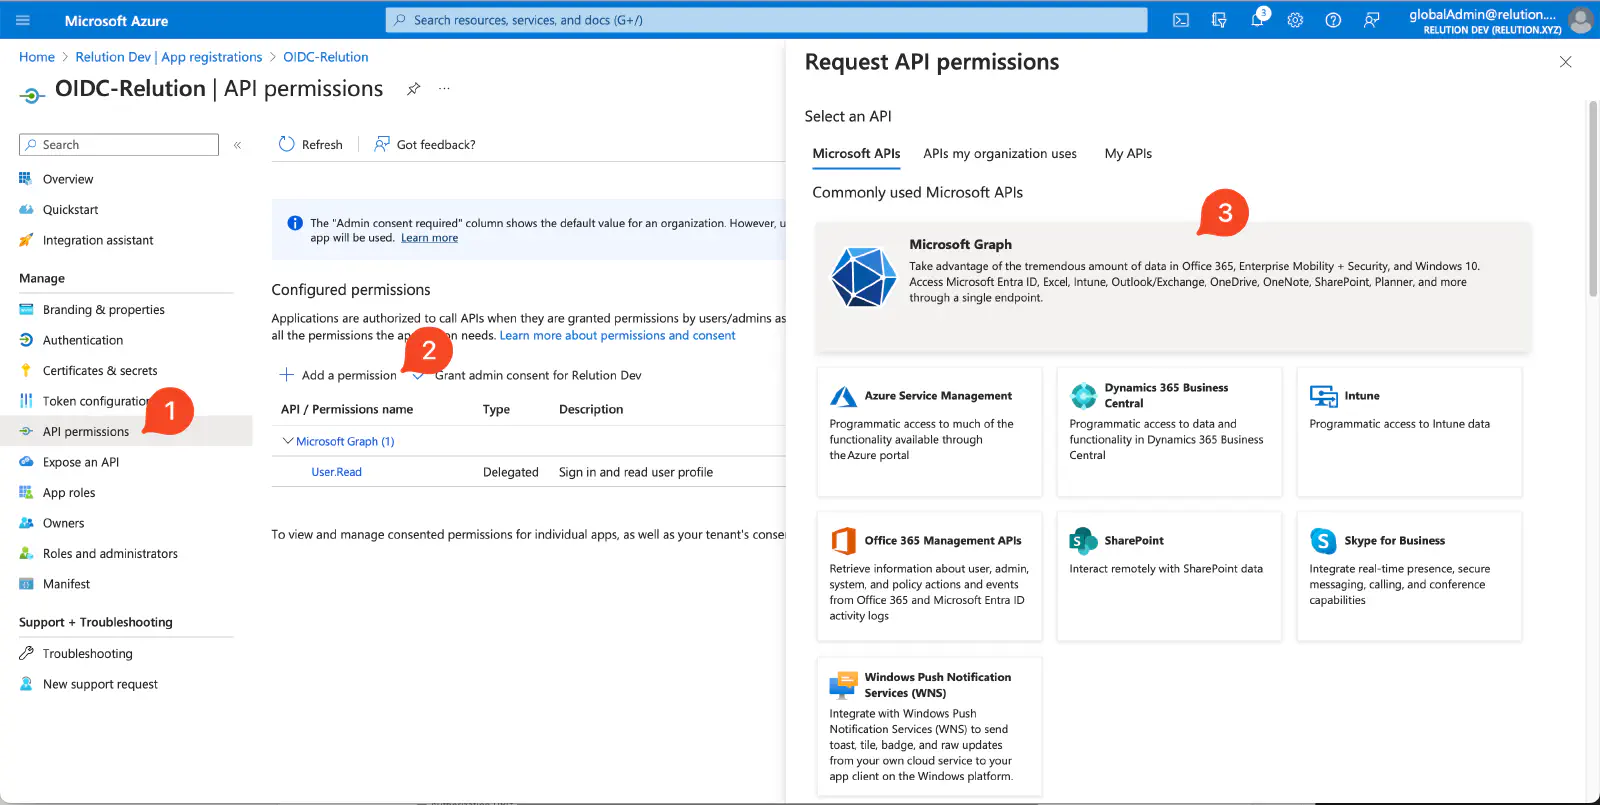
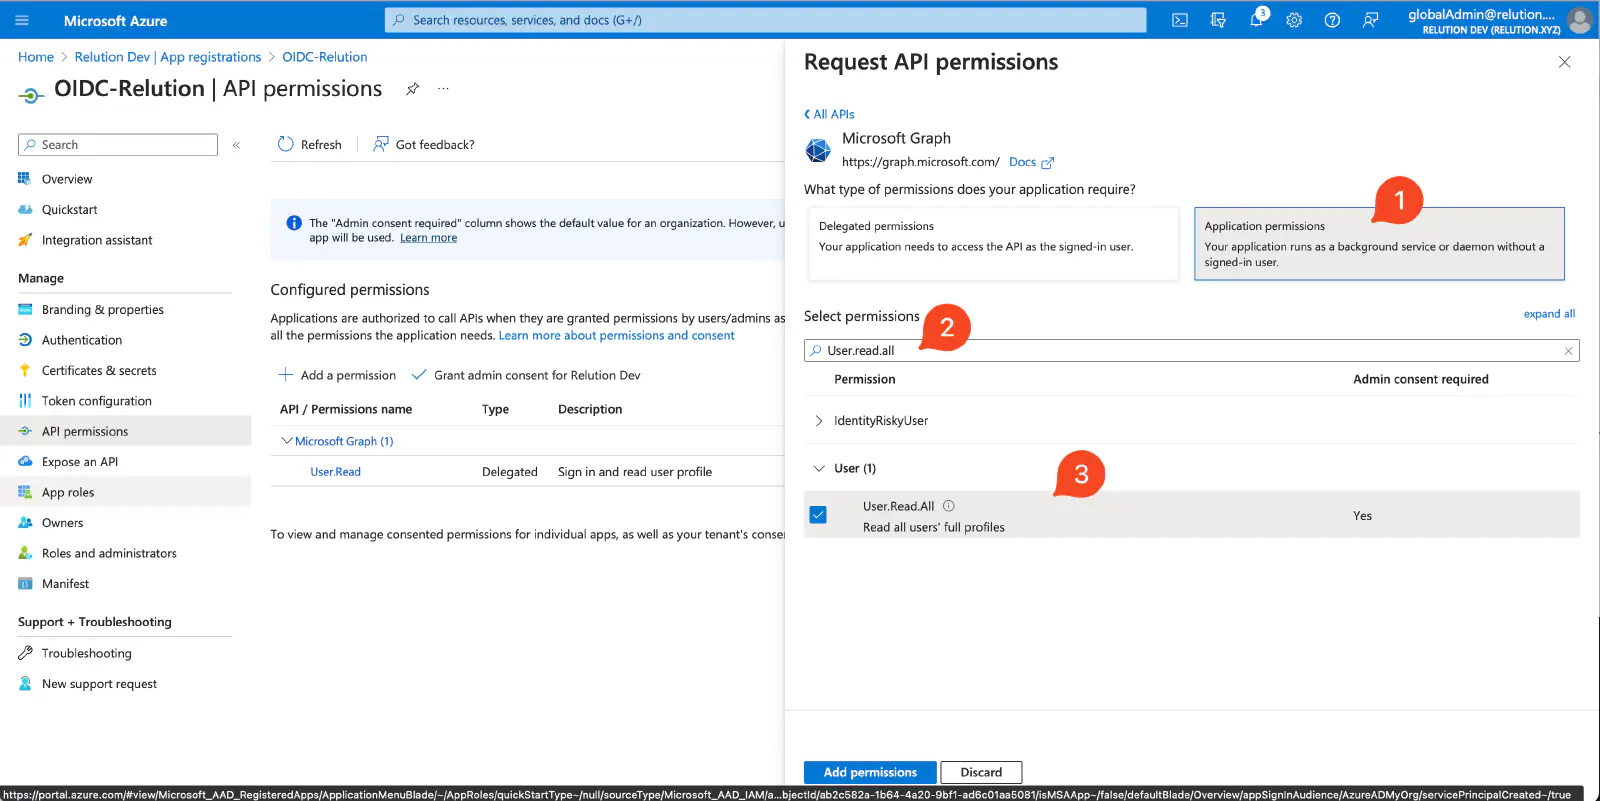
- In the next step, the tile `Application permissions can be selected.
User.Read.Allfor can be selected for User.
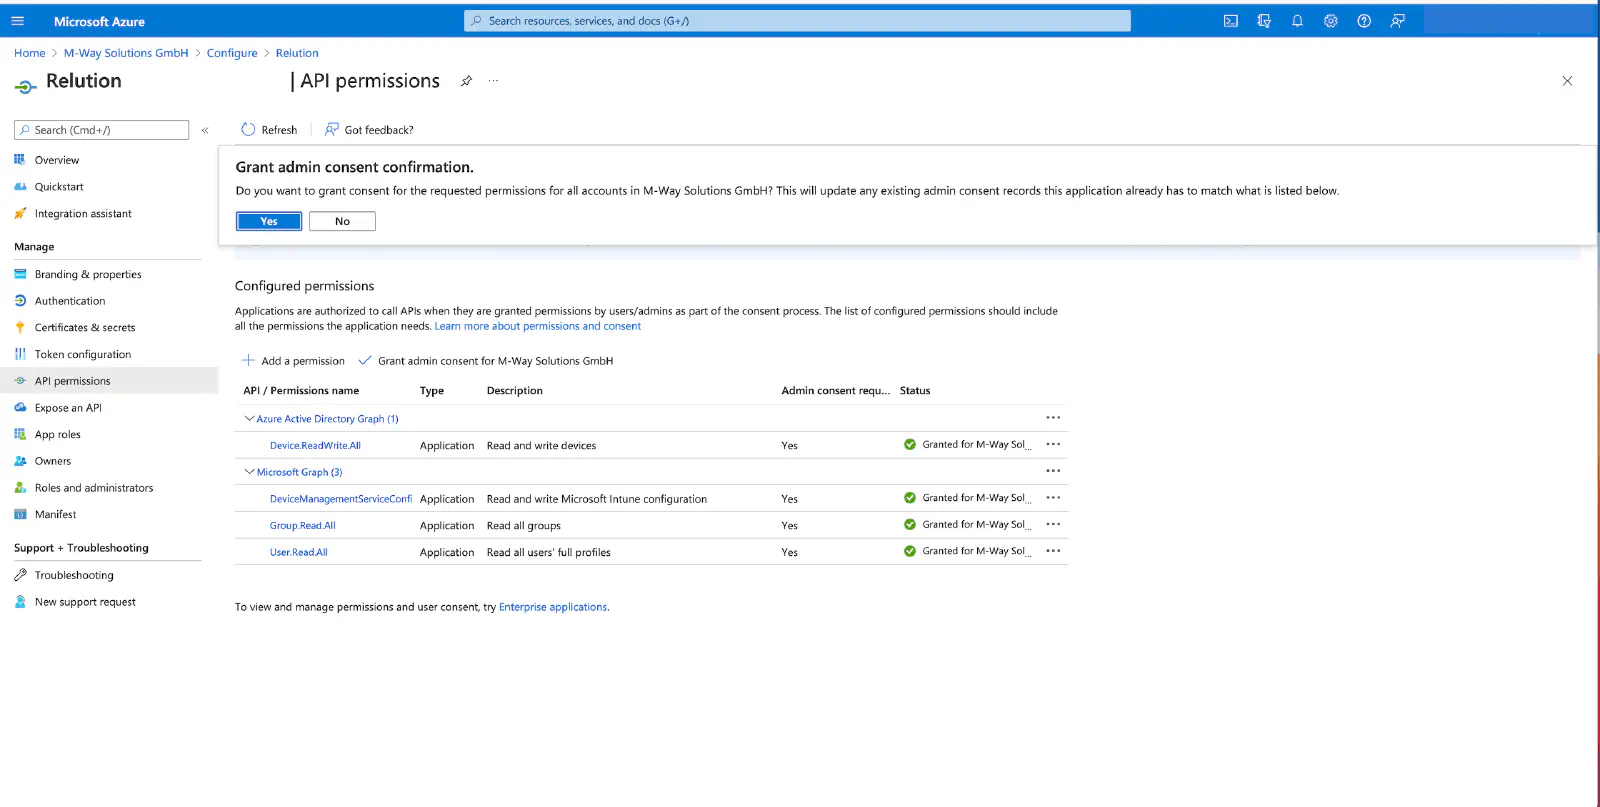
For the newly added API permissions, an exclamation mark is initially displayed as the status. Administrators must agree to this once in order for Microsoft Graph to ultimately receive the permissions. Afterwards, the status is displayed with a green check mark for Granted and the permissions are granted.
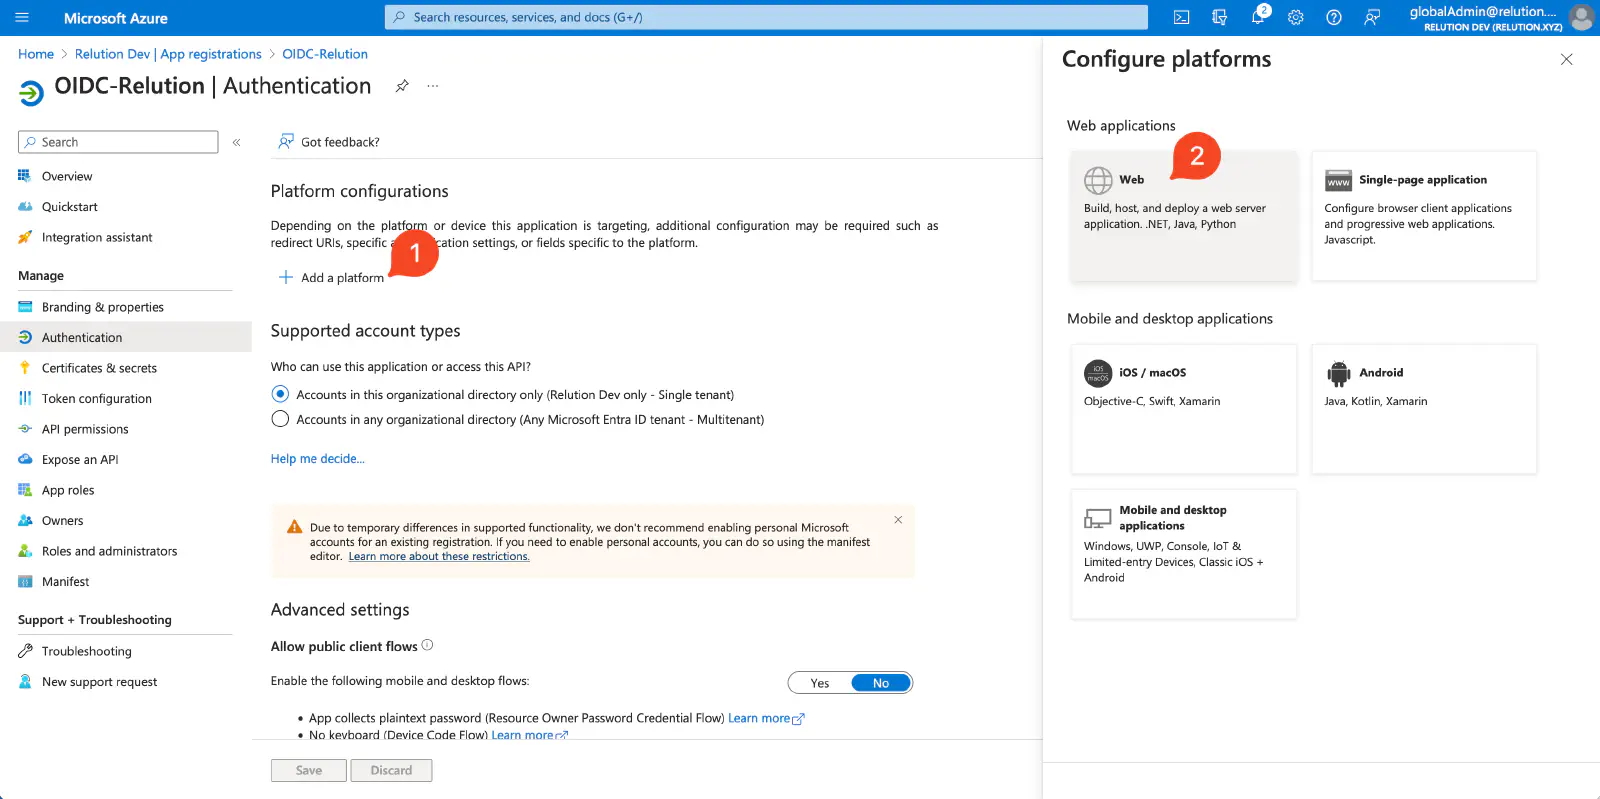
Add redirection URI
New in 26.4The redirection URI will be displayed in the Relution portal once the connection is configured and saved.
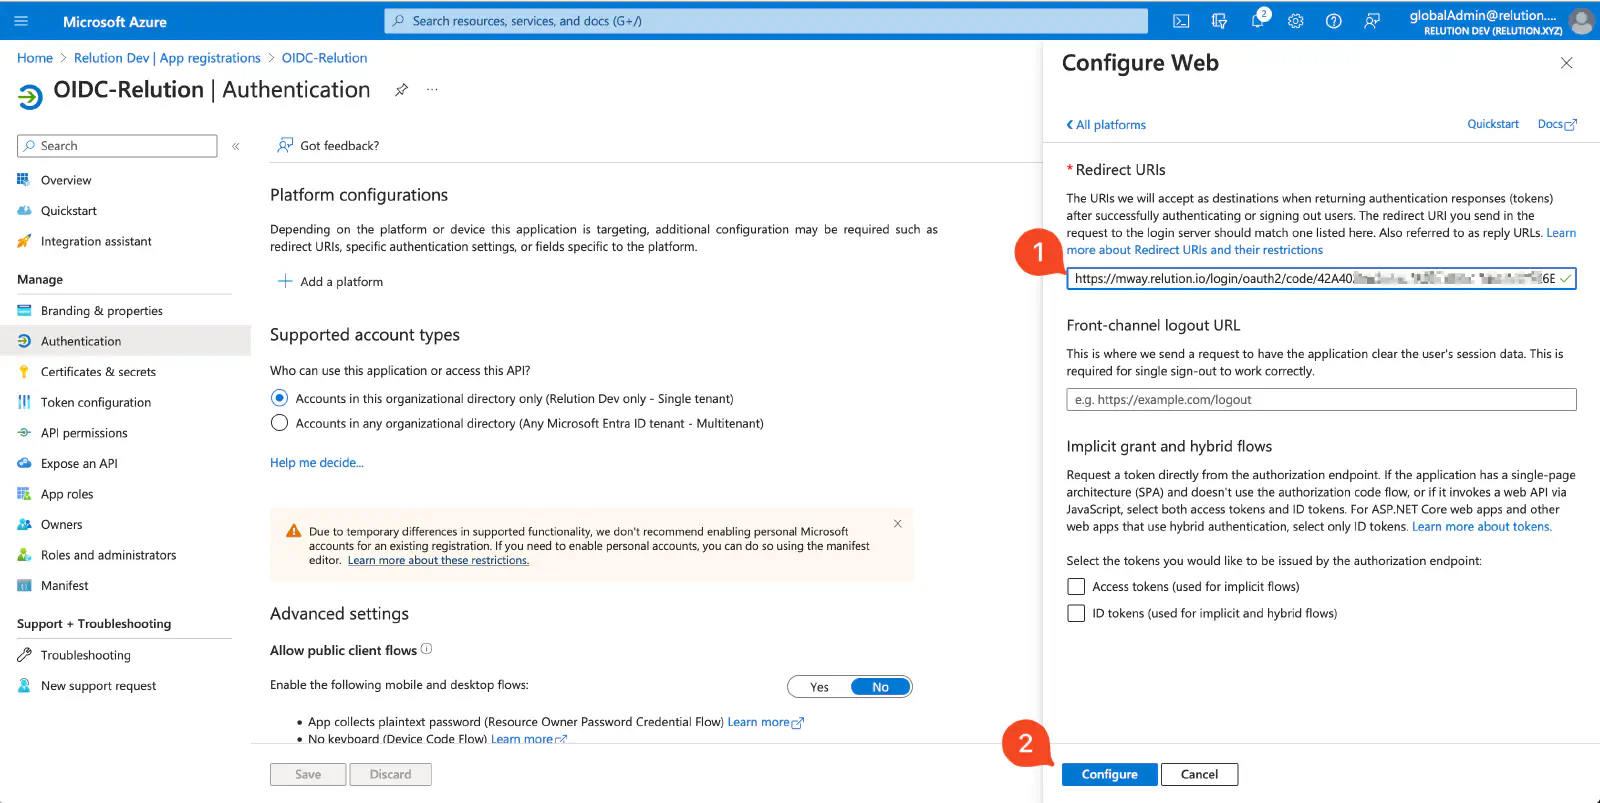
Where to find them: the exact redirect URIs for the instance are shown in the Relution portal under Settings → OpenID Connect once the connection is saved. Copy them from there rather than building them by hand.
Before 26.4 (legacy — one redirect URI):
https://<host>/login/oauth2/code/<registrationId>
From 26.4 (scoped — register all that apply):
https://<host>/api/management/login/oauth2/code/<registrationId>
https://<host>/api/device/login/oauth2/code/<registrationId>
https://<host>/api/teacher/login/oauth2/code/<registrationId>          # Education license only
https://<host>/api/management/logout/connect/back-channel/<registrationId>   # back-channel logout
When upgrading, add the scoped URIs to the existing Entra app registration. The legacy URI keeps working but is deprecated and will be removed in a future release. <registrationId> is the OIDC configuration UUID shown in Relution.
Backchannel Logout
Backchannel Logout is supported in Relution starting with Server version 5.32.0.
ExempExample use case: A user is signed in to a central SSO service and multiple applications. When the user logs out of the SSO service, the backchannel logout ensures that all connected applications also terminate their sessions—even if running in the background.
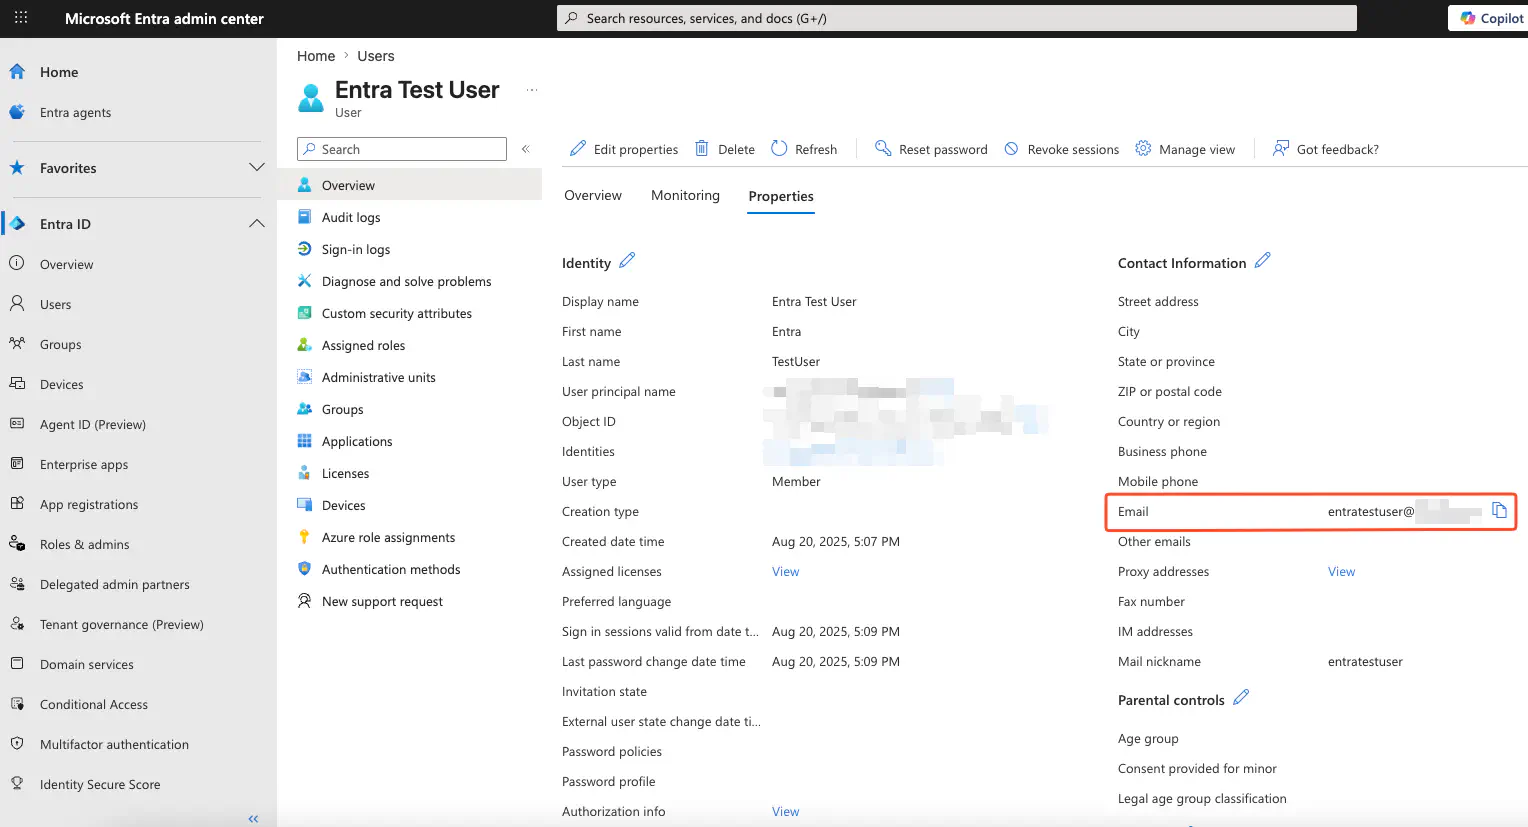
Entra User Requirements for OIDC
OIDC login behind an outgoing proxy
As of Relution 26.3, login via EntraID and other OIDC providers fails if the Relution server can only reach the internet through an outgoing corporate proxy. After clicking Sign in with Microsoft, the callback loads for about five minutes and then ends in a timeout (nginx error 504 or an error page).
The cause is that the internal OIDC component no longer uses the configured proxy and connects directly to the identity provider, which can be blocked by the firewall. Up to Relution 26.2, the configured proxy was still used automatically at this point. The issue is tracked as REL-13391 and will be fixed in an upcoming version.
Workaround — allow outgoing access to the login endpoints: Until the fix is available, outgoing access from the Relution server (port 443) directly to the Microsoft login addresses can be enabled on the firewall. Enabling access by hostname is recommended, as Microsoft frequently changes the associated IP addresses:
login.microsoftonline.comlogin.microsoft.comlogin.windows.net
For other OIDC providers, the respective login or authorization endpoints of the identity provider need to be enabled for outgoing access accordingly.
Logout Verification
Verify both logout paths work correctly before go-live:
- Front-channel logout: User clicks “Logout” in Relution — session is revoked and browser is redirected to the IdP logout endpoint.
- Back-channel logout: The IdP sends a logout notification to Relution — the session is revoked without user interaction.
Test both paths to ensure that IdP-initiated session termination (e.g. from the IdP admin console) propagates correctly to Relution.