OIDC with Workspace
OpenID Connect OIDC is an identity protocol built on top of OAuth 2.0 that enables secure authentication and authorization for web and mobile applications. It allows users to log in securely to various services while service providers can simultaneously access verified identity information.
This guide explains the step-by-step configuration of OIDC in Relution using Google Workspace as an example.
Hint: When using OIDC, no classes or groups are synchronized. Only the user who has logged in successfully at least once will be created in Relution.
Project and Client Setup (Google Cloud Console)
First, an application must be registered in the Google Cloud Console to obtain the necessary credentials.
Log in at console.cloud.google.com →.
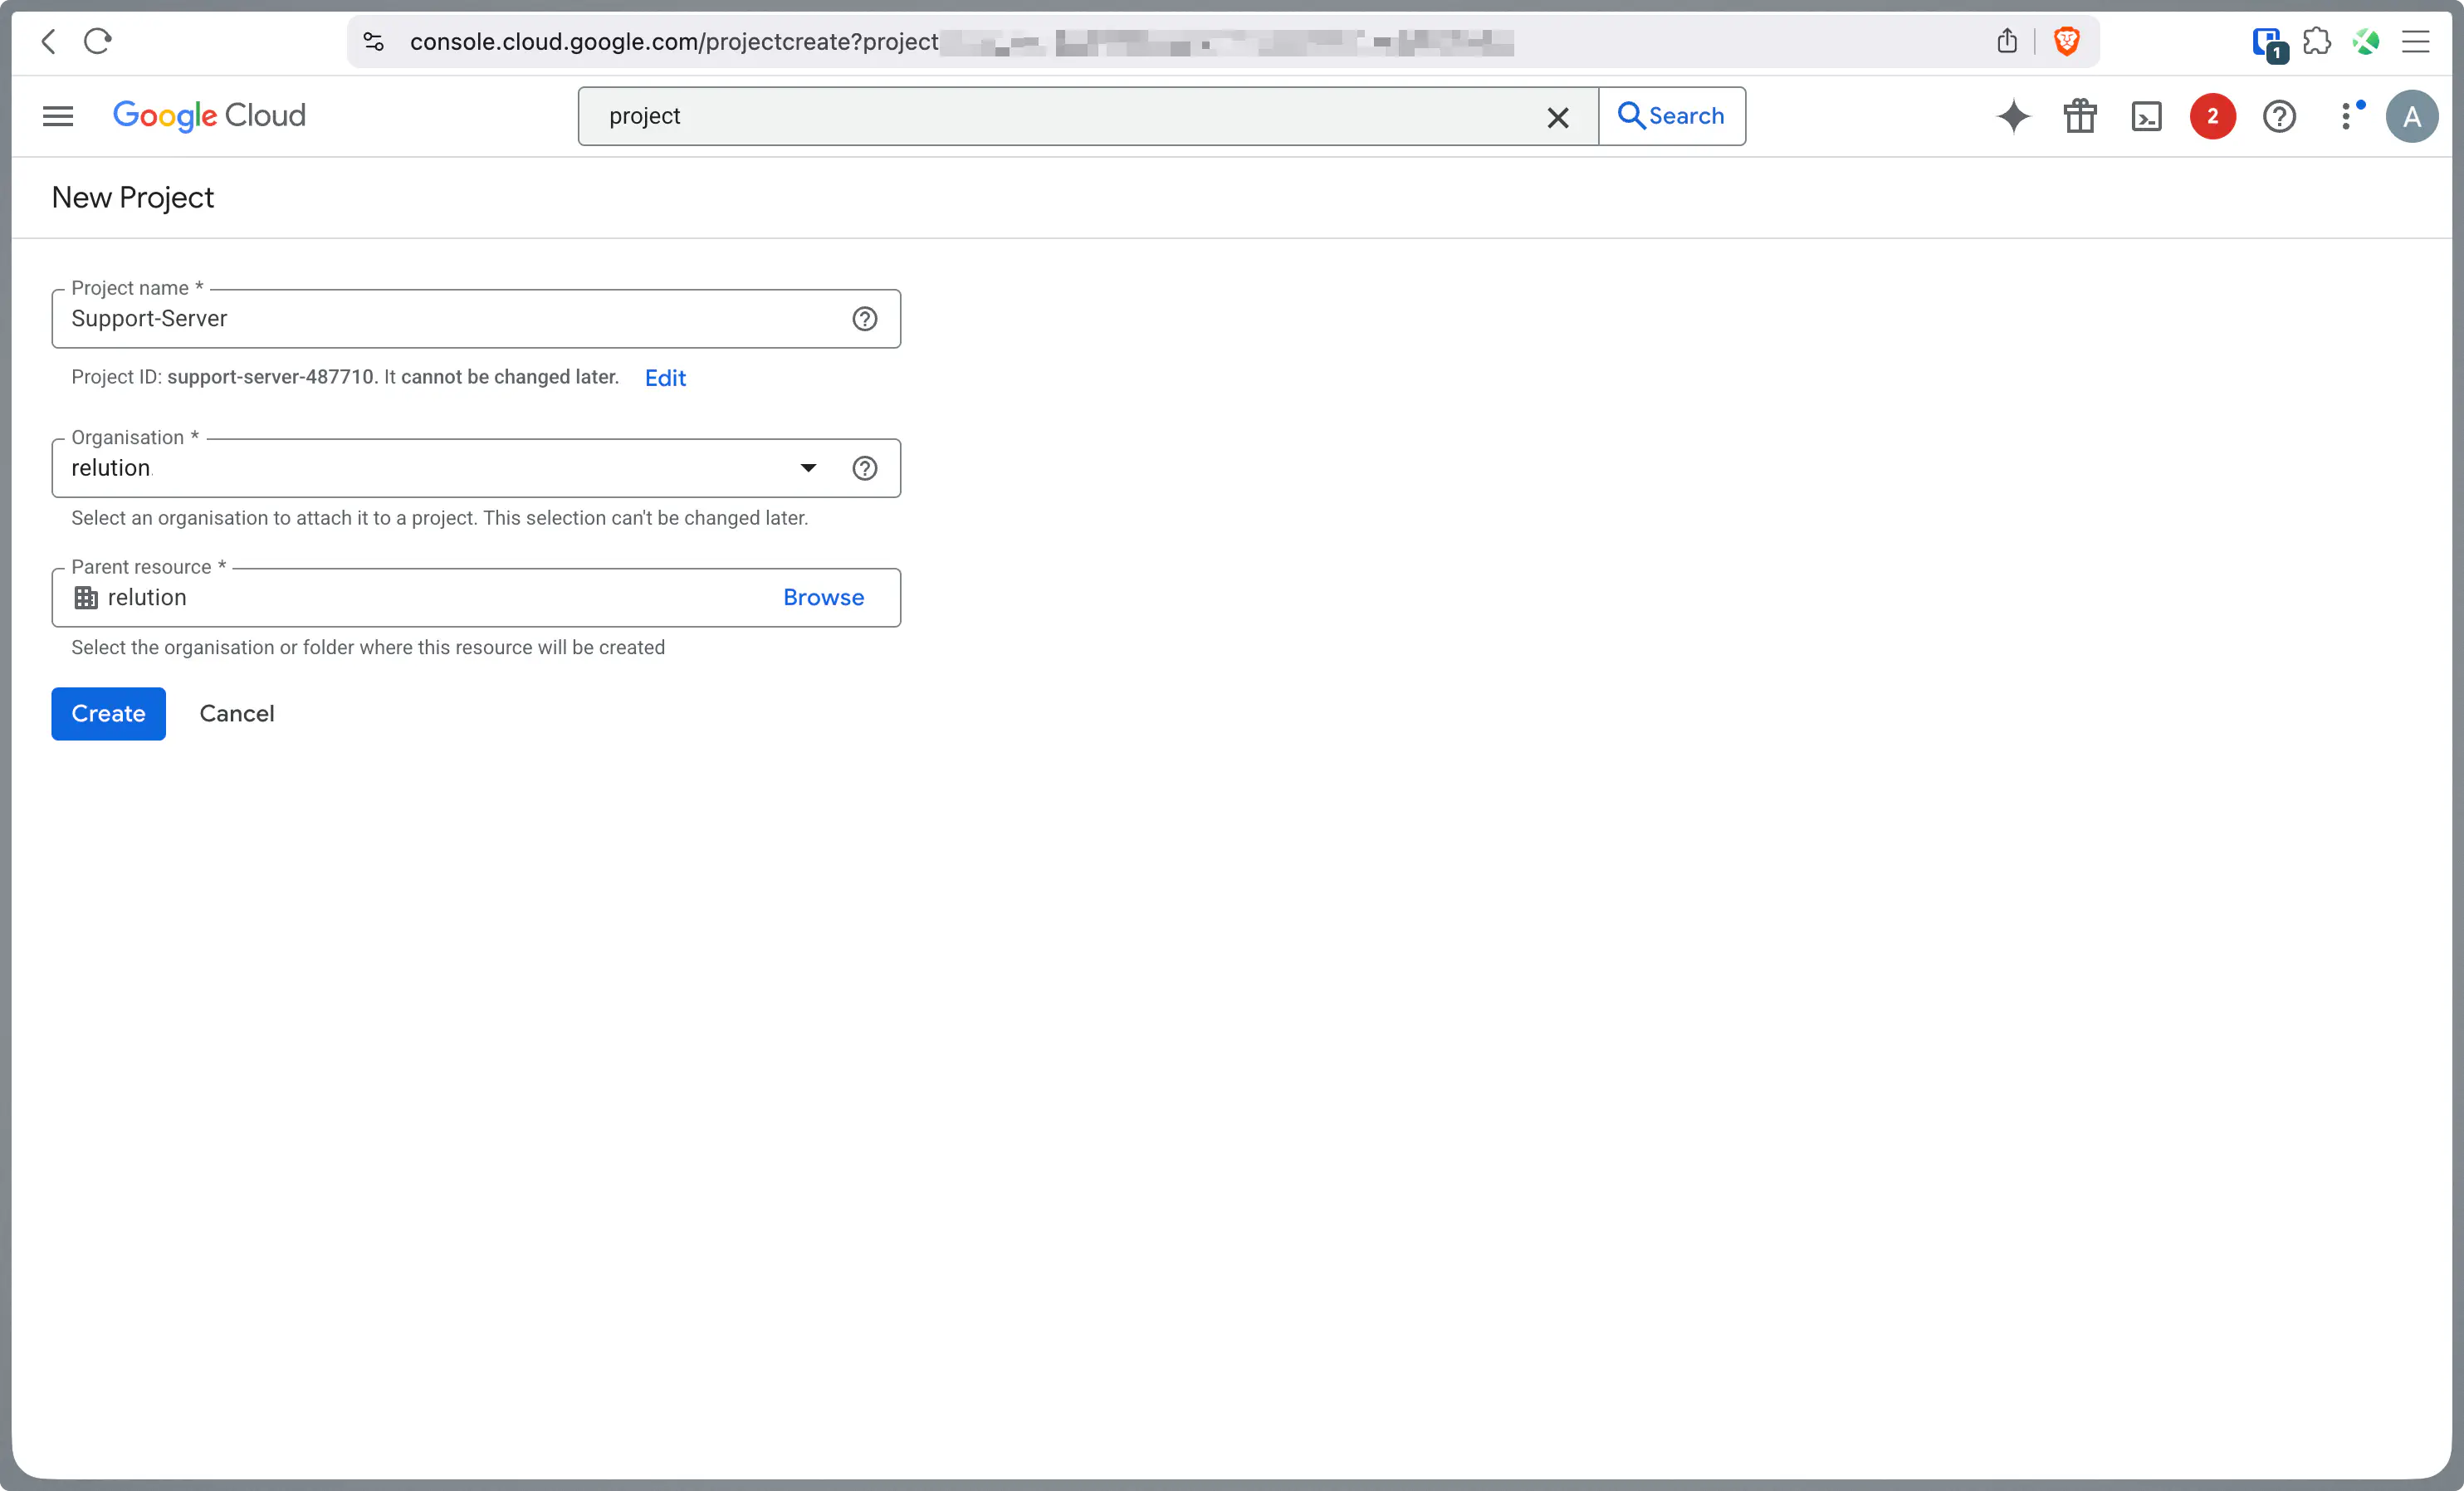
Create a new project or select an existing one.
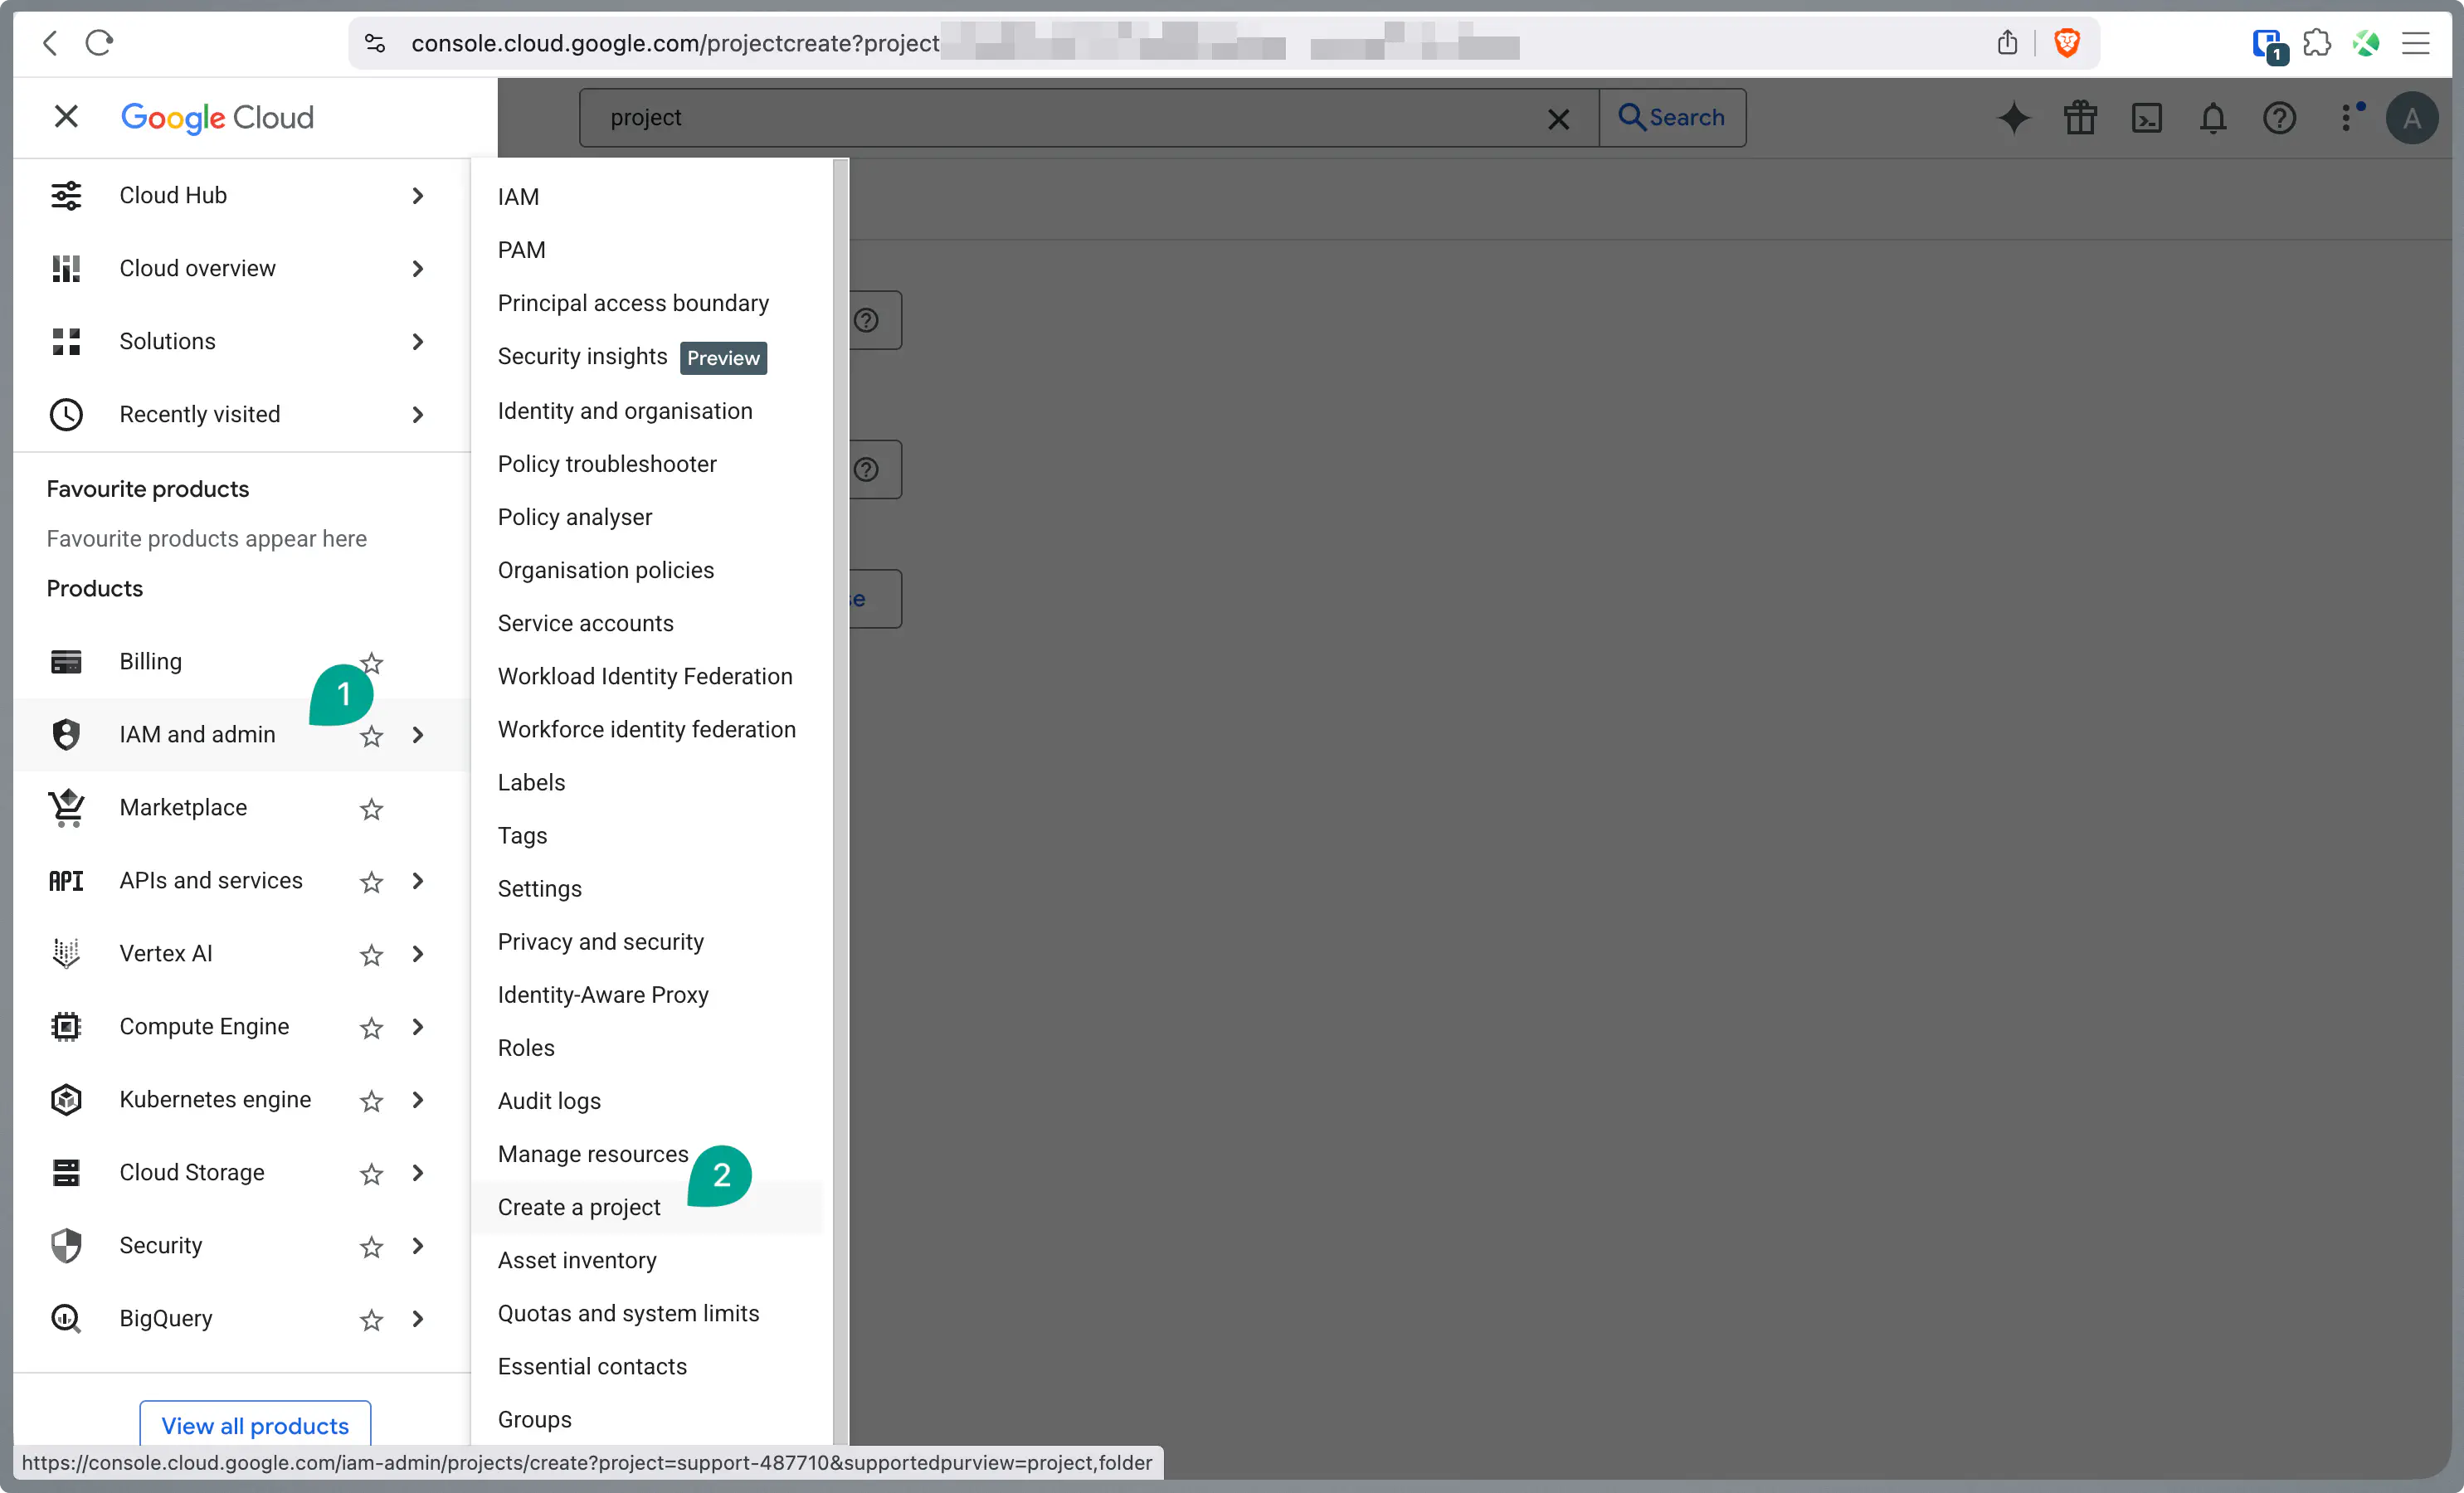
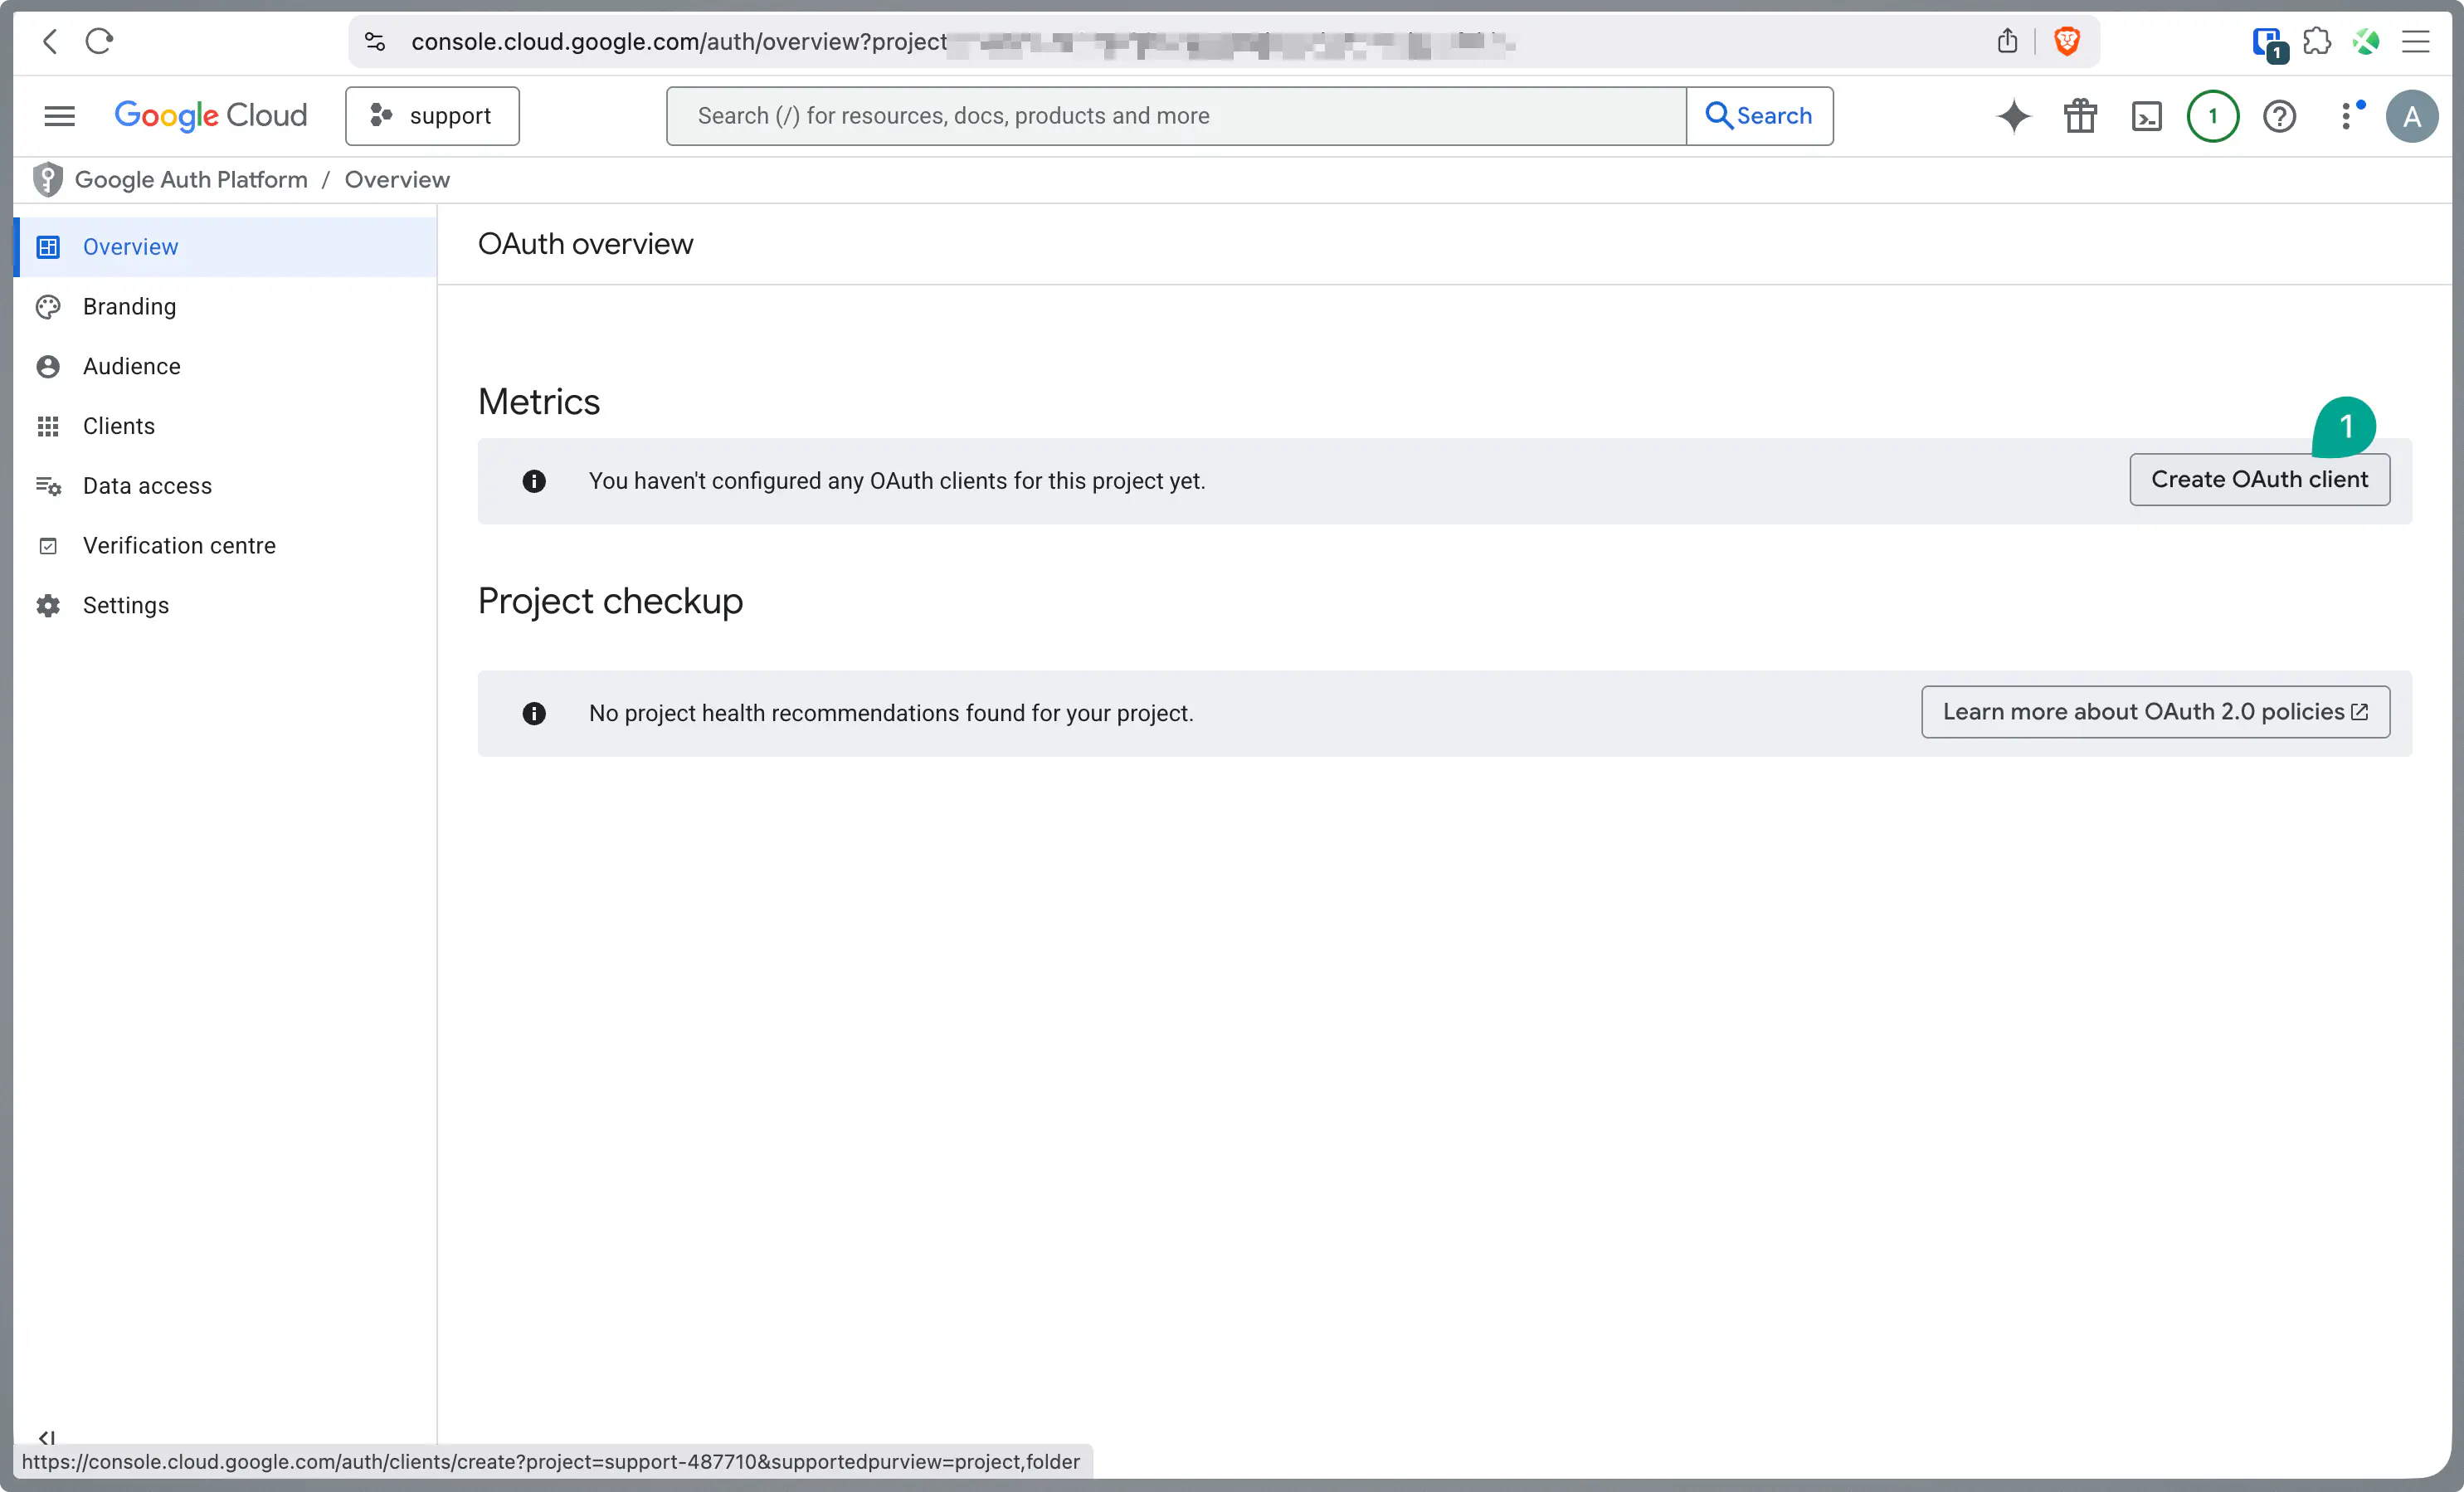
In the navigation menu, go to APIs & Services > OAuth consent screen and configure it if necessary.
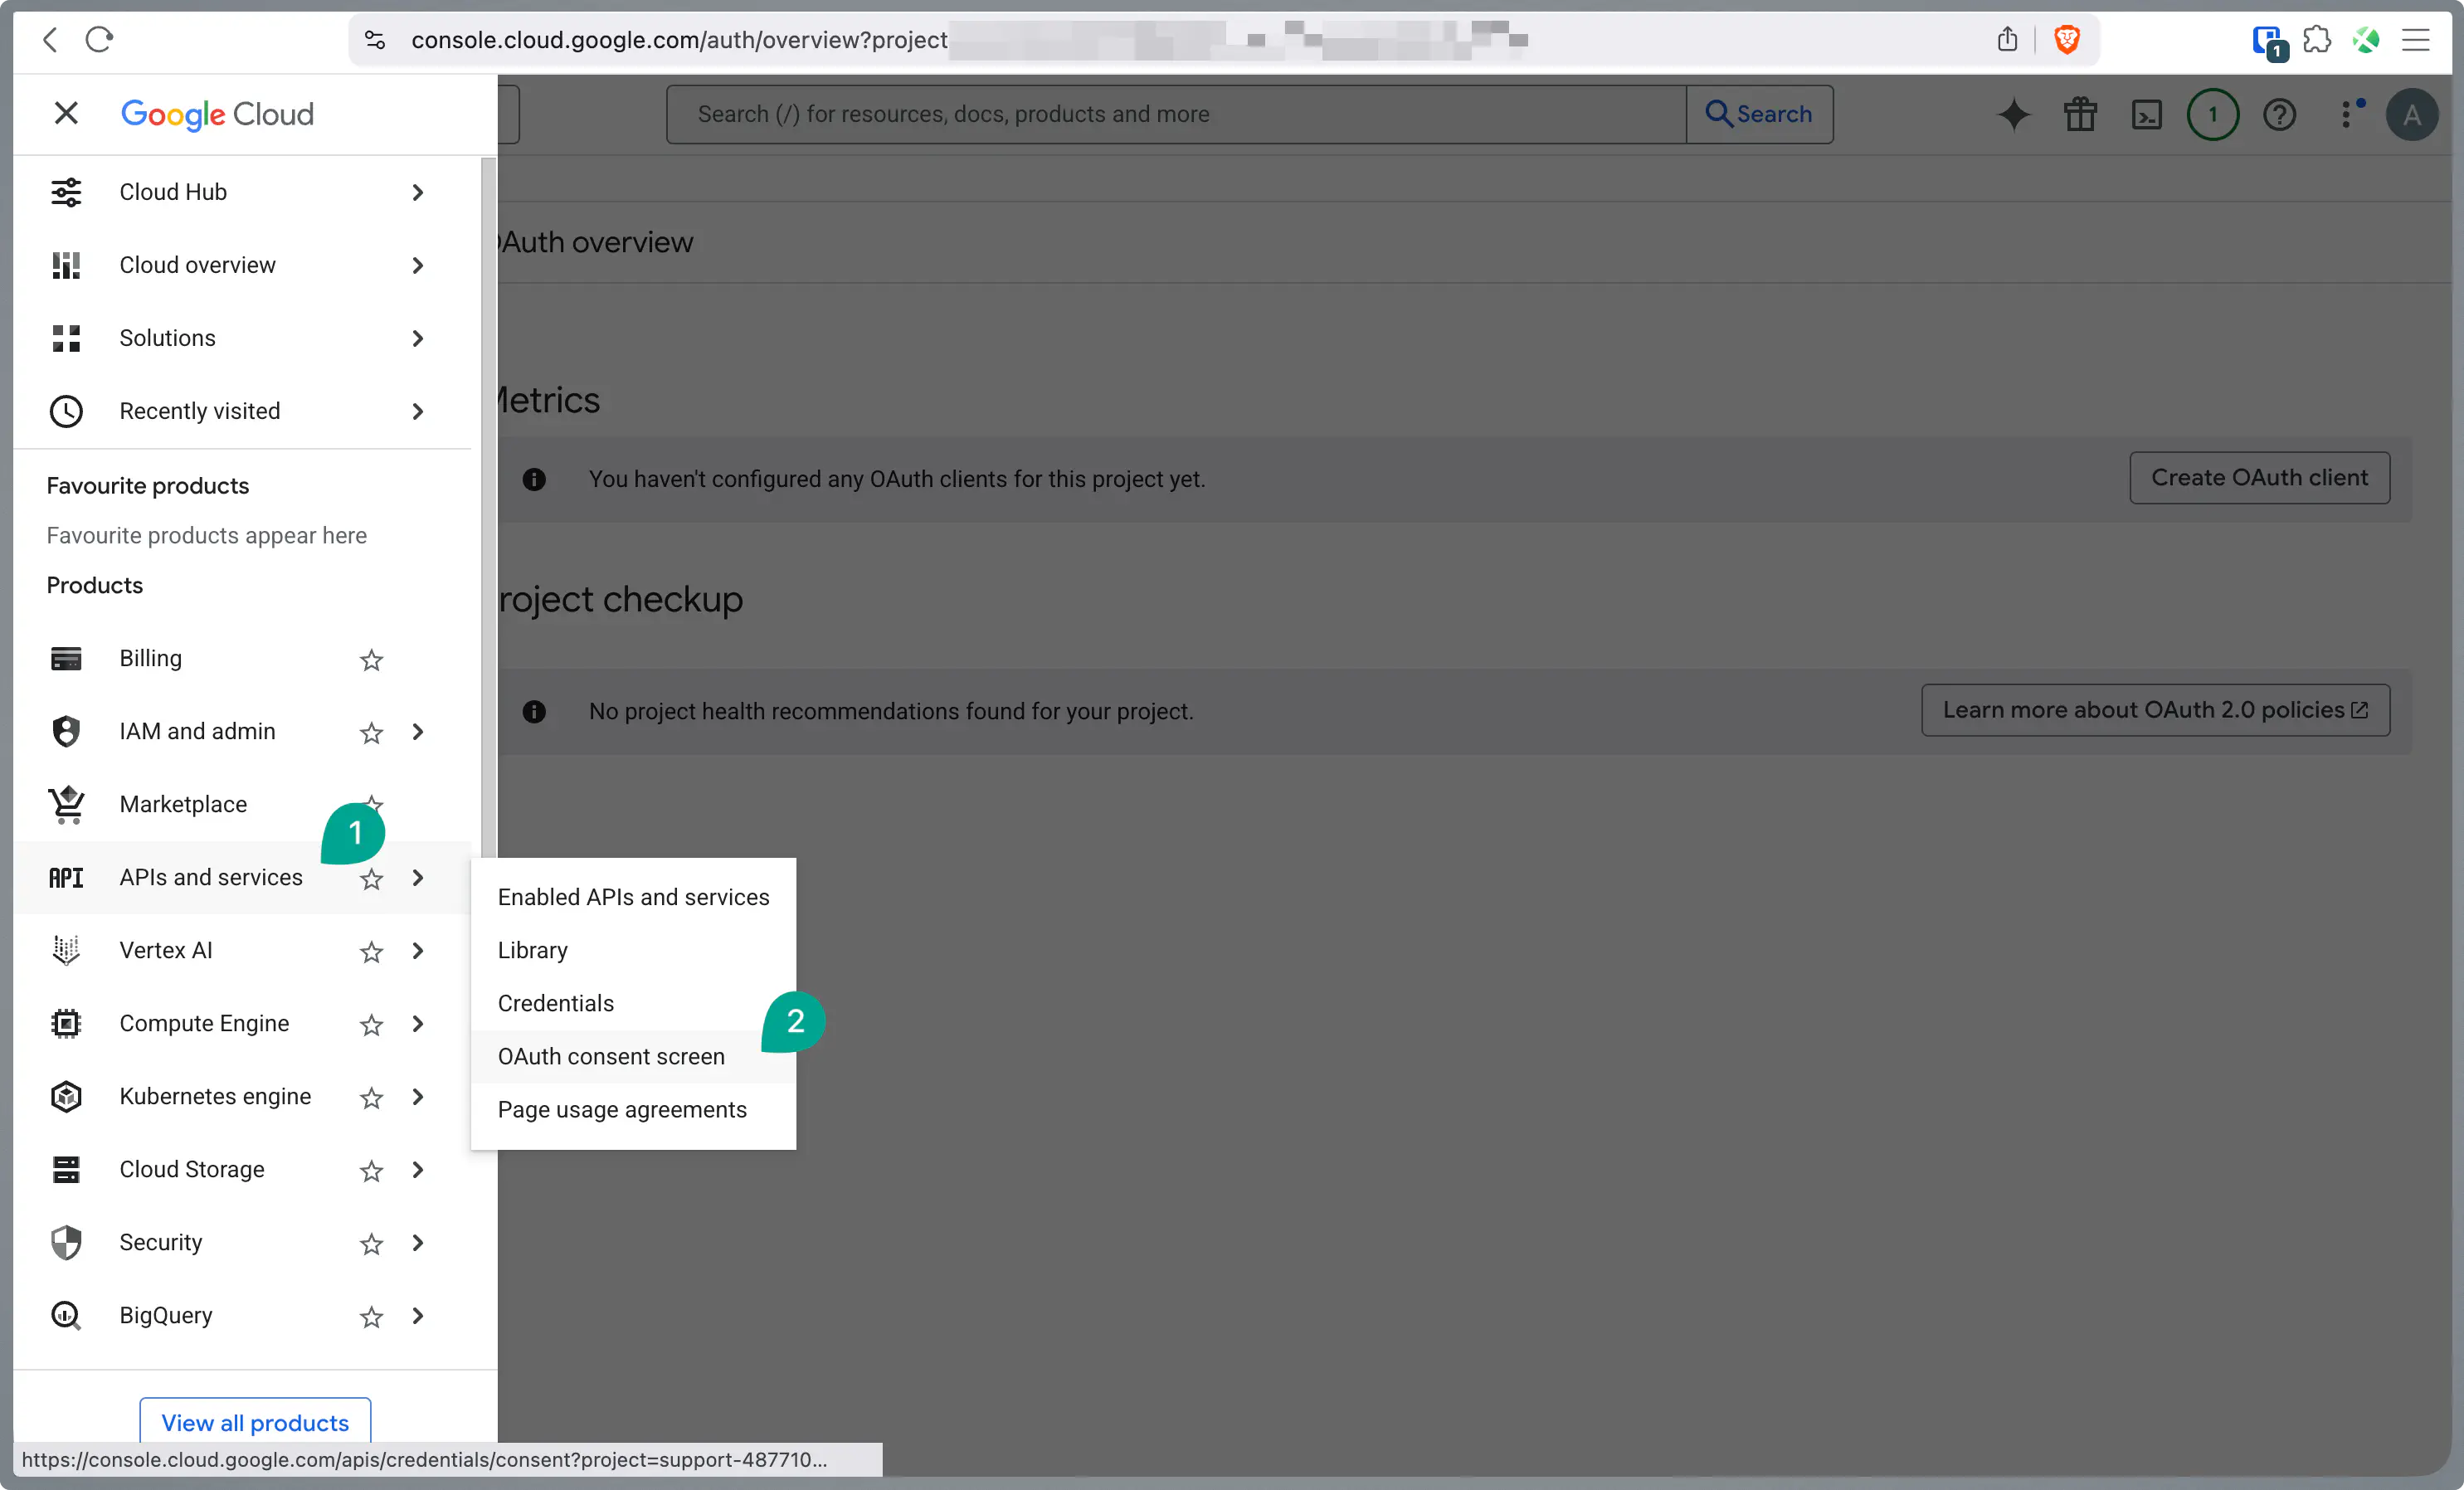
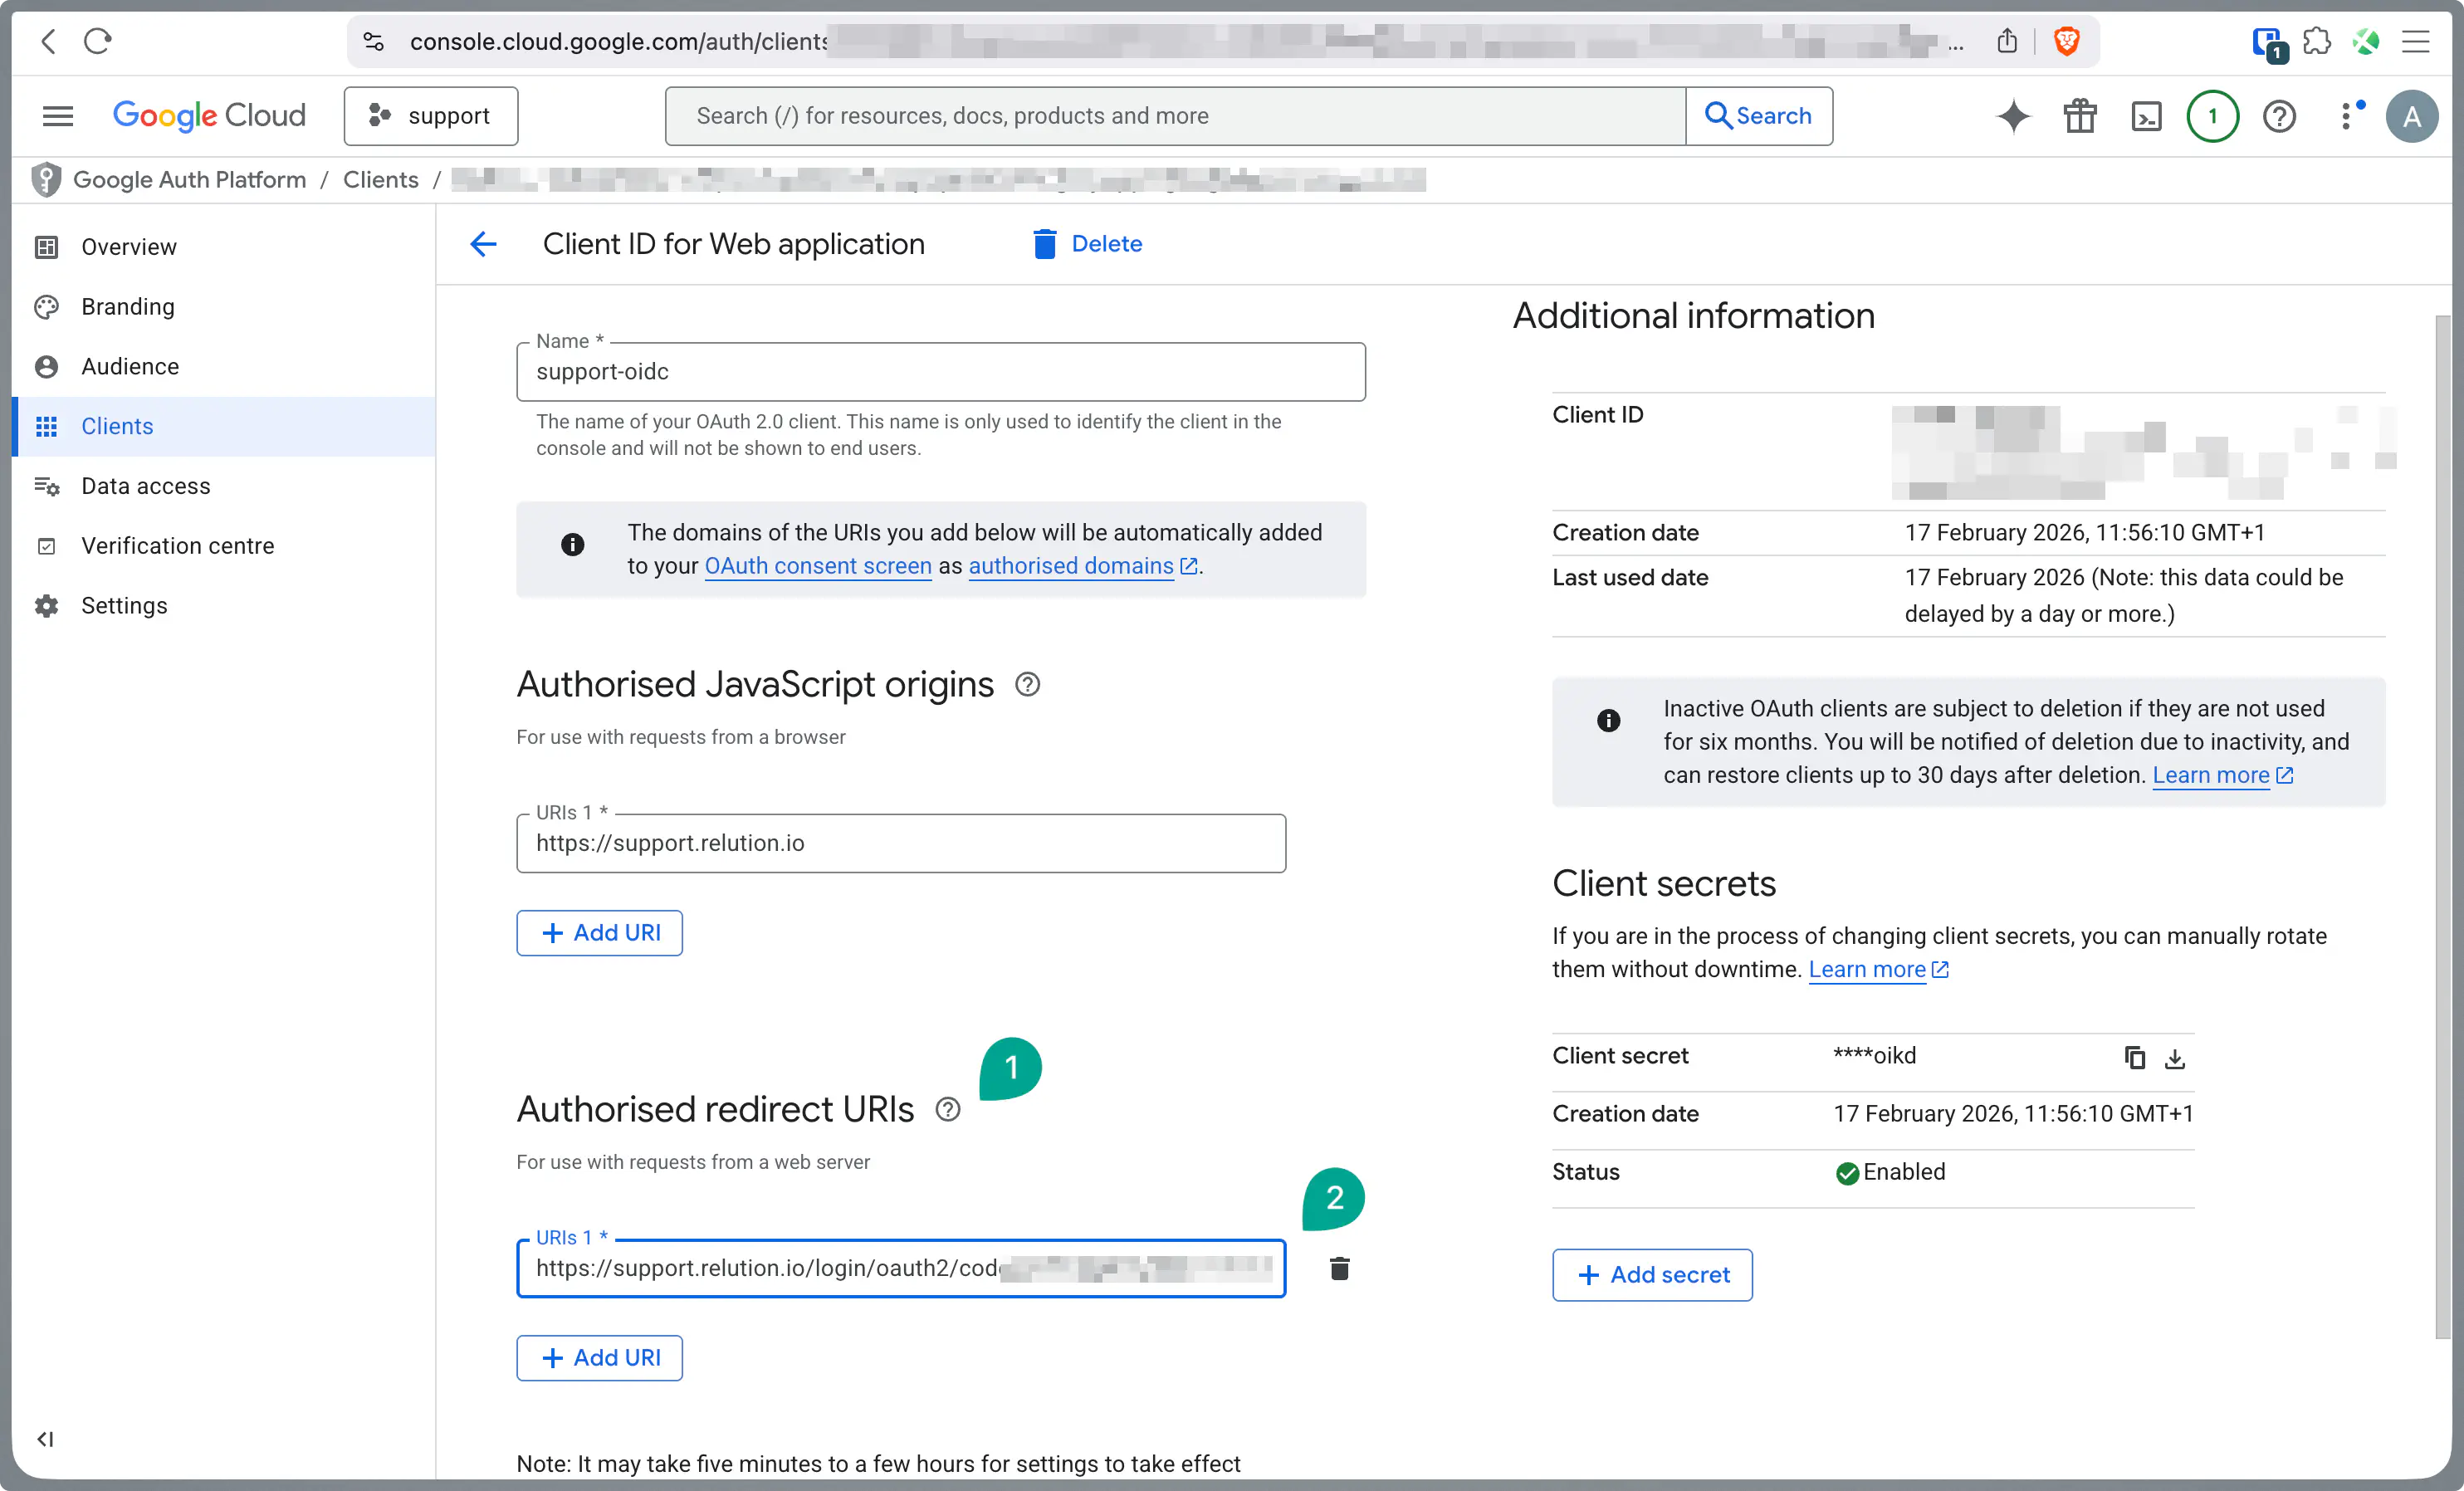
Navigate to Credentials, click the Create Credentials button, and select OAuth client ID.
For Application type, select
Web application.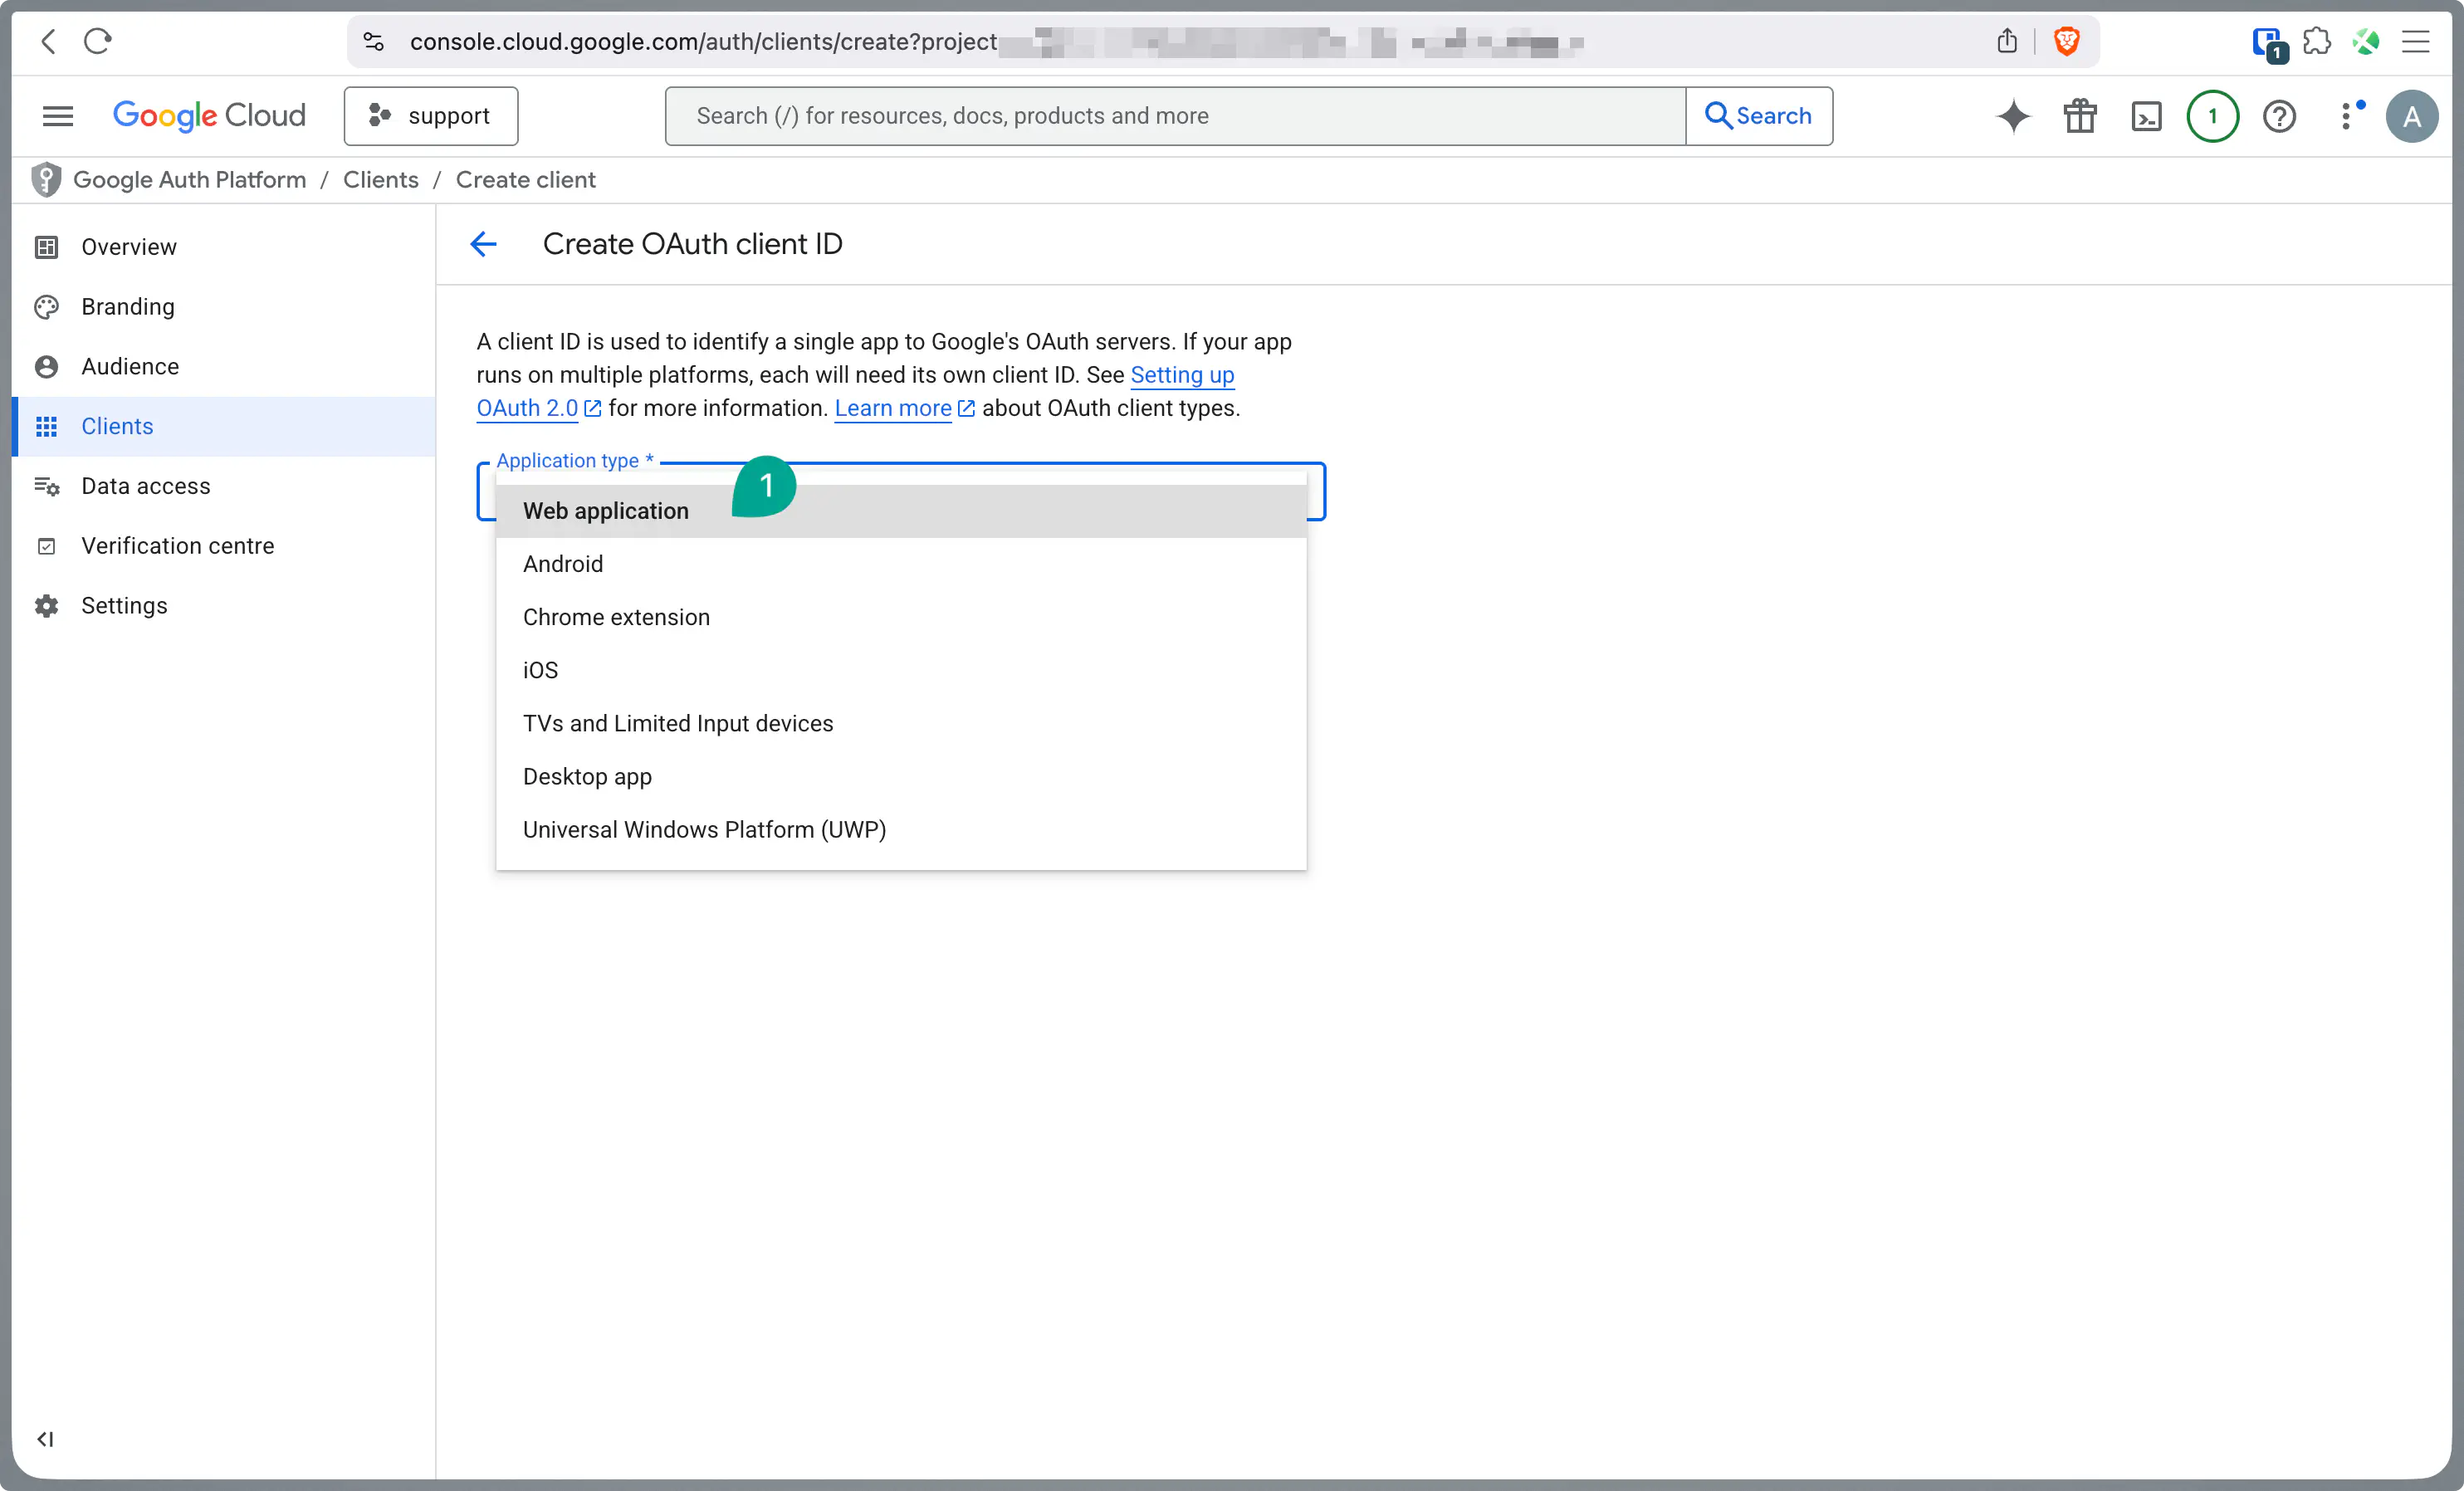
Under Authorized JavaScript origins, enter your server URL (e.g.,
https://support.relution.io). Note: Leave the Authorized redirect URIs field open for now; it will be updated later with specific data from Relution.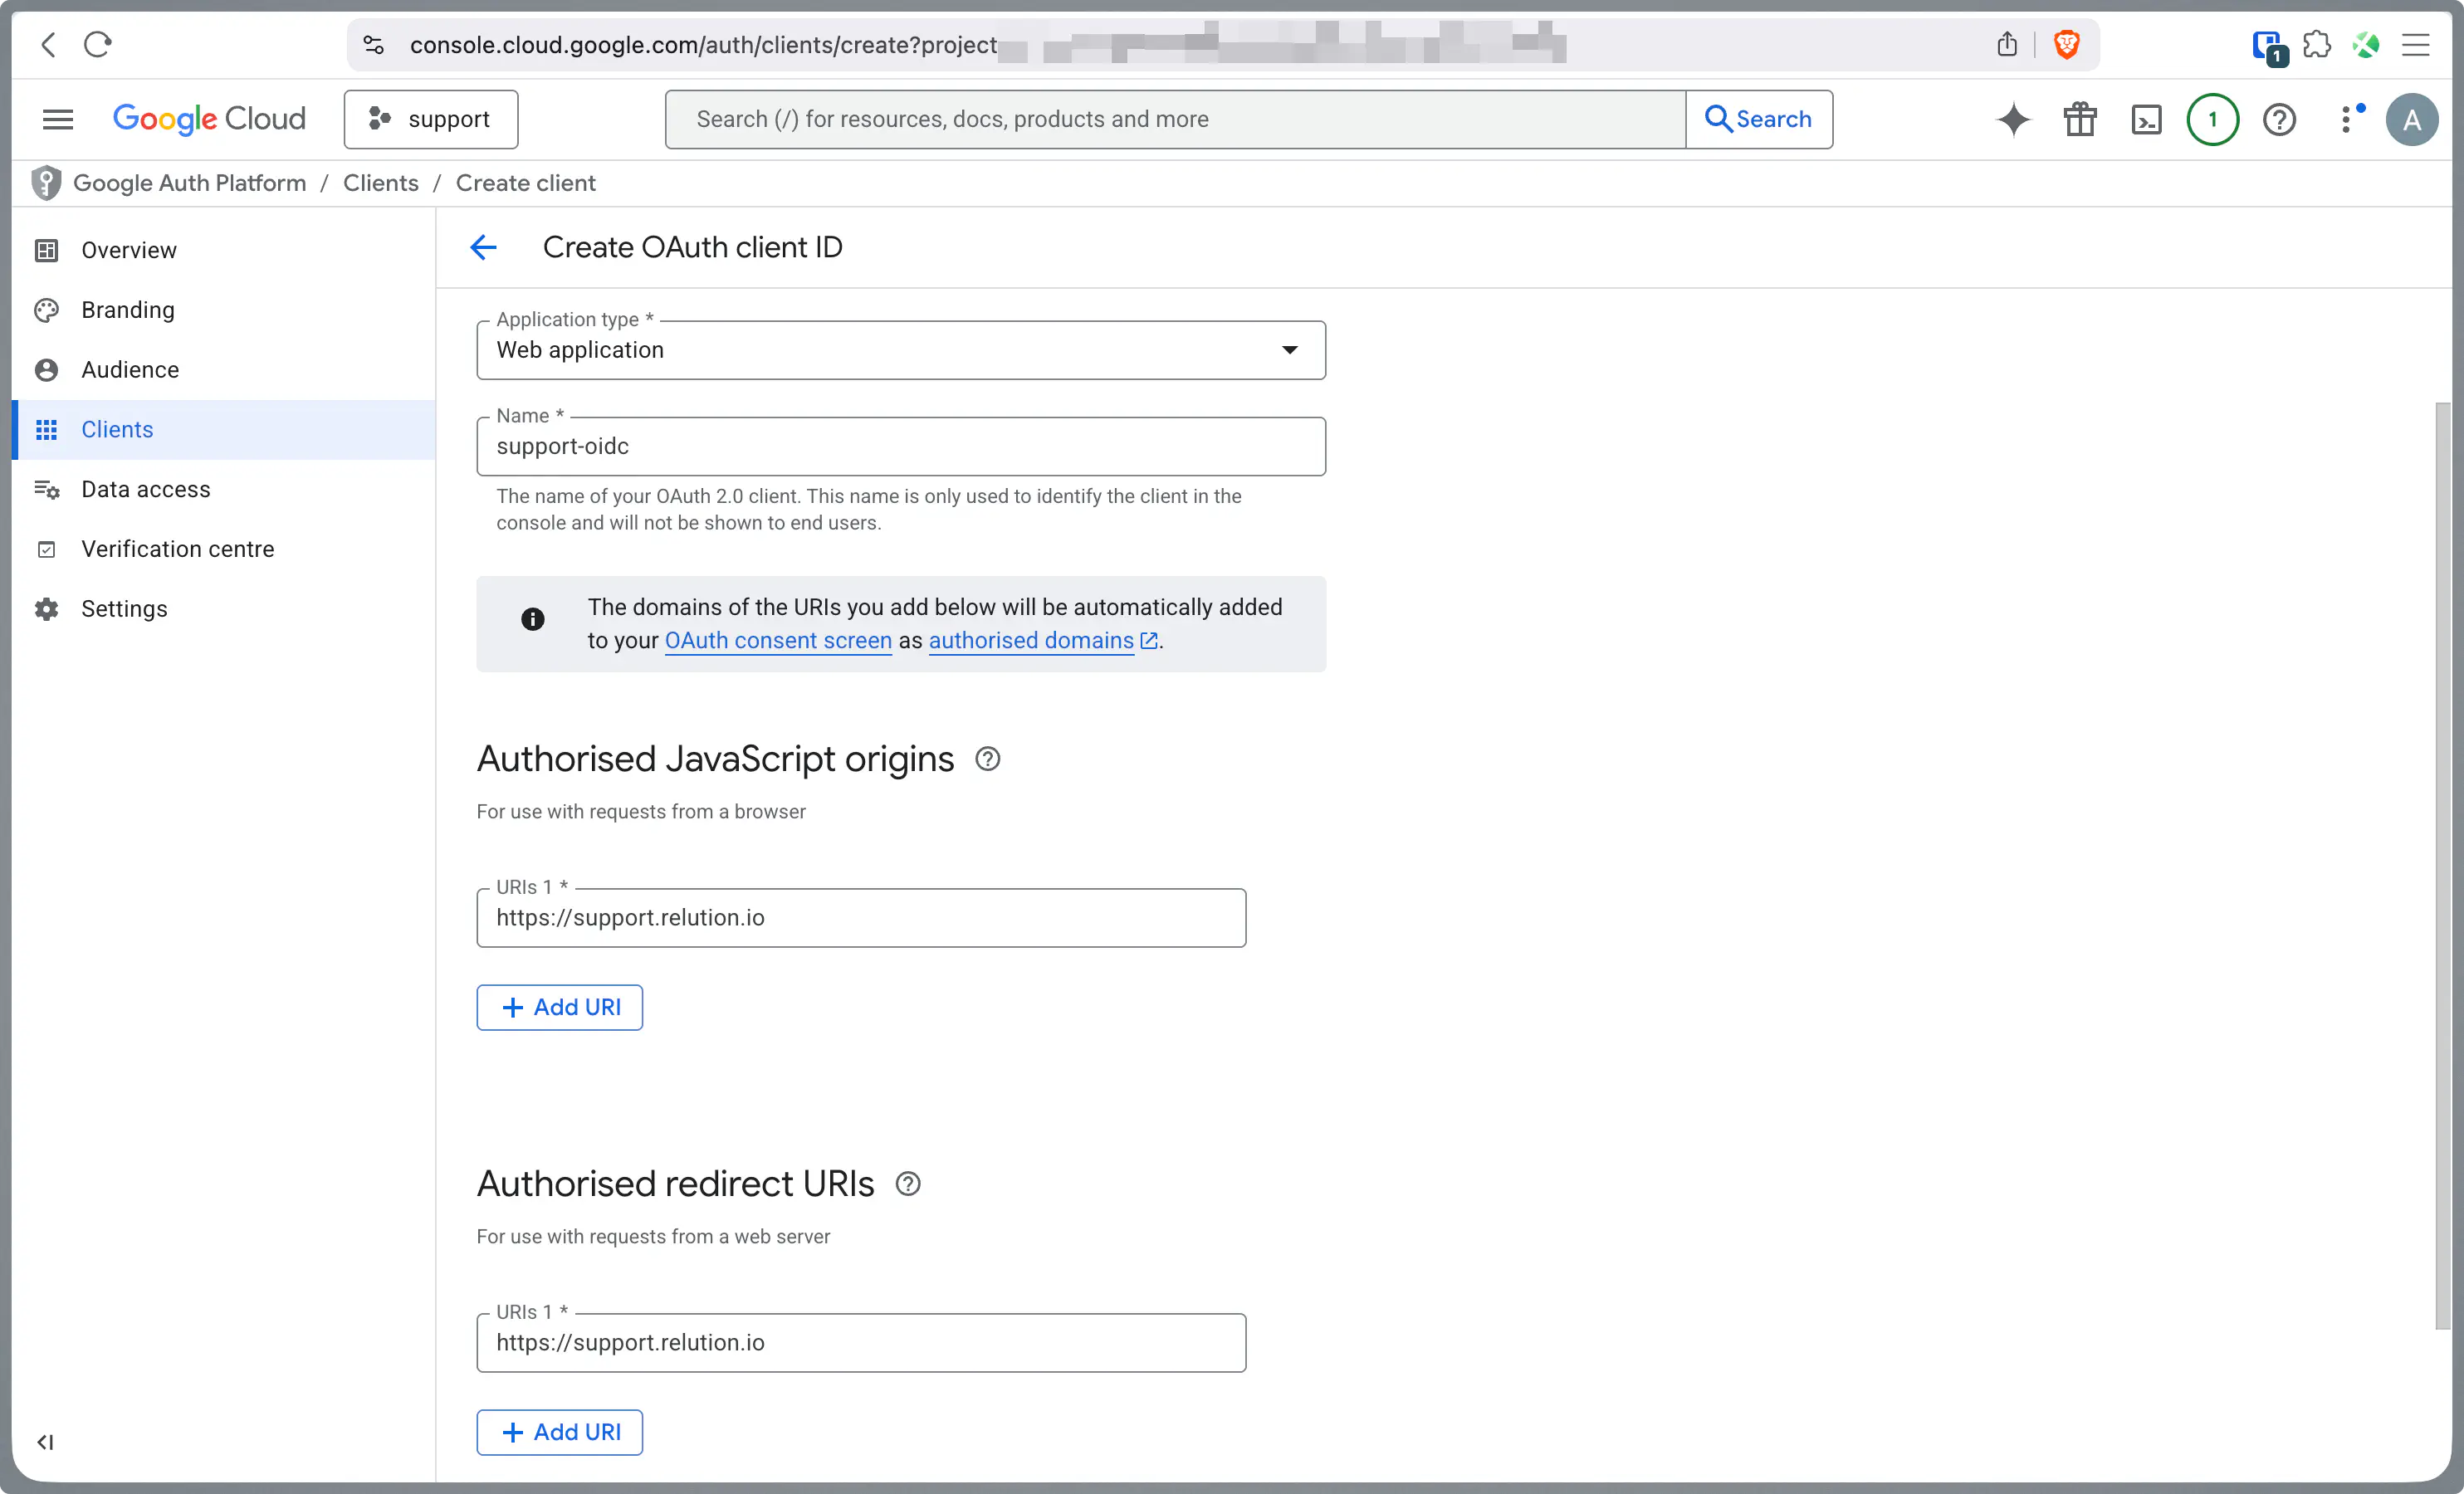
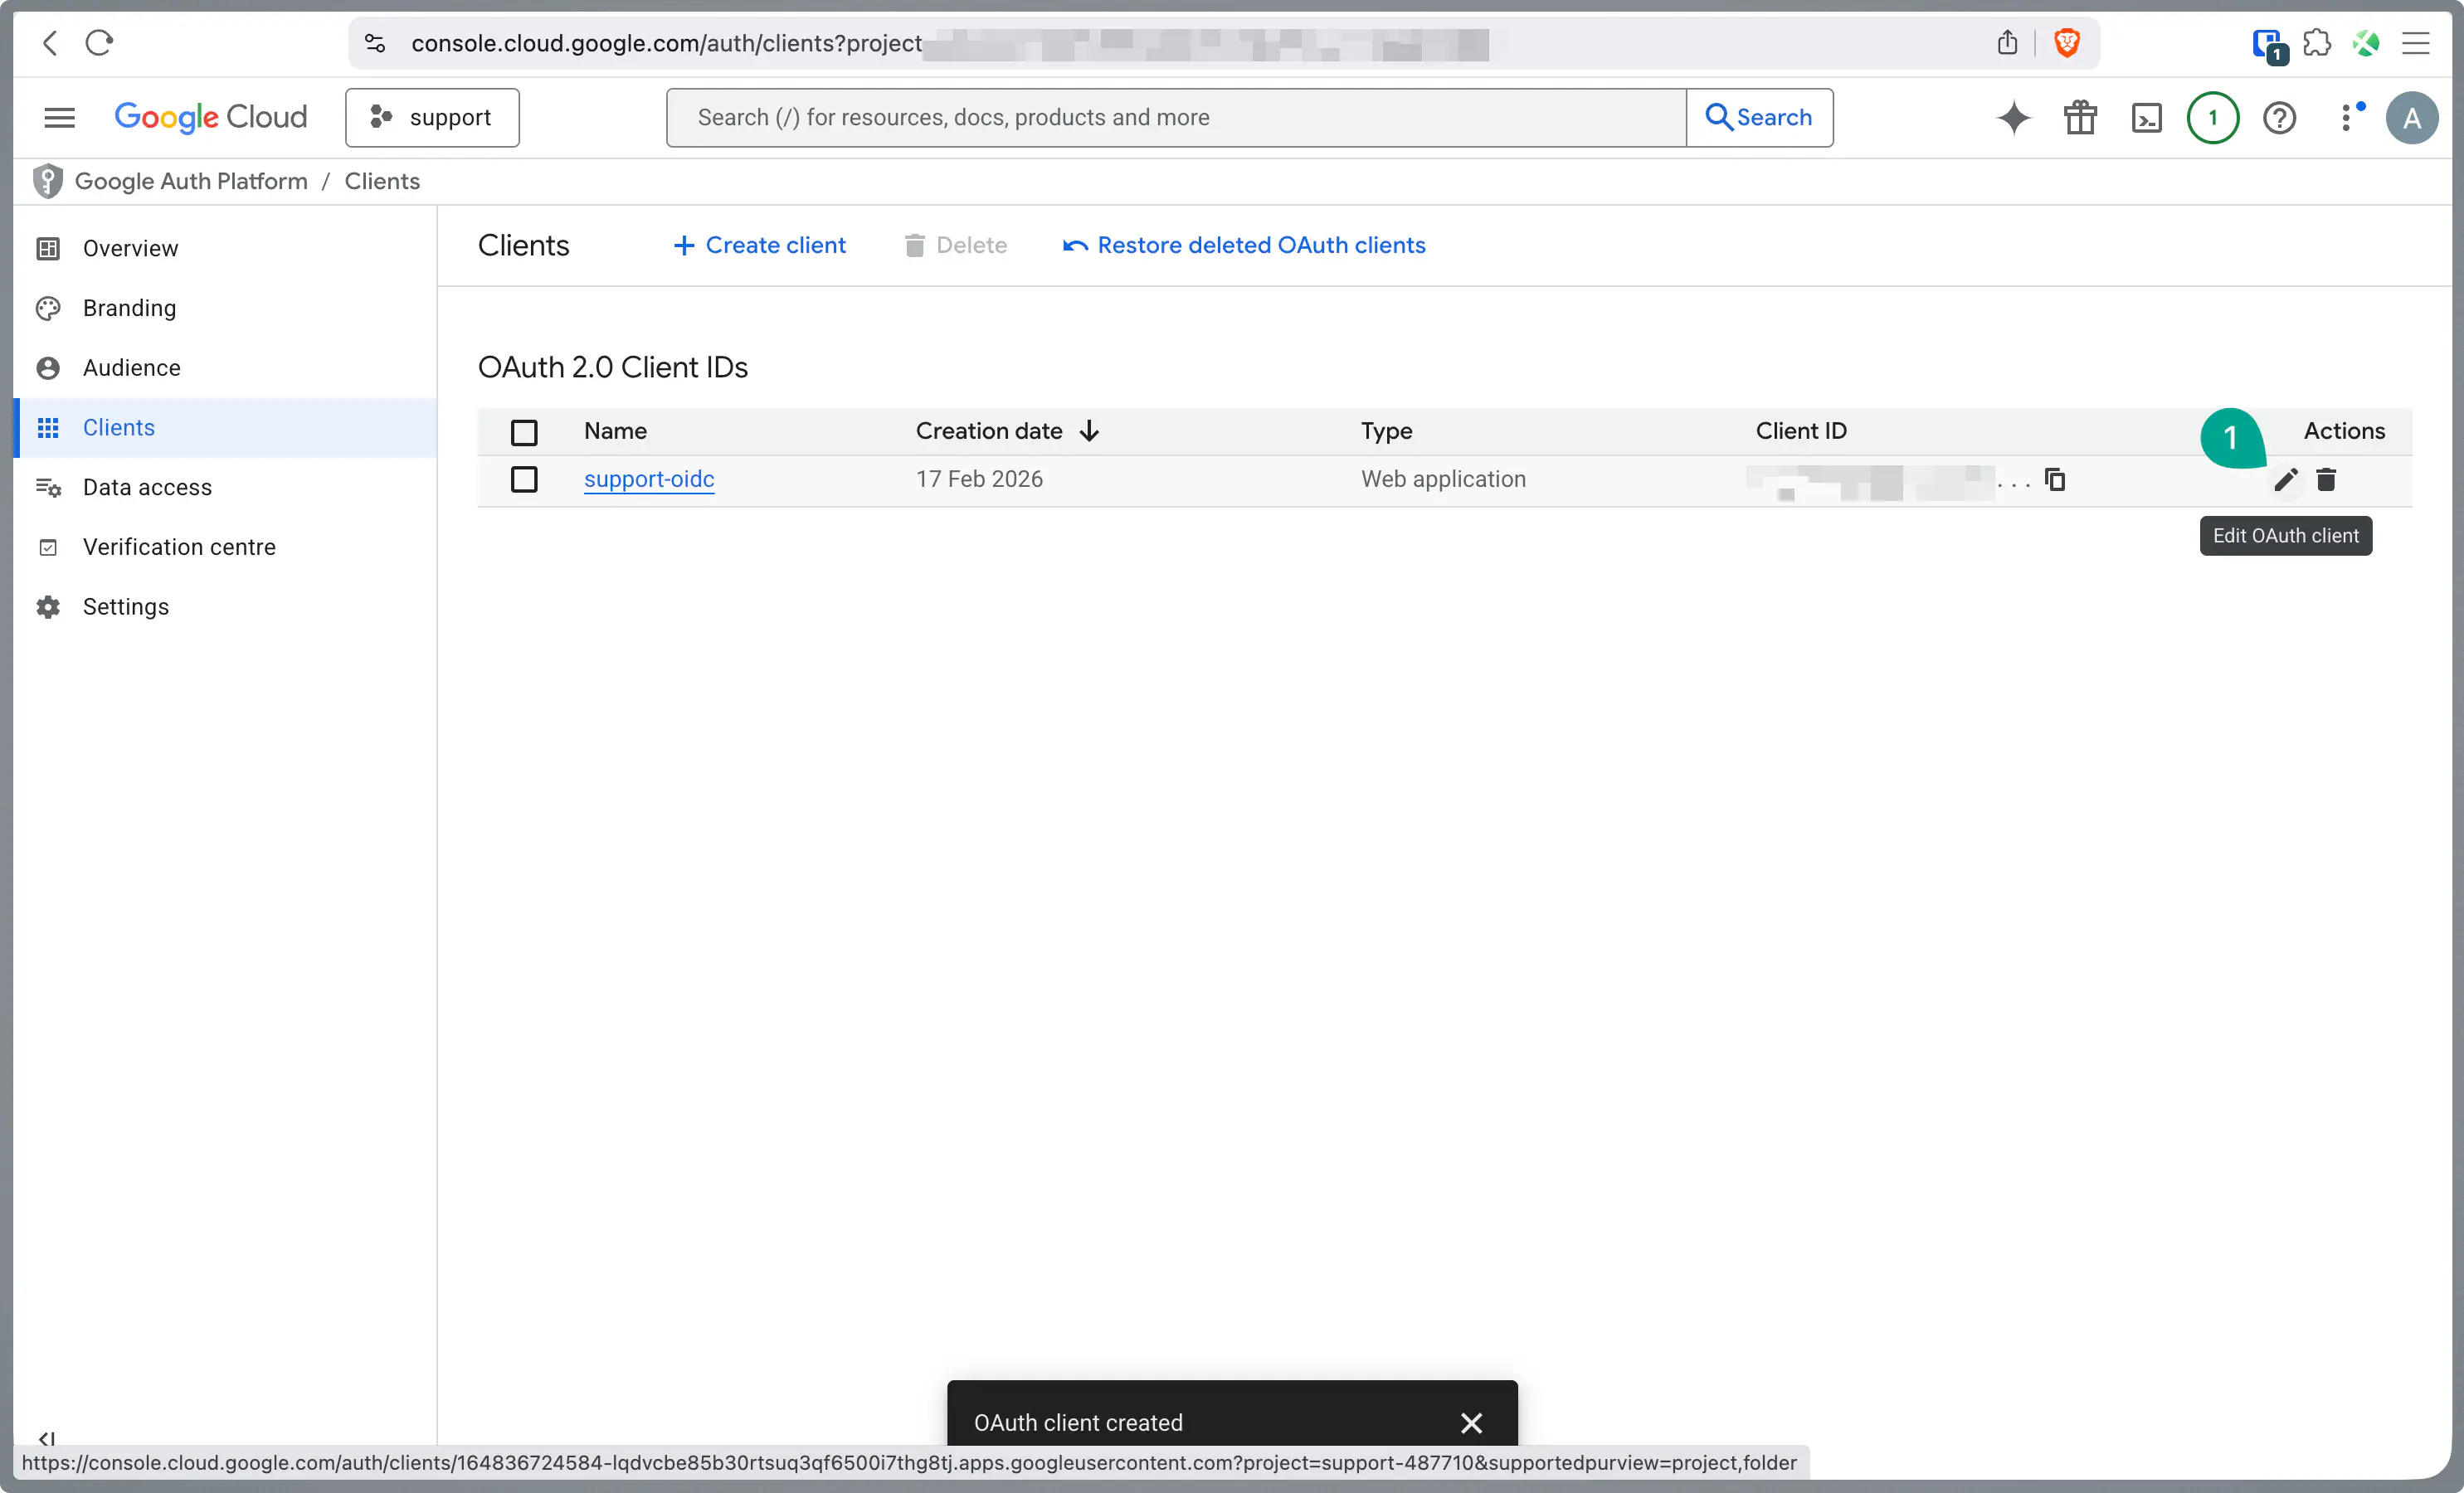
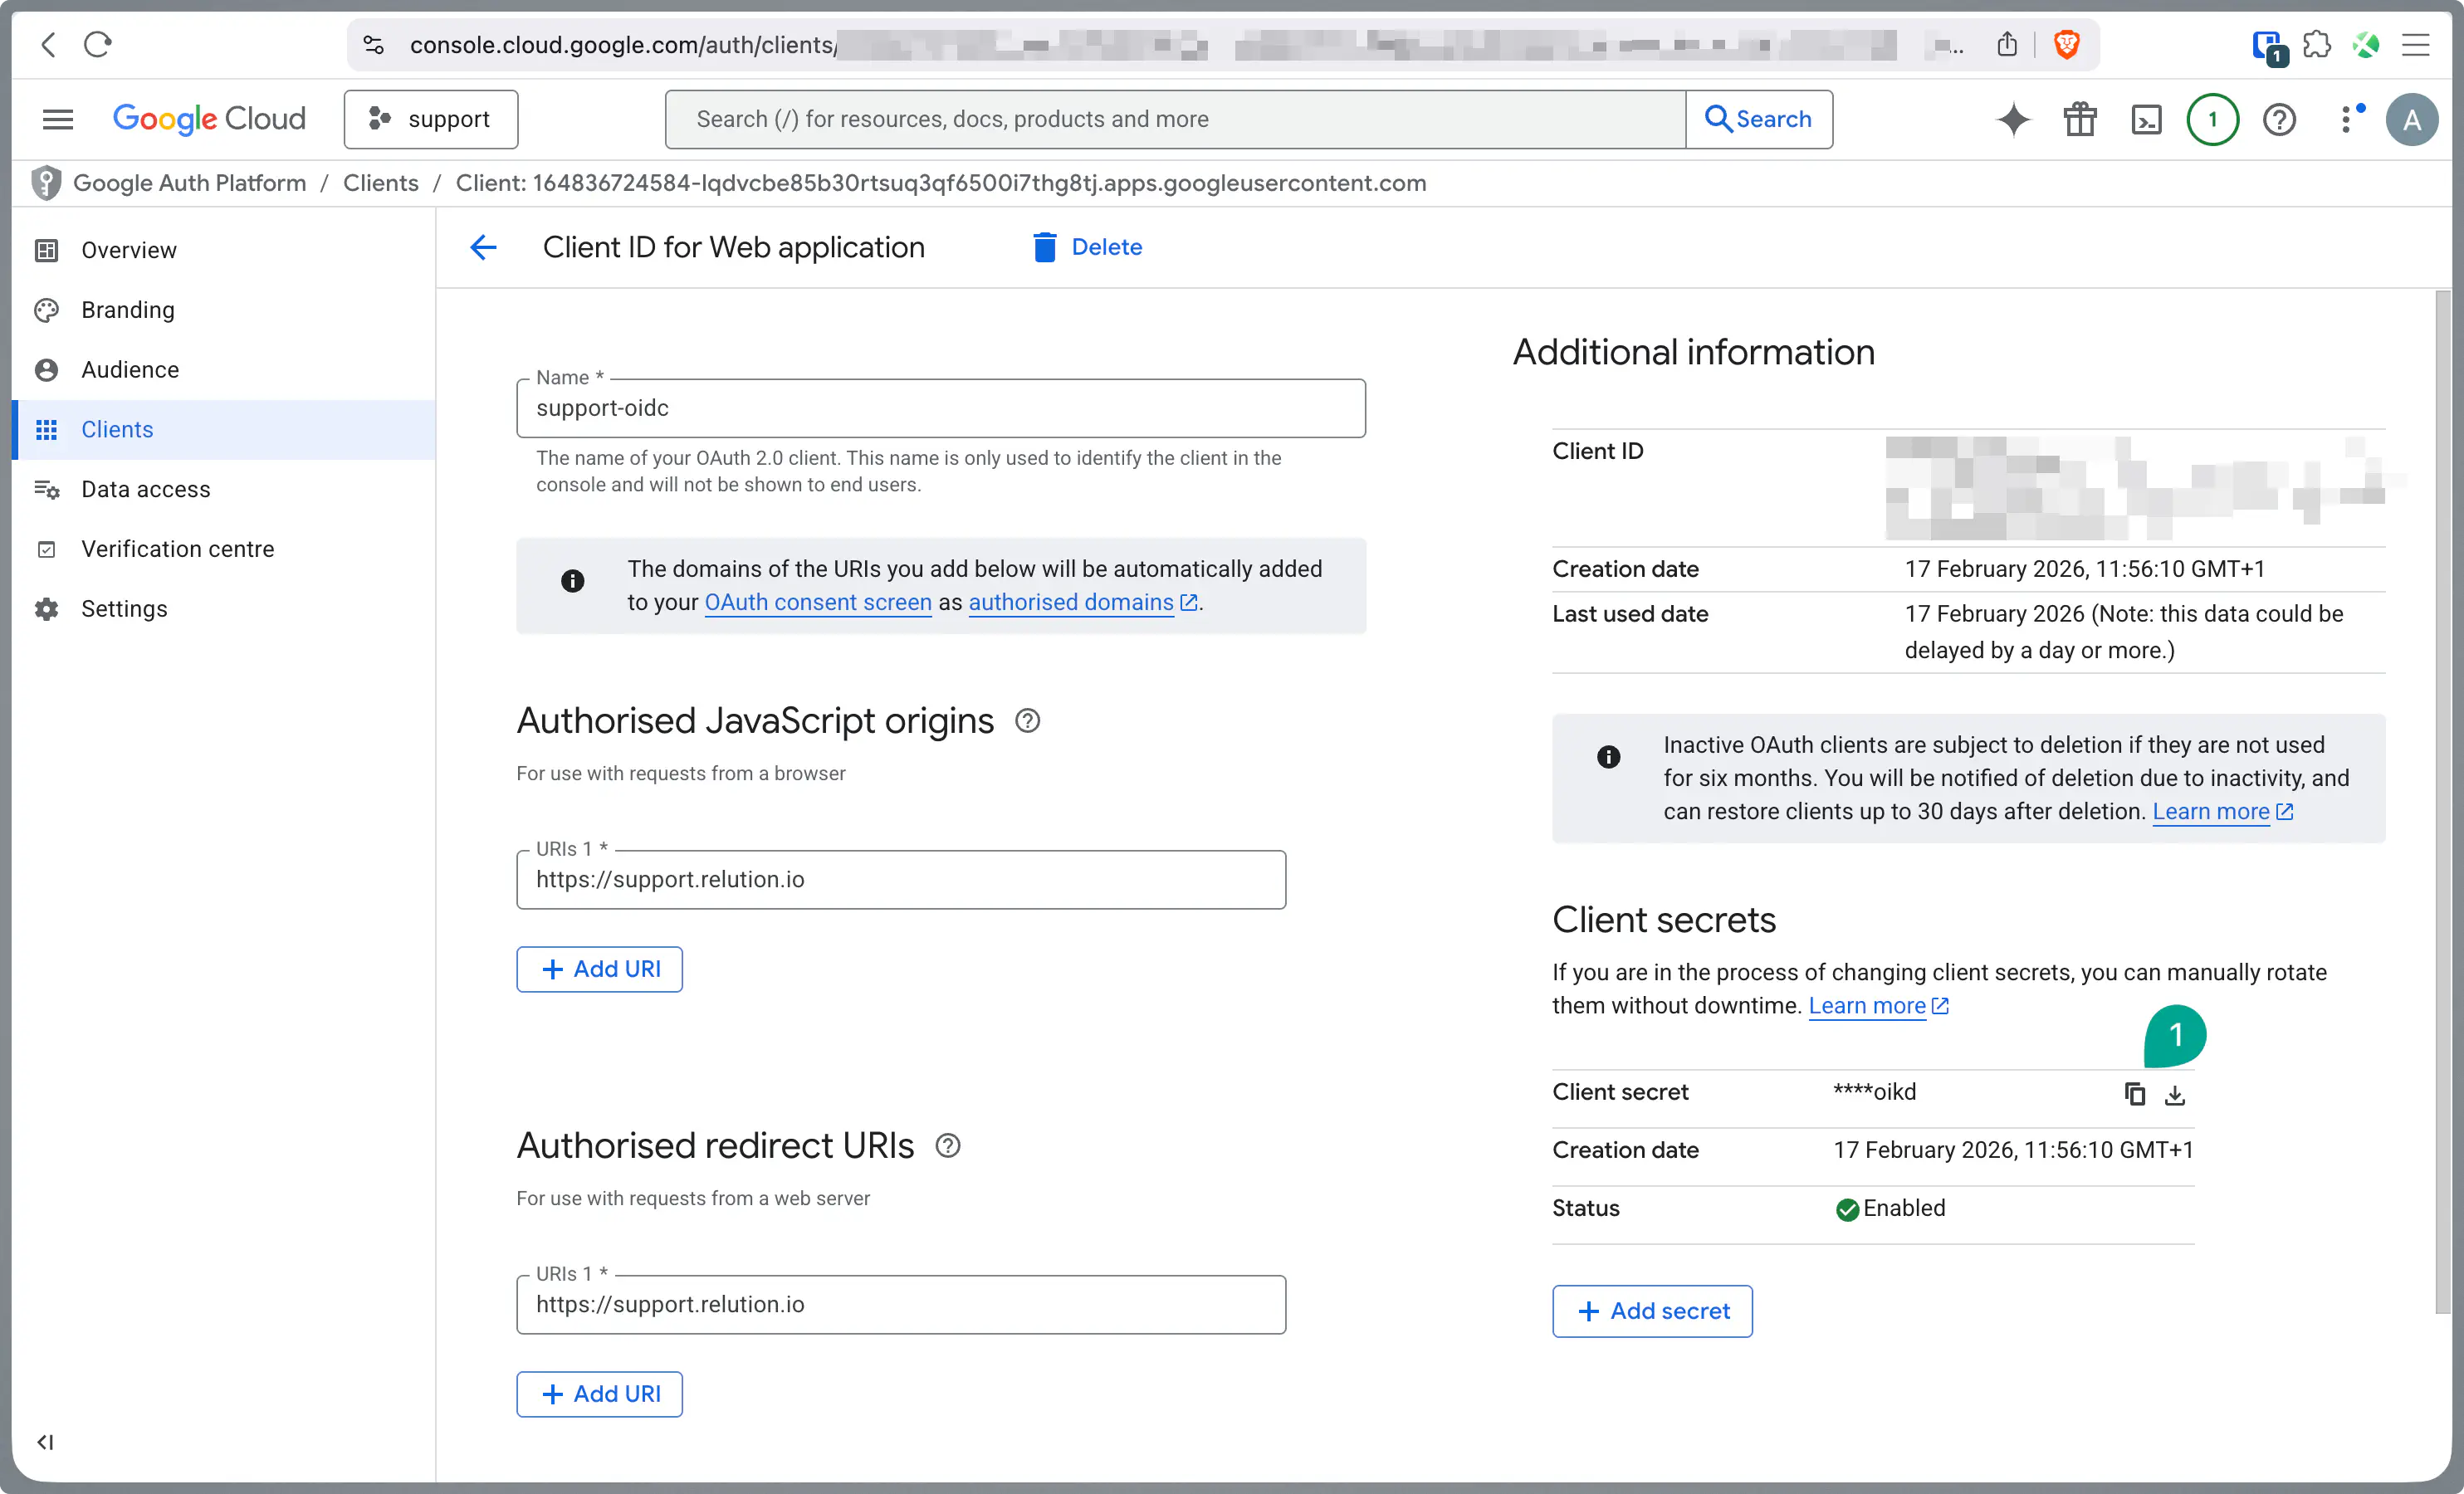
Copy the Client ID displayed after saving.
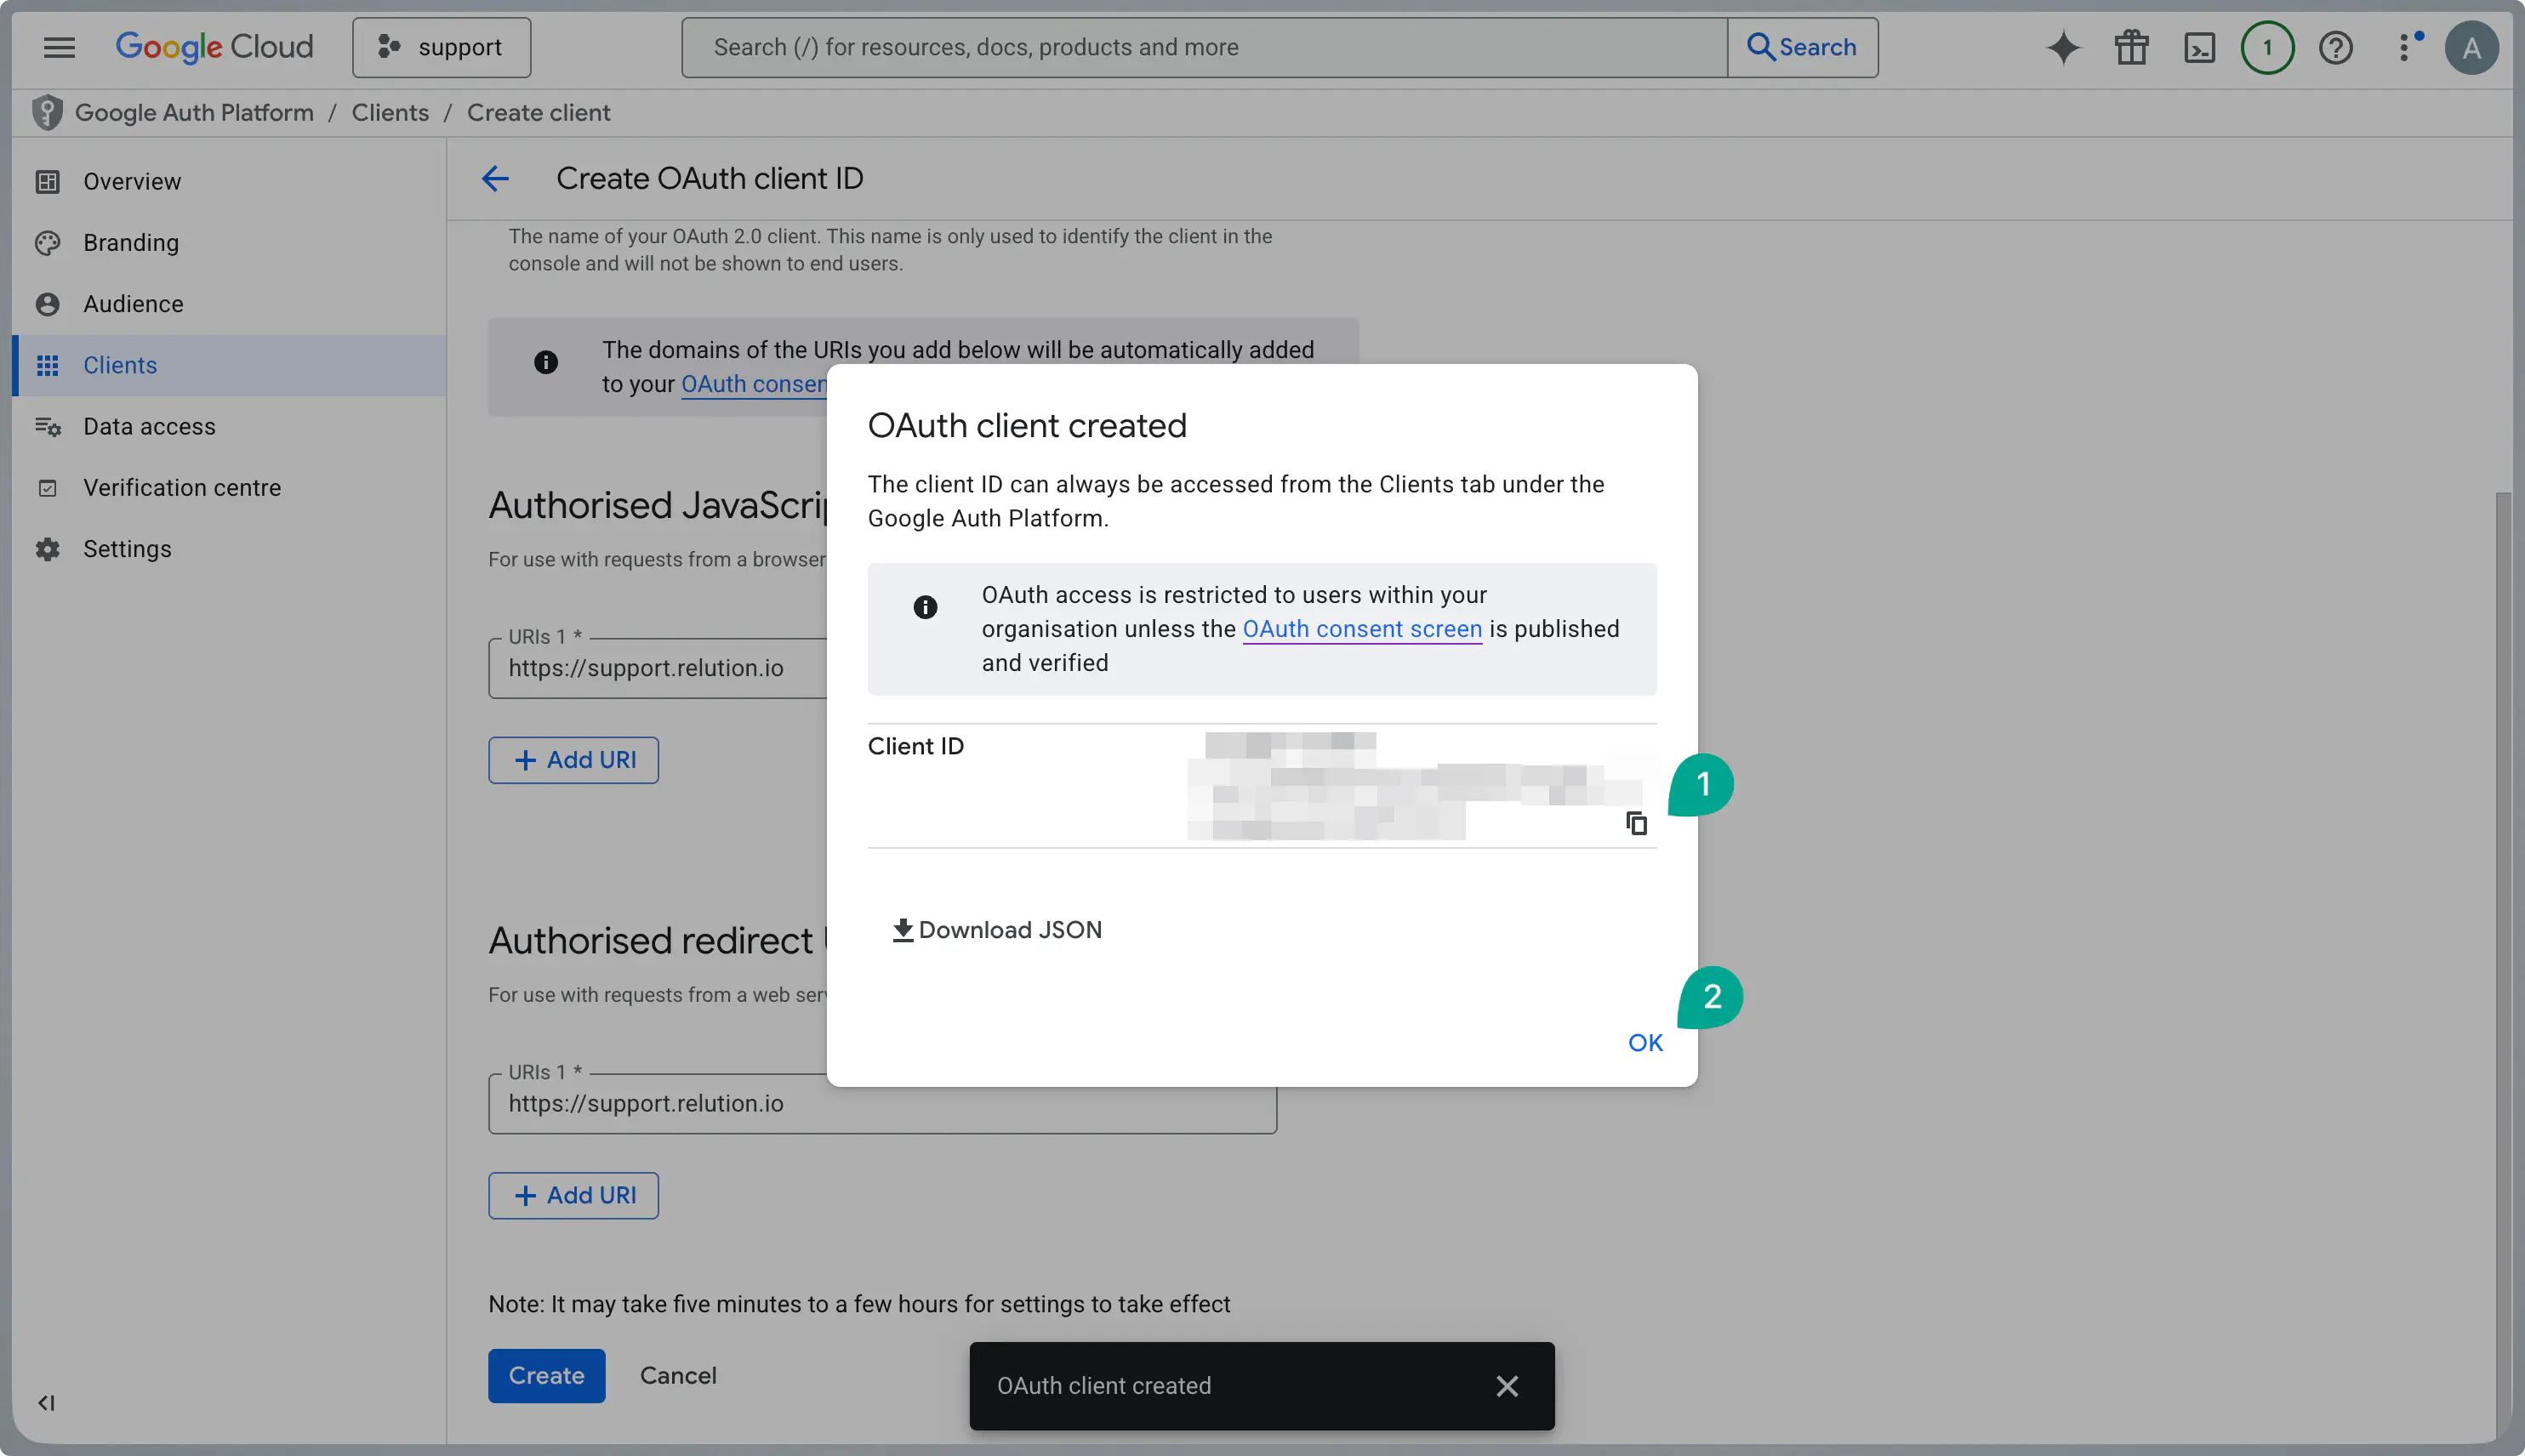
Edit your newly created client to view the details.
Copy the Client Secret. Keep both the ID and Secret secure for later use in Relution.
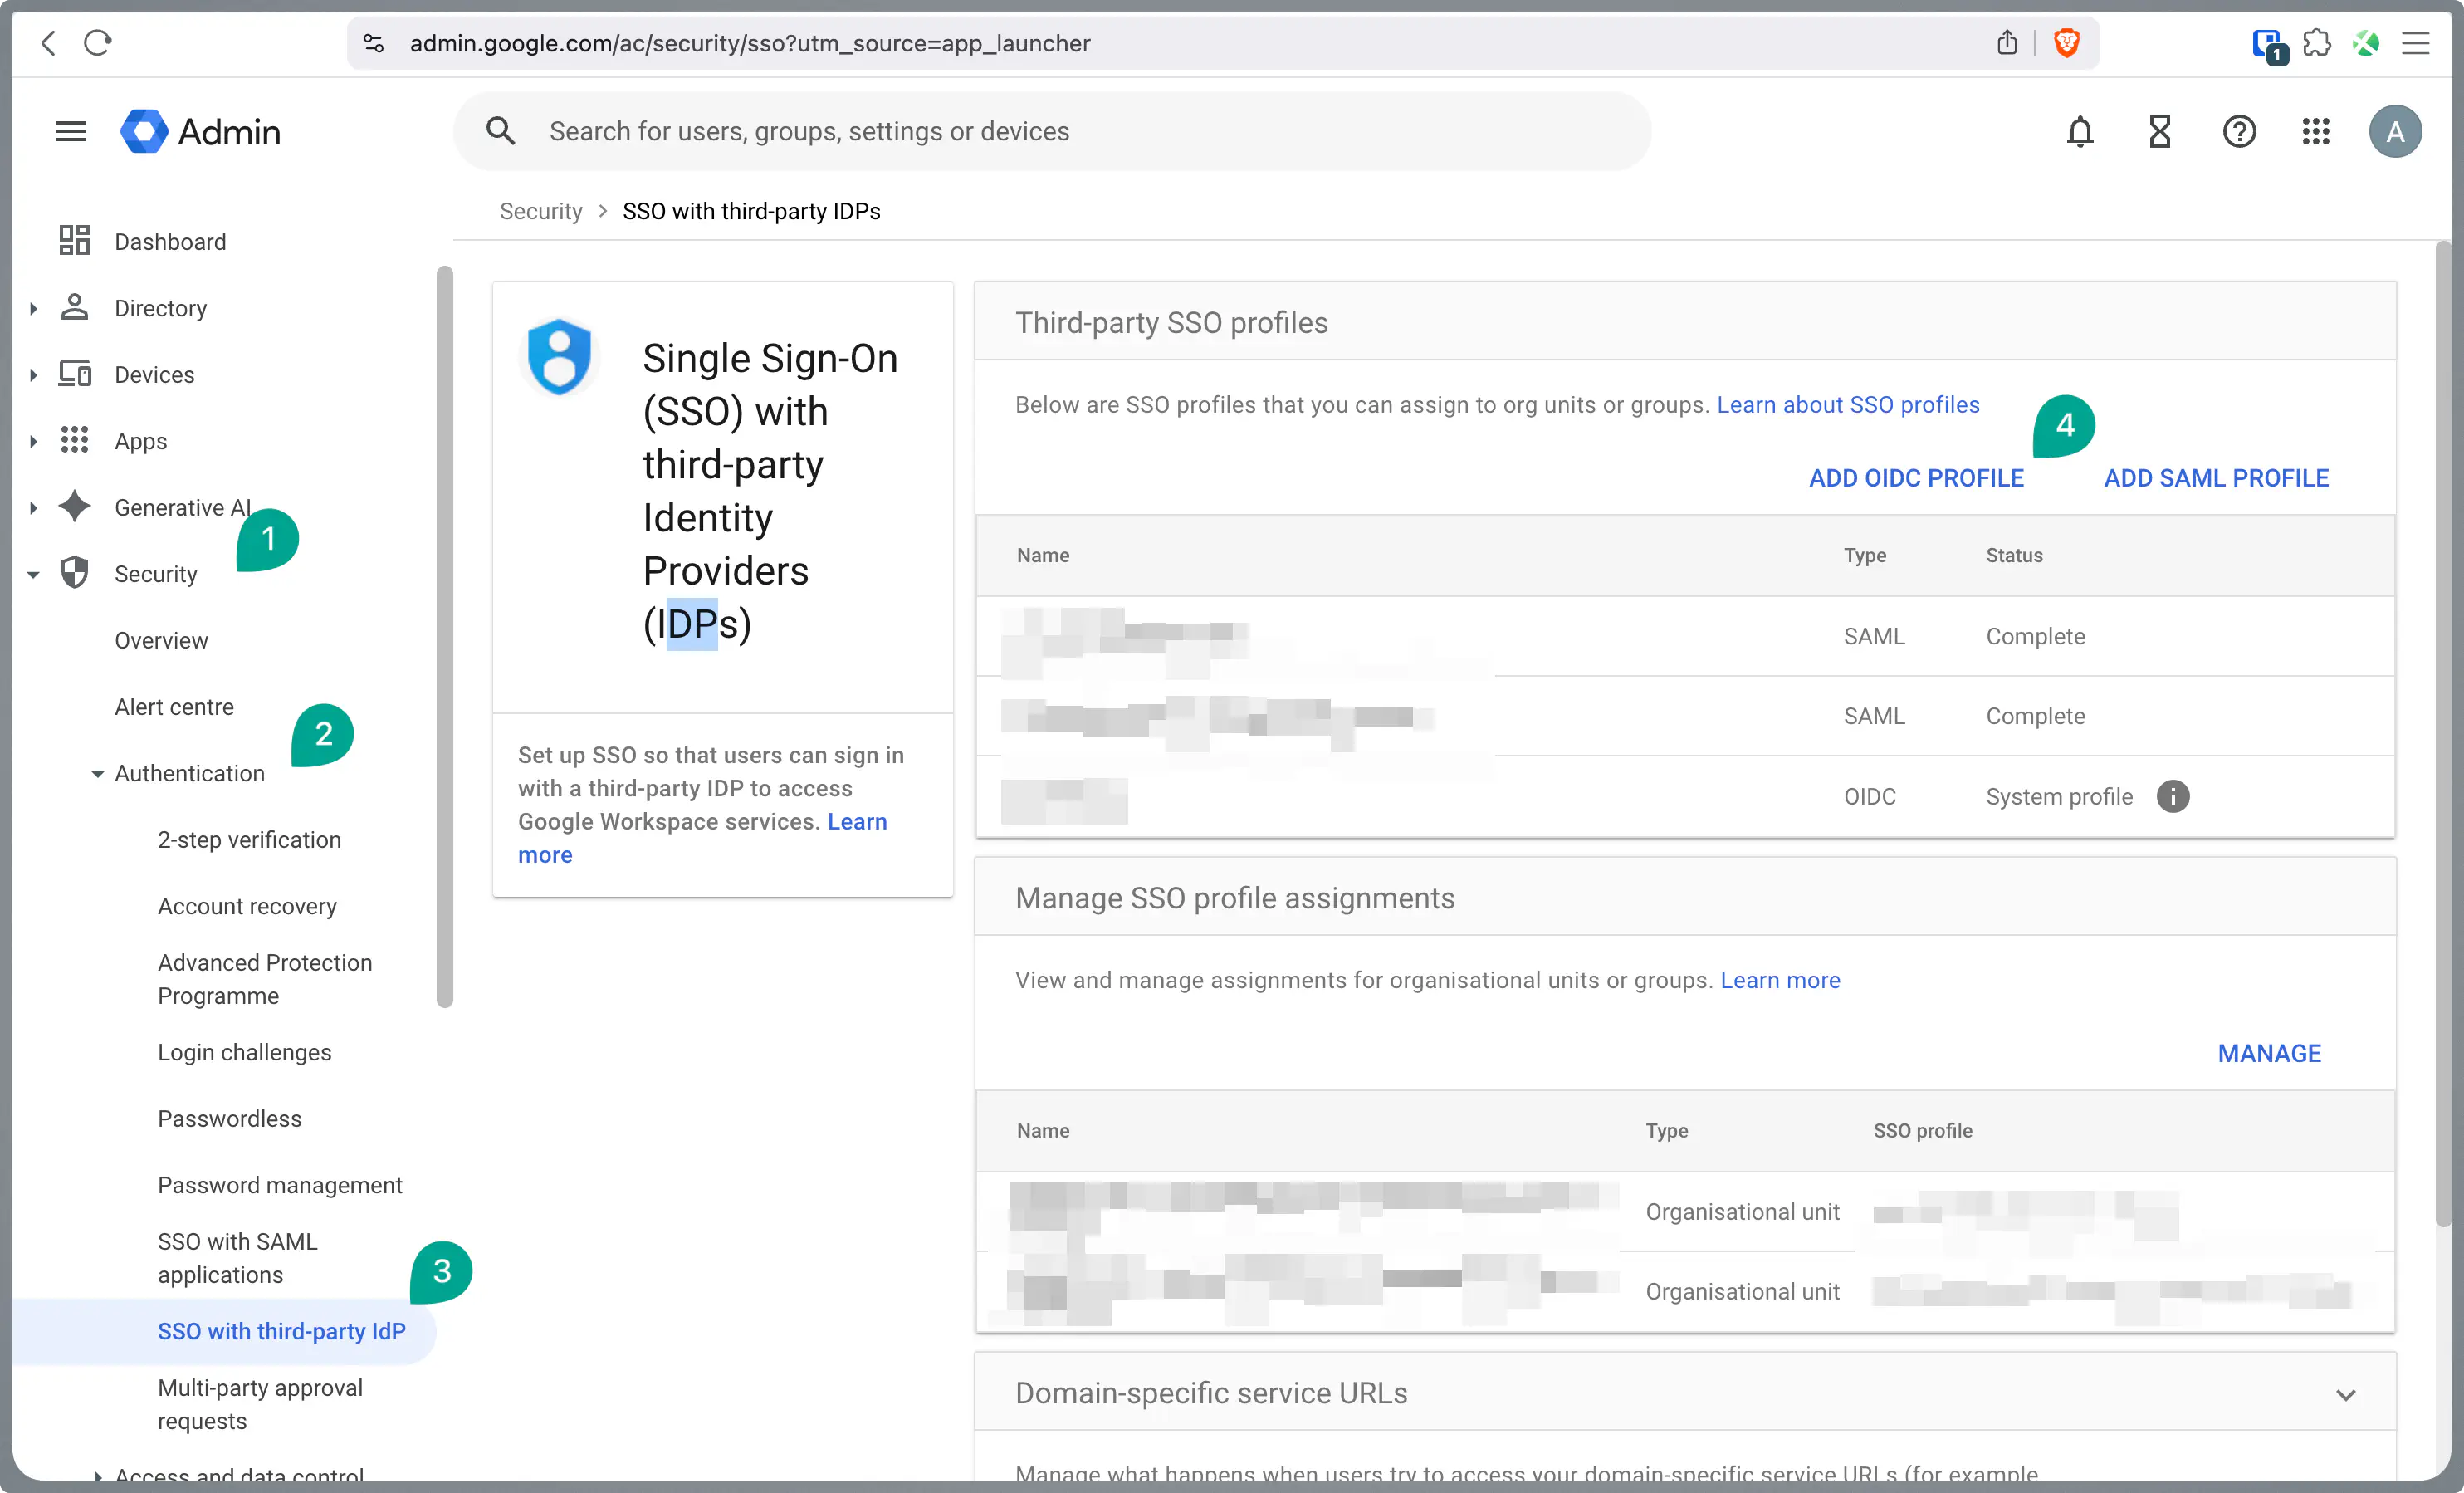
SSO Setup (Google Admin Console)
In parallel, the Single Sign-On (SSO) profile must be stored in the Google Admin Console.
Navigate to admin.google.com →.
Create a new OIDC profile under Security > Authentication > SSO with third-party IdP.
Enter the Client ID and Client Secret obtained in the previous steps.
- For the Issuer URL and Change password URL, use your Relution server URL (e.g.,
https://support.relution.io).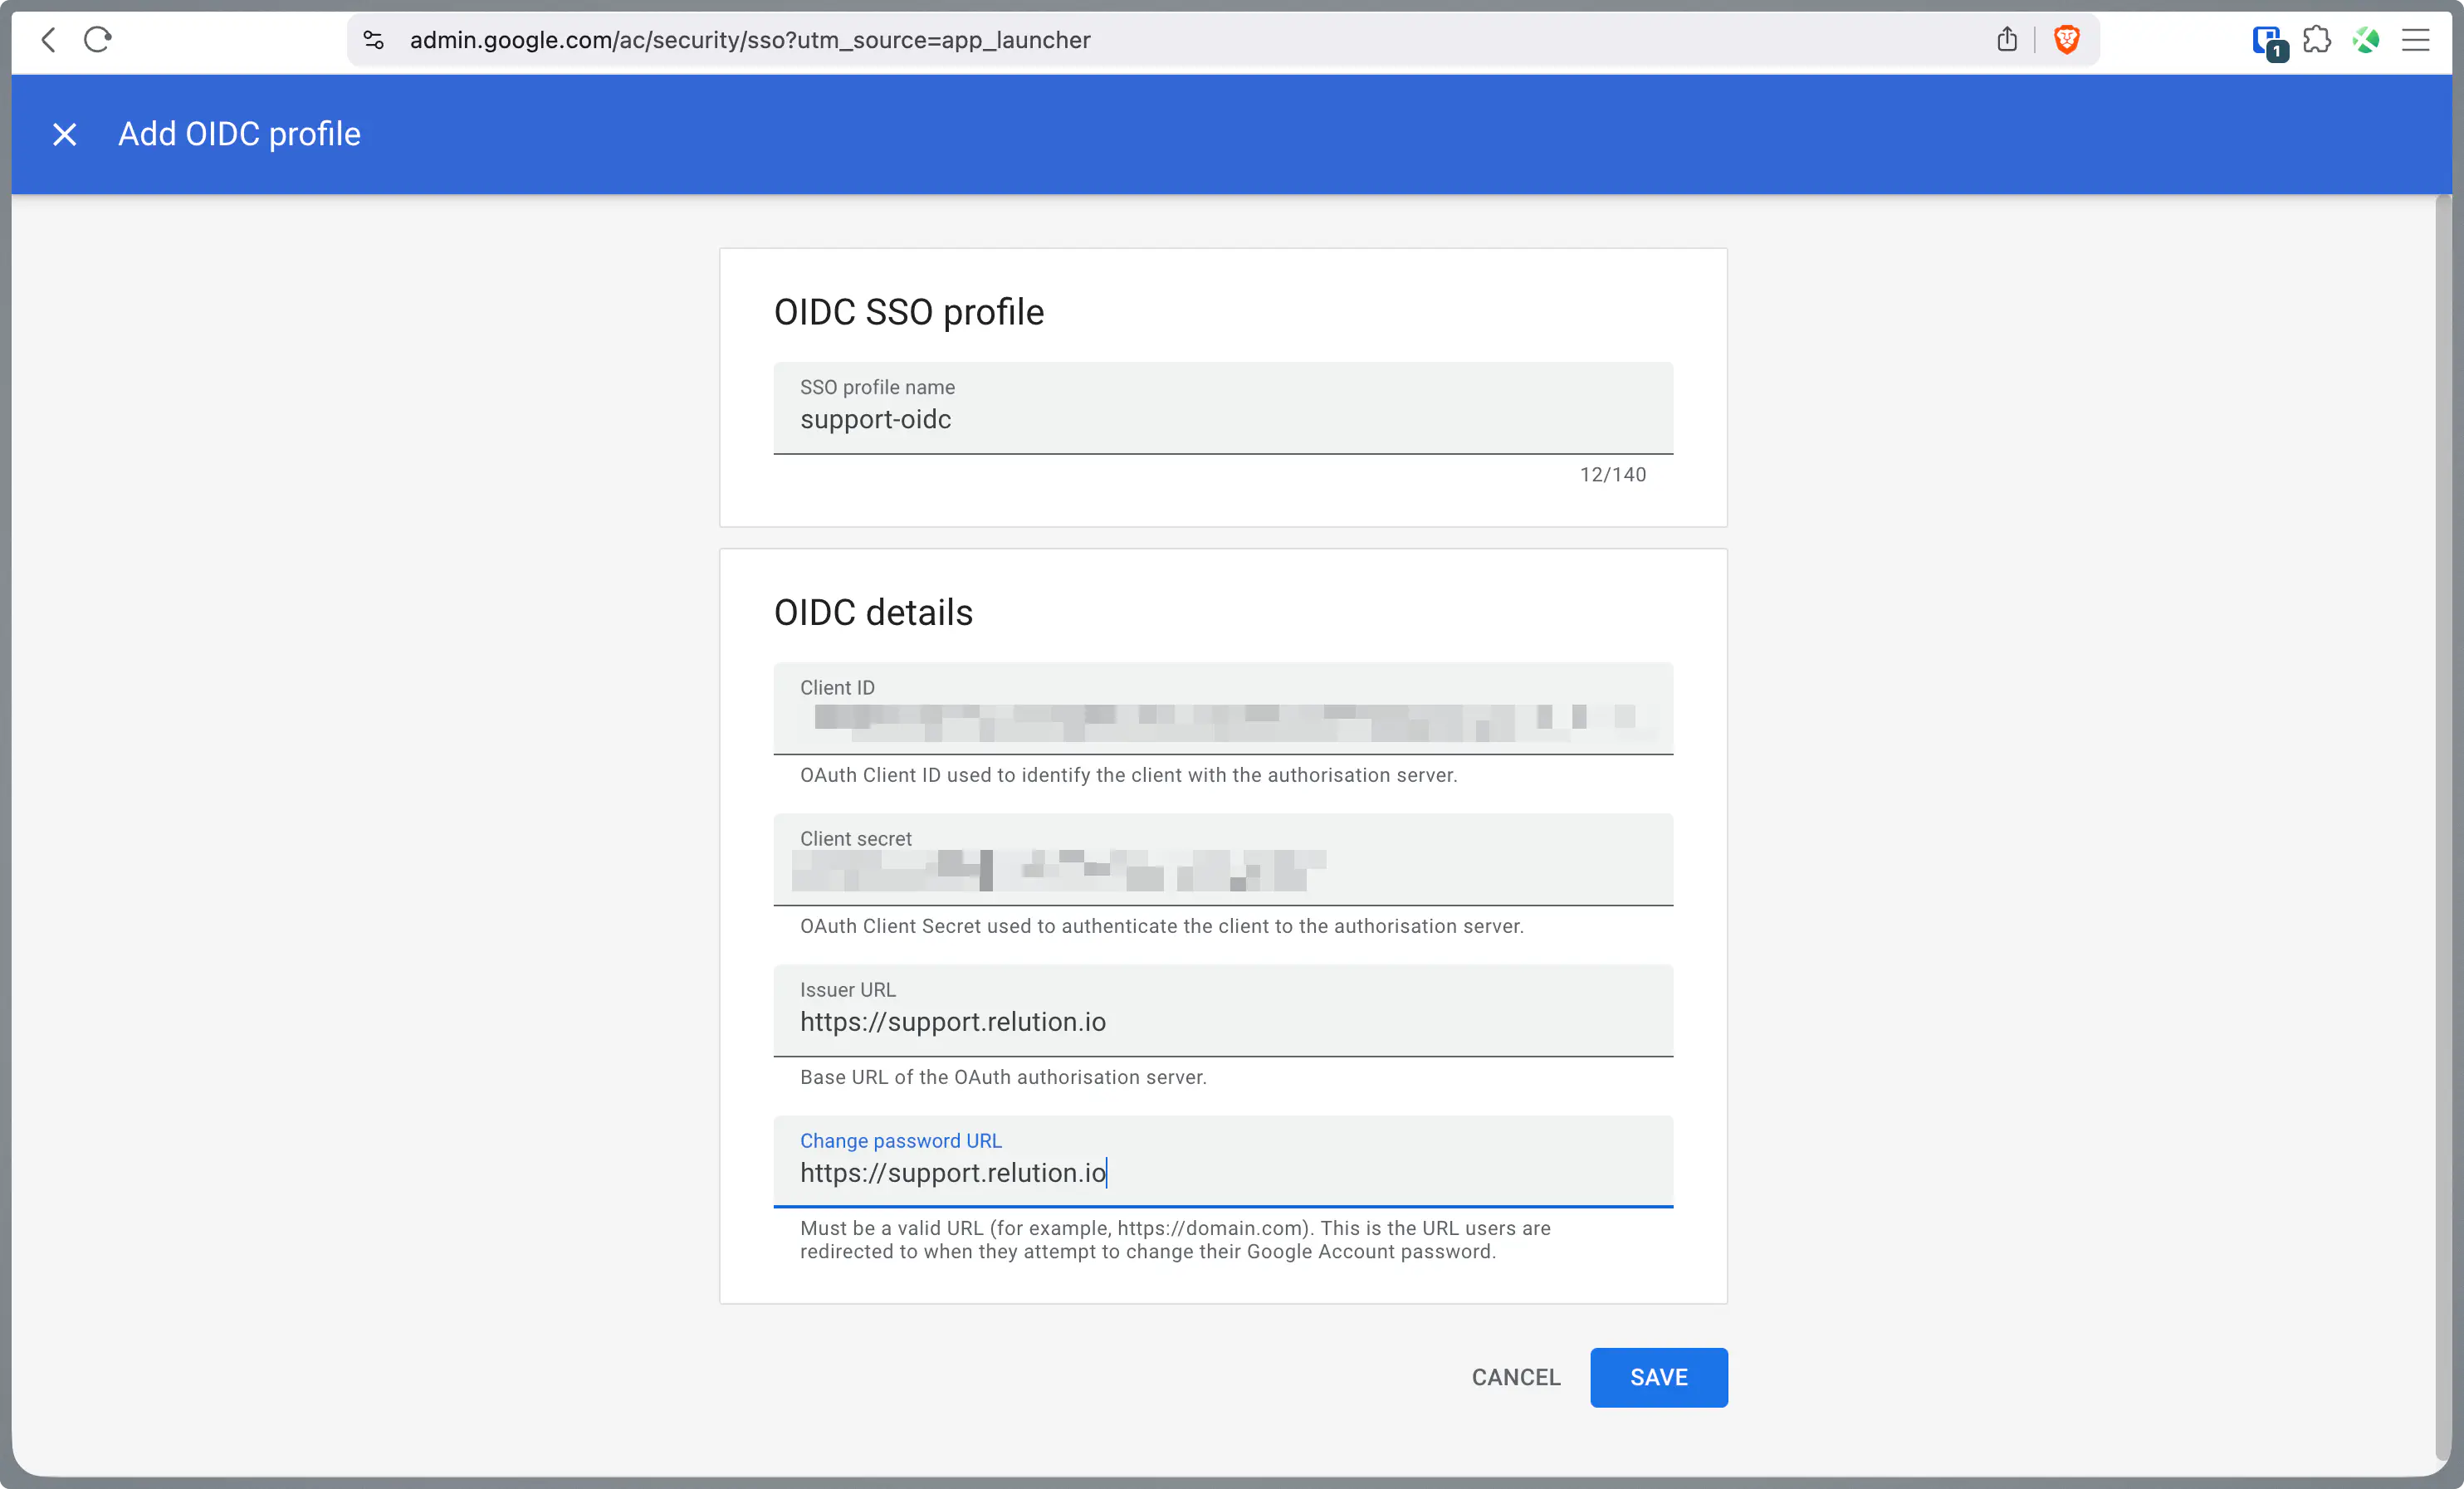
- For the Issuer URL and Change password URL, use your Relution server URL (e.g.,
OIDC Configuration in Relution
Now, the collected data is entered into Relution to establish the connection with Google.
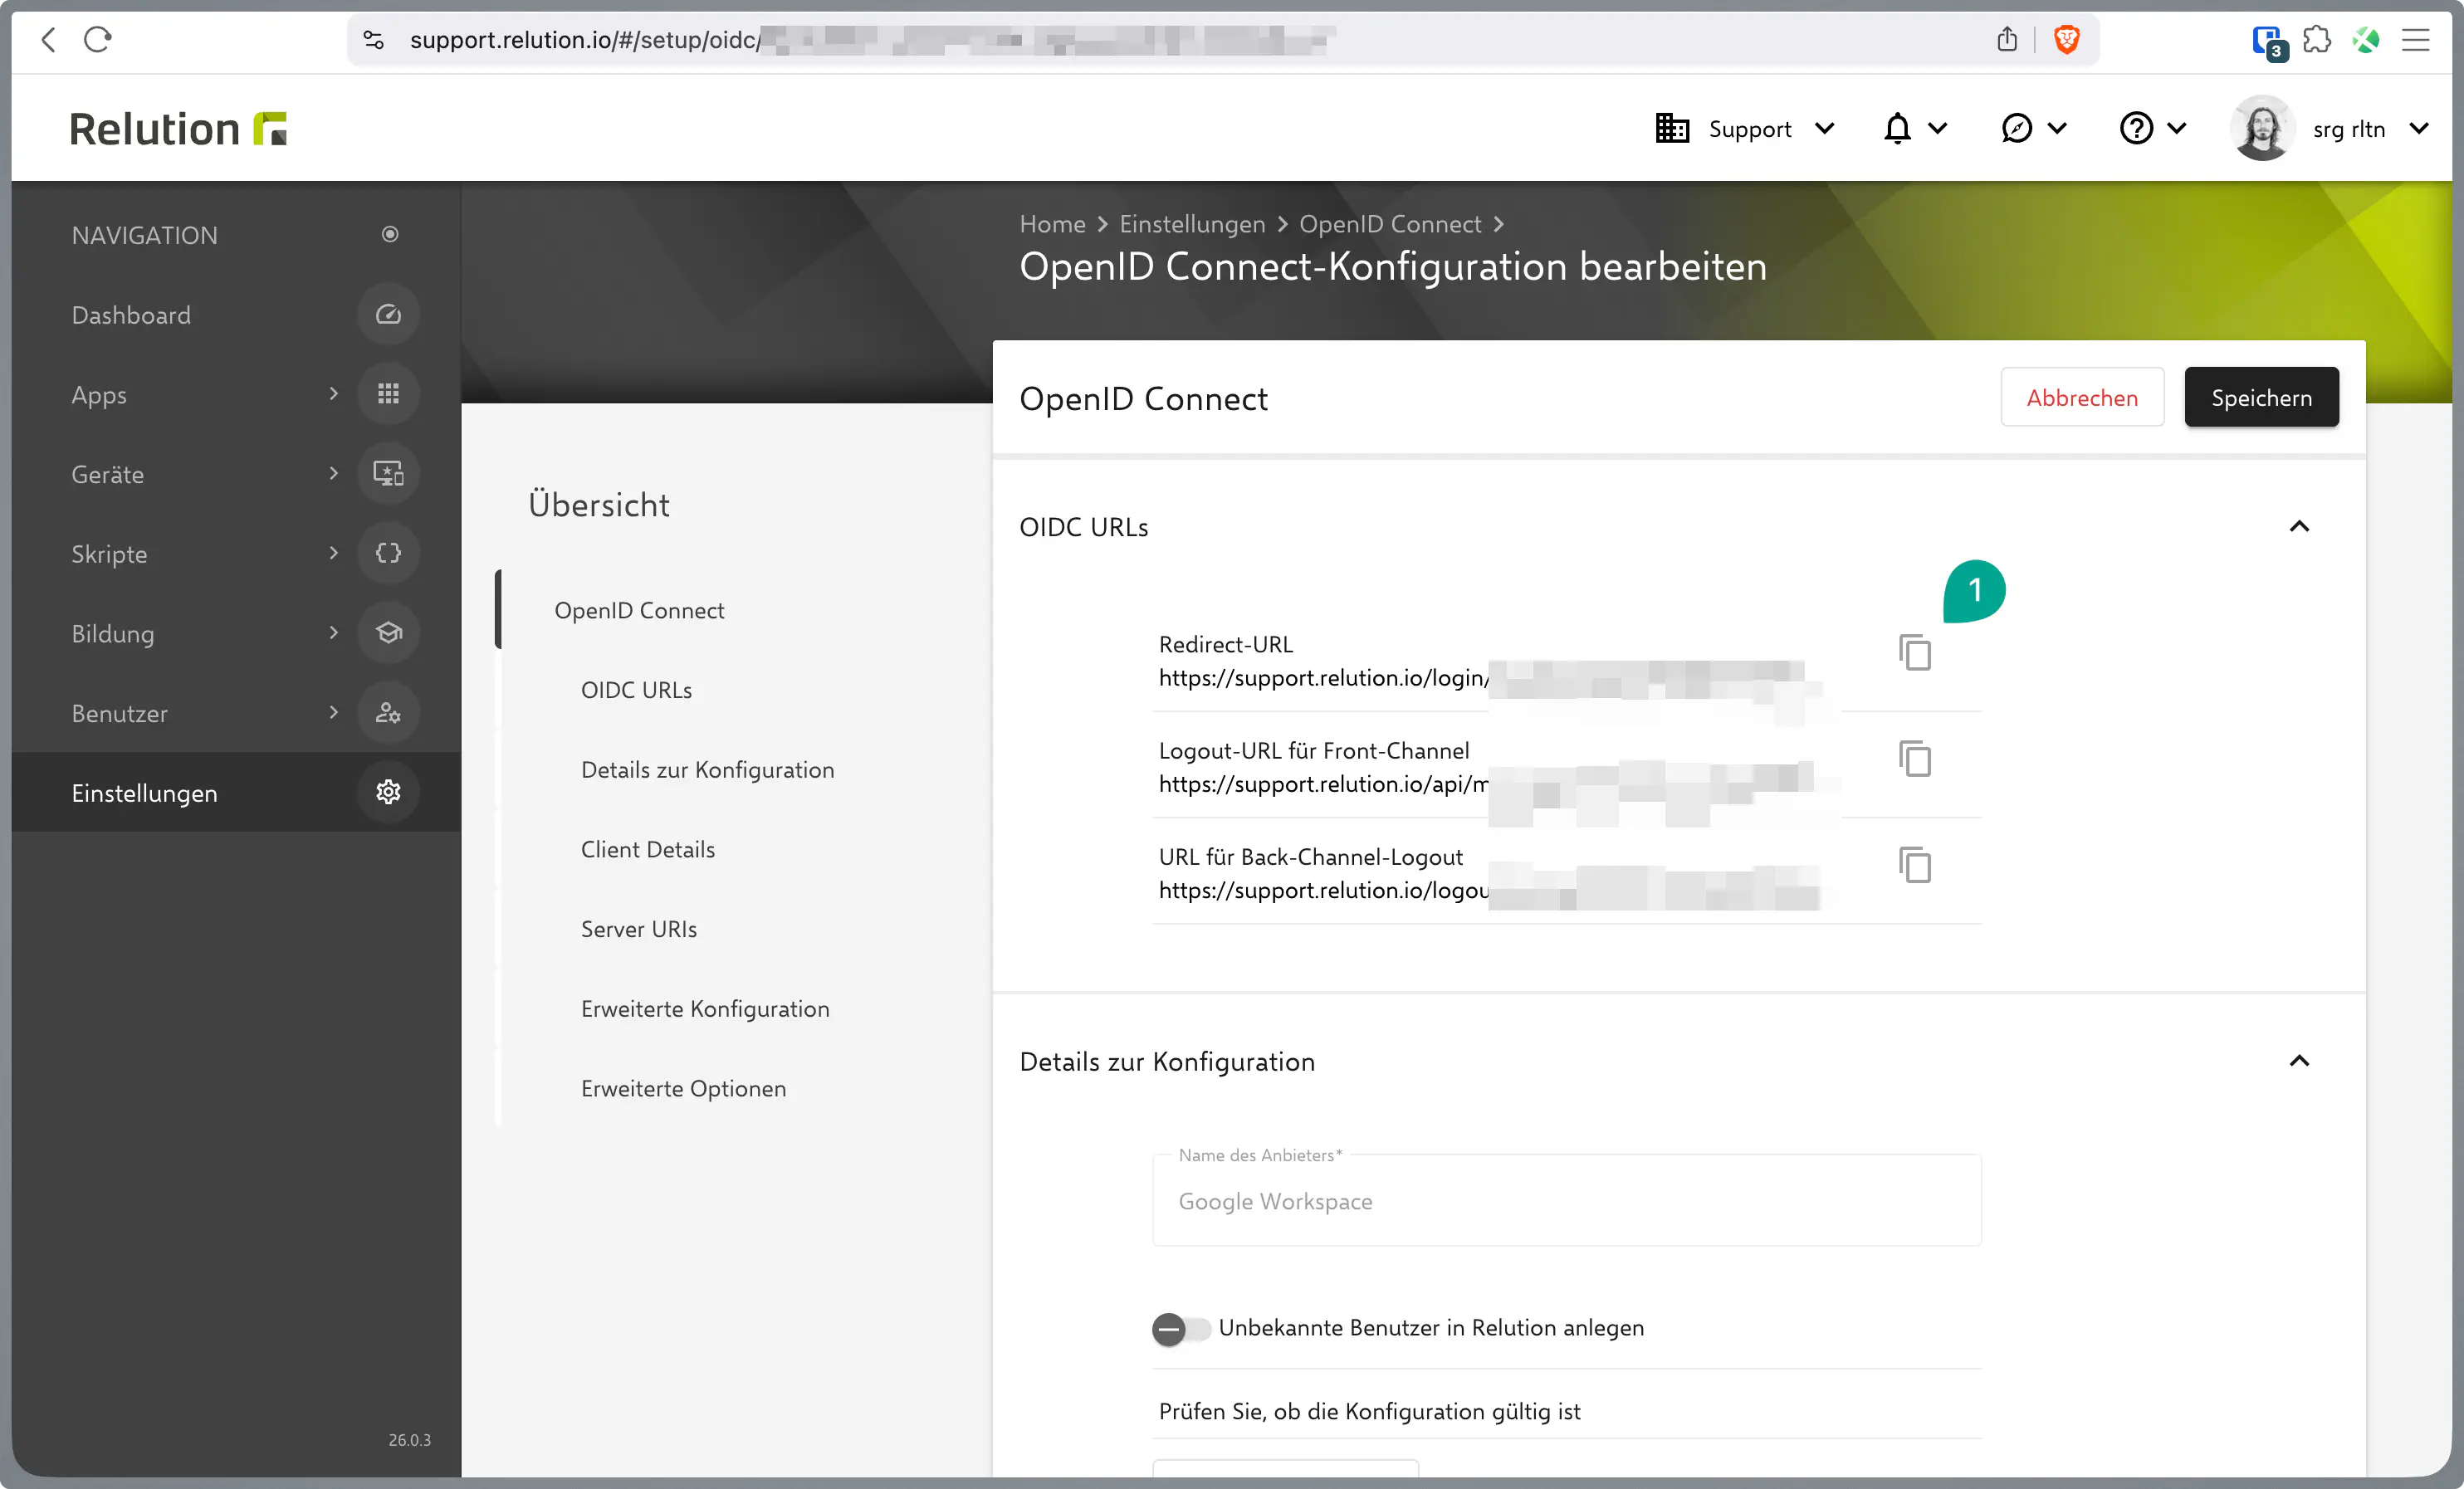
Open the OIDC settings in Relution under Settings → OpenID Connect.
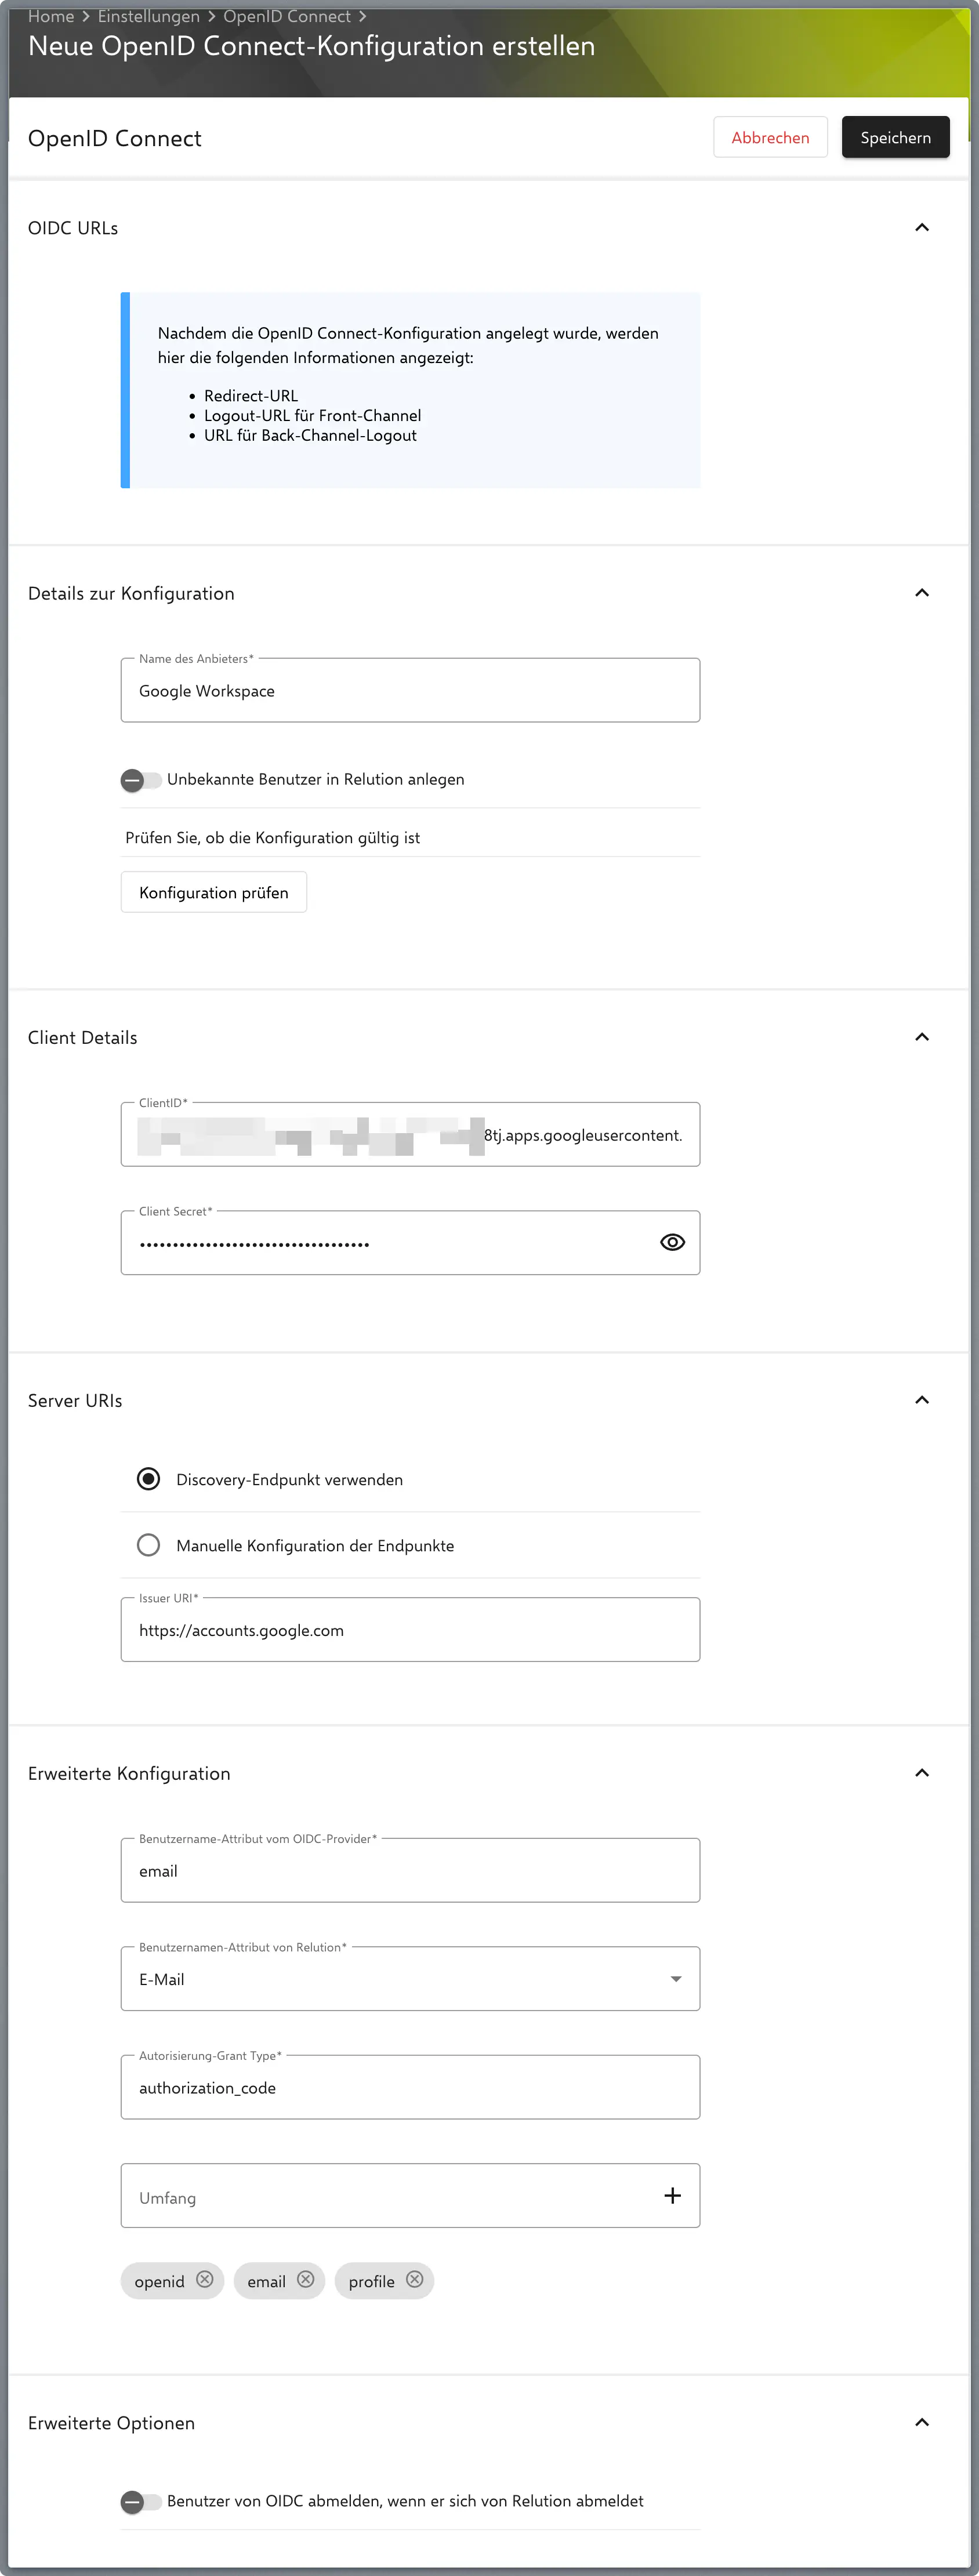
Re-enter the Client ID and Client Secret here.
Under Server URIs > Discovery Endpoint, you must use
https://accounts.google.com.Save the configuration and then open it again to see the generated fields.
Copy the Redirect URL provided by Relution.
Return to console.cloud.google.com →.
Update the Authorized redirect URIs with the Redirect URL you just copied from Relution.
Migration notice — Scoped redirect URIs (from 26.4.0). With 26.4.0 Relution changed the redirect URI scheme: login callbacks are now scoped so they can in future be gated per path on a reverse proxy. The redirect URIs you must register therefore differ depending on your Relution version.
Where to find them: the exact redirect URIs for your instance are shown in the Relution portal under Settings > OpenID Connect once the connection is saved. Copy them from there rather than building them by hand.
Before 26.4 (legacy — one redirect URI):
https://<host>/login/oauth2/code/<registrationId>
From 26.4 (scoped — register all that apply):
https://<host>/api/management/login/oauth2/code/<registrationId>
https://<host>/api/device/login/oauth2/code/<registrationId>
https://<host>/api/teacher/login/oauth2/code/<registrationId>          # Education license only
When upgrading, add the scoped URIs to your existing Google OAuth client. The legacy URI keeps working but is deprecated and will be removed in a future release. <registrationId> is the OIDC configuration UUID shown in Relution.
Notes
Backchannel Logout
Relution supports Backchannel Logout starting with server version 5.32.0.
Example Scenario: A user is simultaneously logged into multiple applications via SSO. When logging out of the SSO service, Backchannel Logout ensures that sessions in all other applications are also terminated, even if they are running in the background.
Logout Verification
Verify both logout paths work correctly before go-live:
- Front-channel logout: User clicks “Logout” in Relution — session is revoked and browser is redirected to the IdP logout endpoint.
- Back-channel logout: The IdP sends a logout notification to Relution — the session is revoked without user interaction.
Test both paths to ensure that IdP-initiated session termination (e.g. from the IdP admin console) propagates correctly to Relution.