Autopilot
Windows Autopilot is a cloud-based Microsoft service that enables the automated setup of new Windows 10/11 devices for productive use. The devices do not need to be reinstalled, as Windows Autopilot uses the existing image already present on the device. Relution supports automatic enrollment through Windows Autopilot, allowing Windows 10/11 devices to be quickly and easily added to the Relution inventory.
Requirements for using Windows Autopilot
Currently only available with an own Relution Server
Windows Autopilot can be used with Windows 10/11 Professional, Enterprise, or Education starting with version 1709. To use it, a Microsoft Entra ID environment, a Microsoft Entra ID P1 or P2 license, and a Microsoft Intune Plan 1 license are required. To configure Microsoft Entra, users must have administrative permissions, for example the Global Administrator role. According to Microsoft documentation, the Microsoft Intune Plan 1 license should not be required. However, in practice it has been shown that Intune cannot be used without it. The license is only required for that purpose.
An internet connection is mandatory during the initial startup of Windows 10/11 devices so that automatic registration and setup can be completed.
How Windows 10/11 device provisioning works
When the Out Of The Box Experience (OOBE) starts on a Windows 10/11 device, the system automatically detects, if a network connection is available, that the device should be configured using Windows Autopilot. The device sends its ID to Microsoft and checks whether it has been registered in Autopilot for a Microsoft Entra ID environment. Users must then sign in on the Microsoft sign-in page using their credentials. After sign-in, enrollment in Relution is performed and a user account for the Microsoft Entra ID user is created on the device.
Advantages of Windows Autopilot
The goal of Windows Autopilot is to avoid the need to manually install an internally created image on each new Windows 10/11 device. Instead, devices should transform themselves into preconfigured devices as automatically as possible. This minimizes the effort required to create and maintain images and reduces the time needed for physical registration and provisioning of devices. Microsoft Entra only needs to be configured once, and automatic registration continues to work until the defined expiration date of the client secret is reached (see below).
Entra Join
Unlike Windows Autopilot, Entra Join is not intended for the automatic initial provisioning of a device, but for connecting the device to the company environment. Windows Autopilot is used to automatically provision and configure new devices, while Entra Join connects the device to the user in Microsoft Entra ID.
This user-based alternative to Windows Autopilot allows your Entra users to enroll any Windows device by signing in with their Microsoft user credentials via Settings > Accounts > Access work or school > Connect.
Adding the MDM application in Entra
A prerequisite is that Relution has already been linked with Entra ID →.
Either the existing MDM application in Microsoft Entra can be used, or a new one can be created and fully configured using the values provided in the Relution guide.
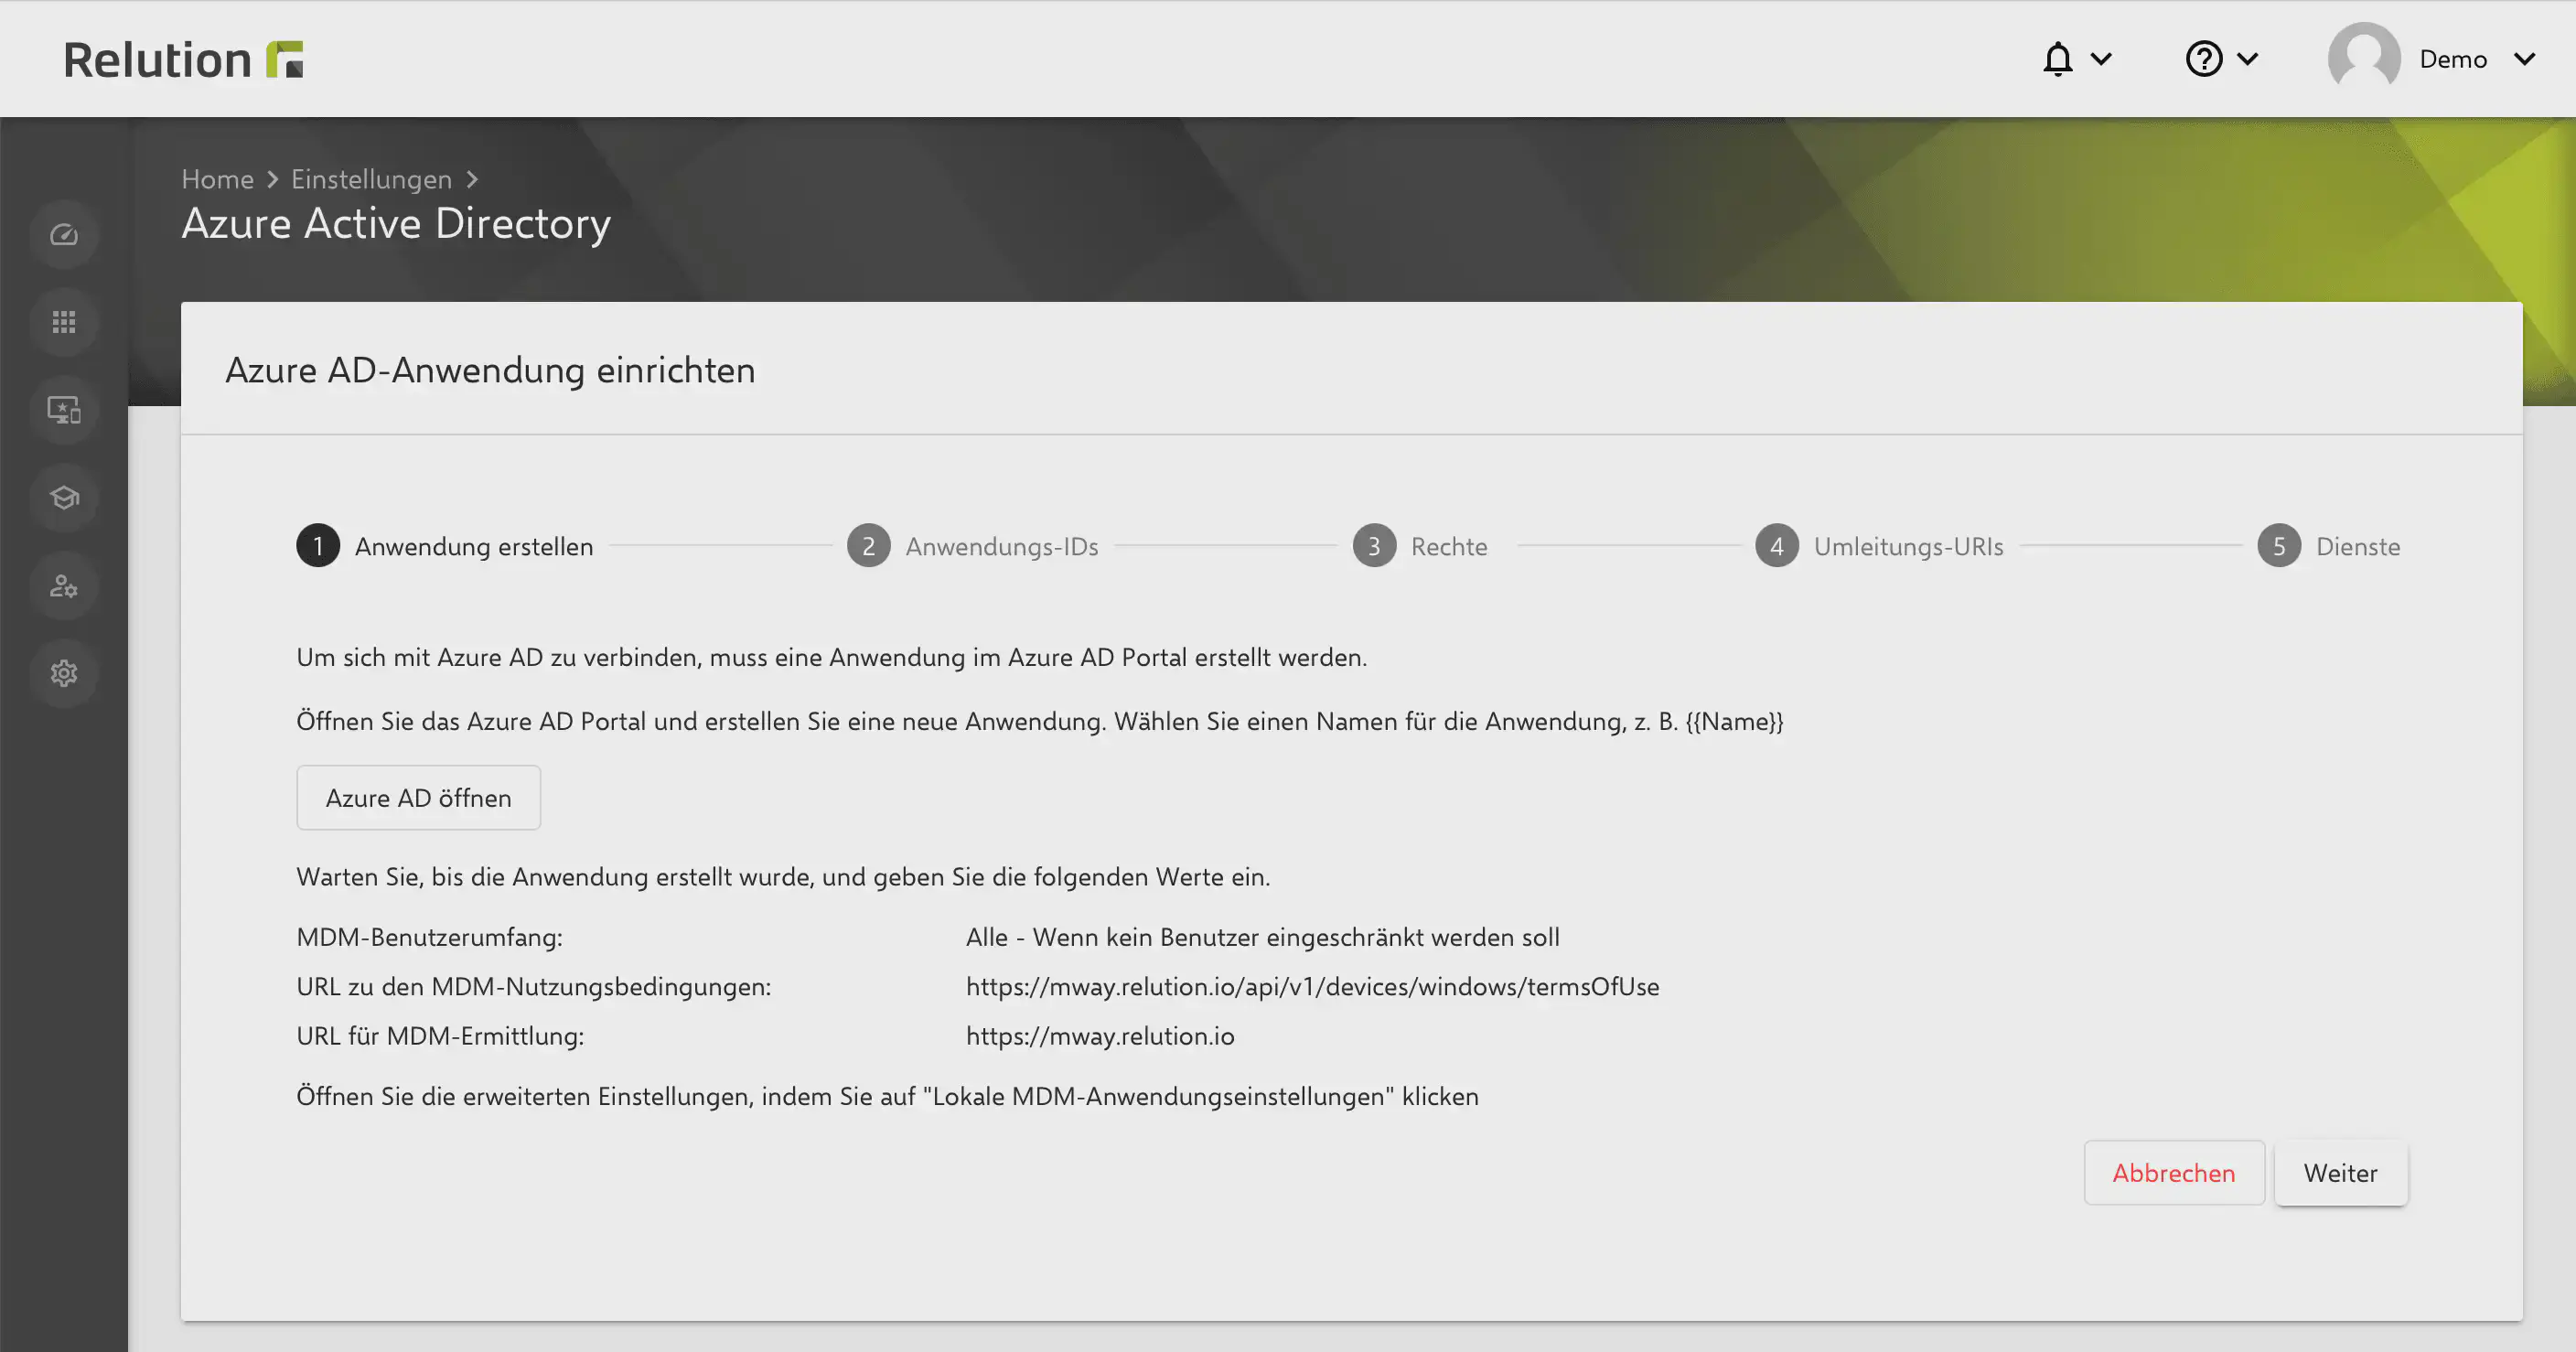
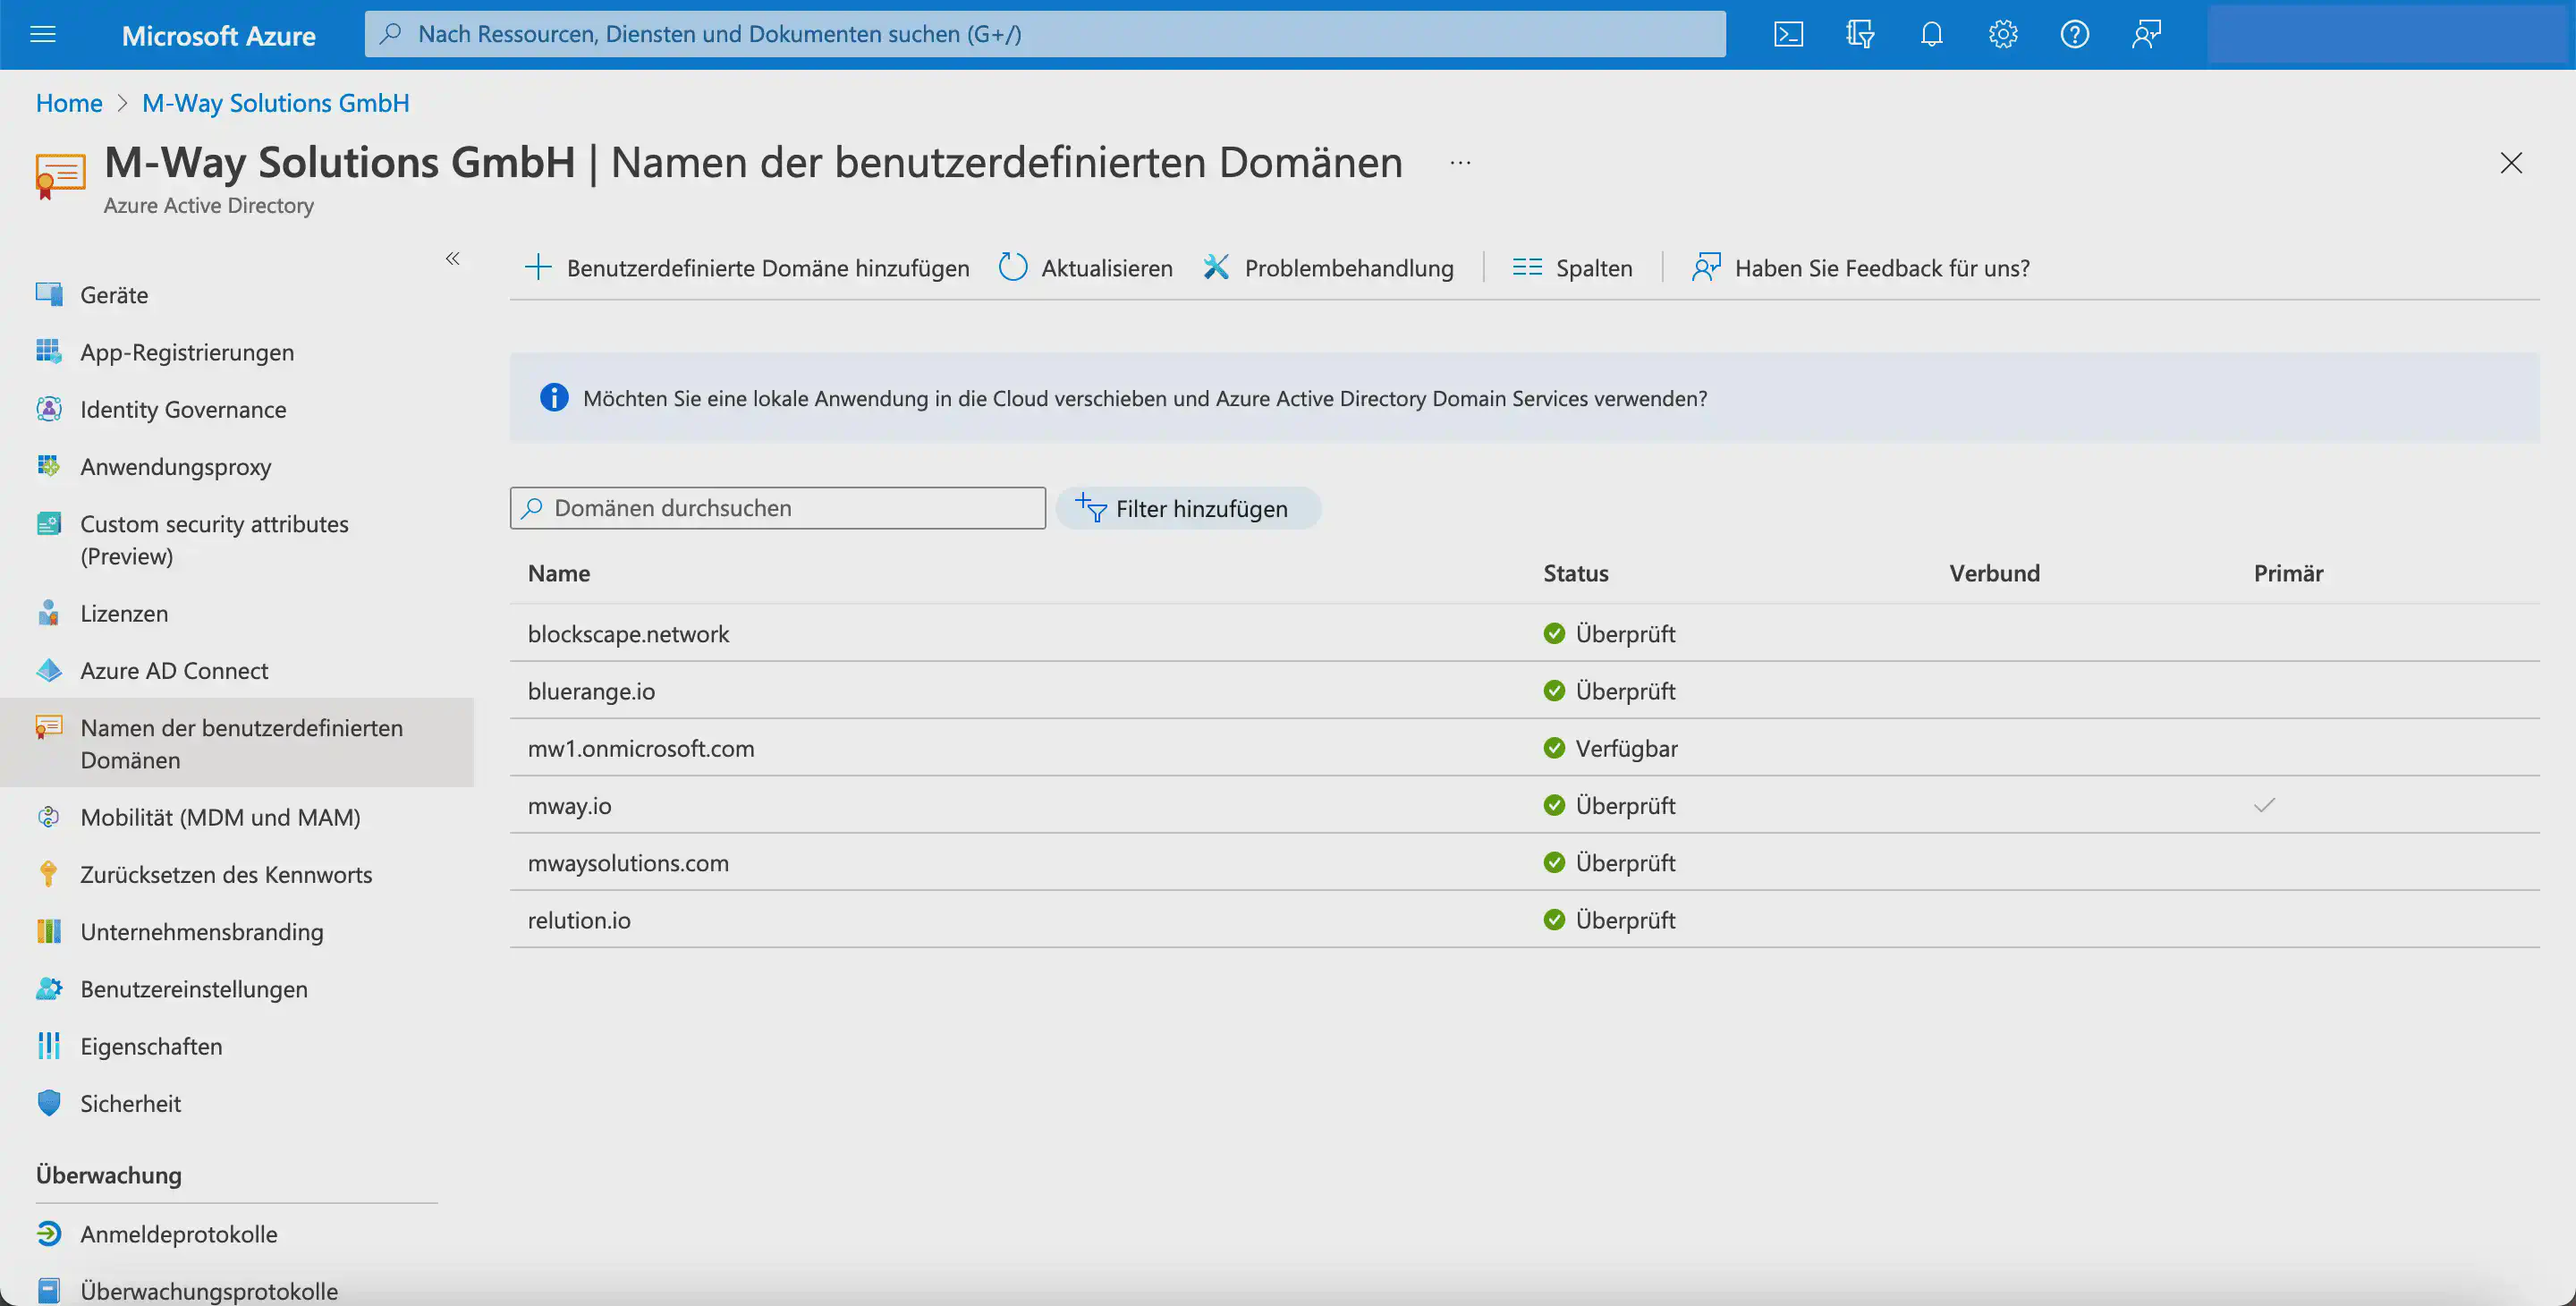
Add the domain of the corresponding Relution Server in Microsoft Entra ID under Custom domain names. This process may take some time. Further information can be found in the Microsoft documentation.
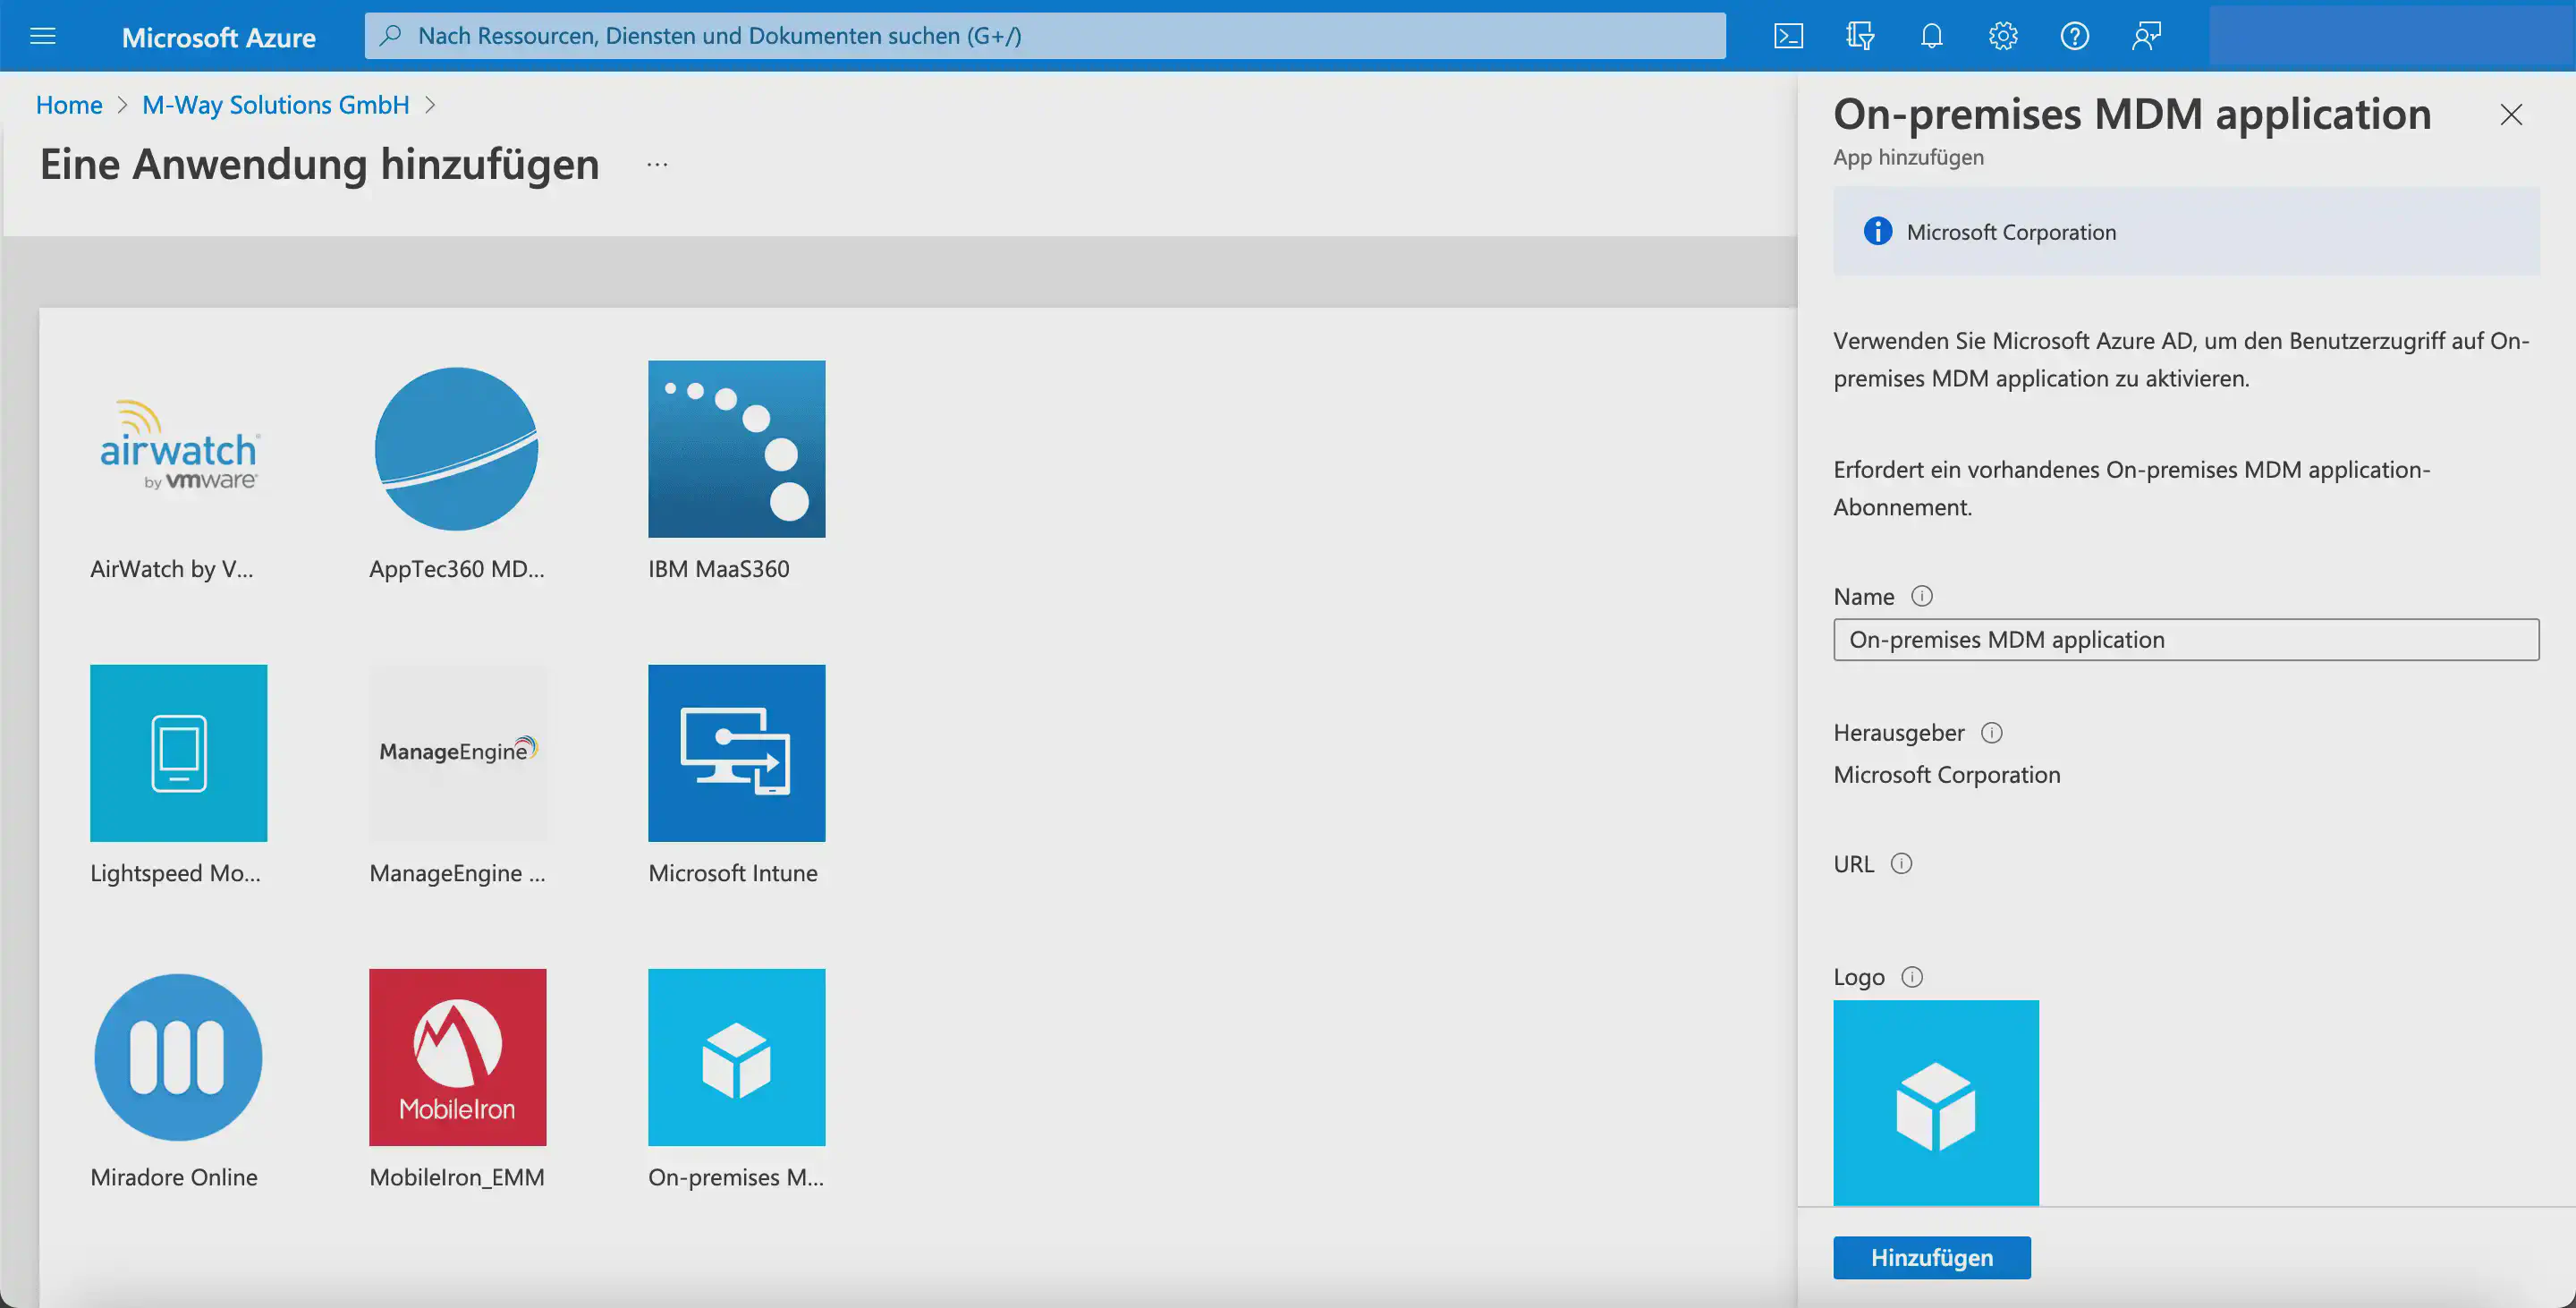
Under Mobility (MDM and MAM), the desired MDM application is then added and activated:
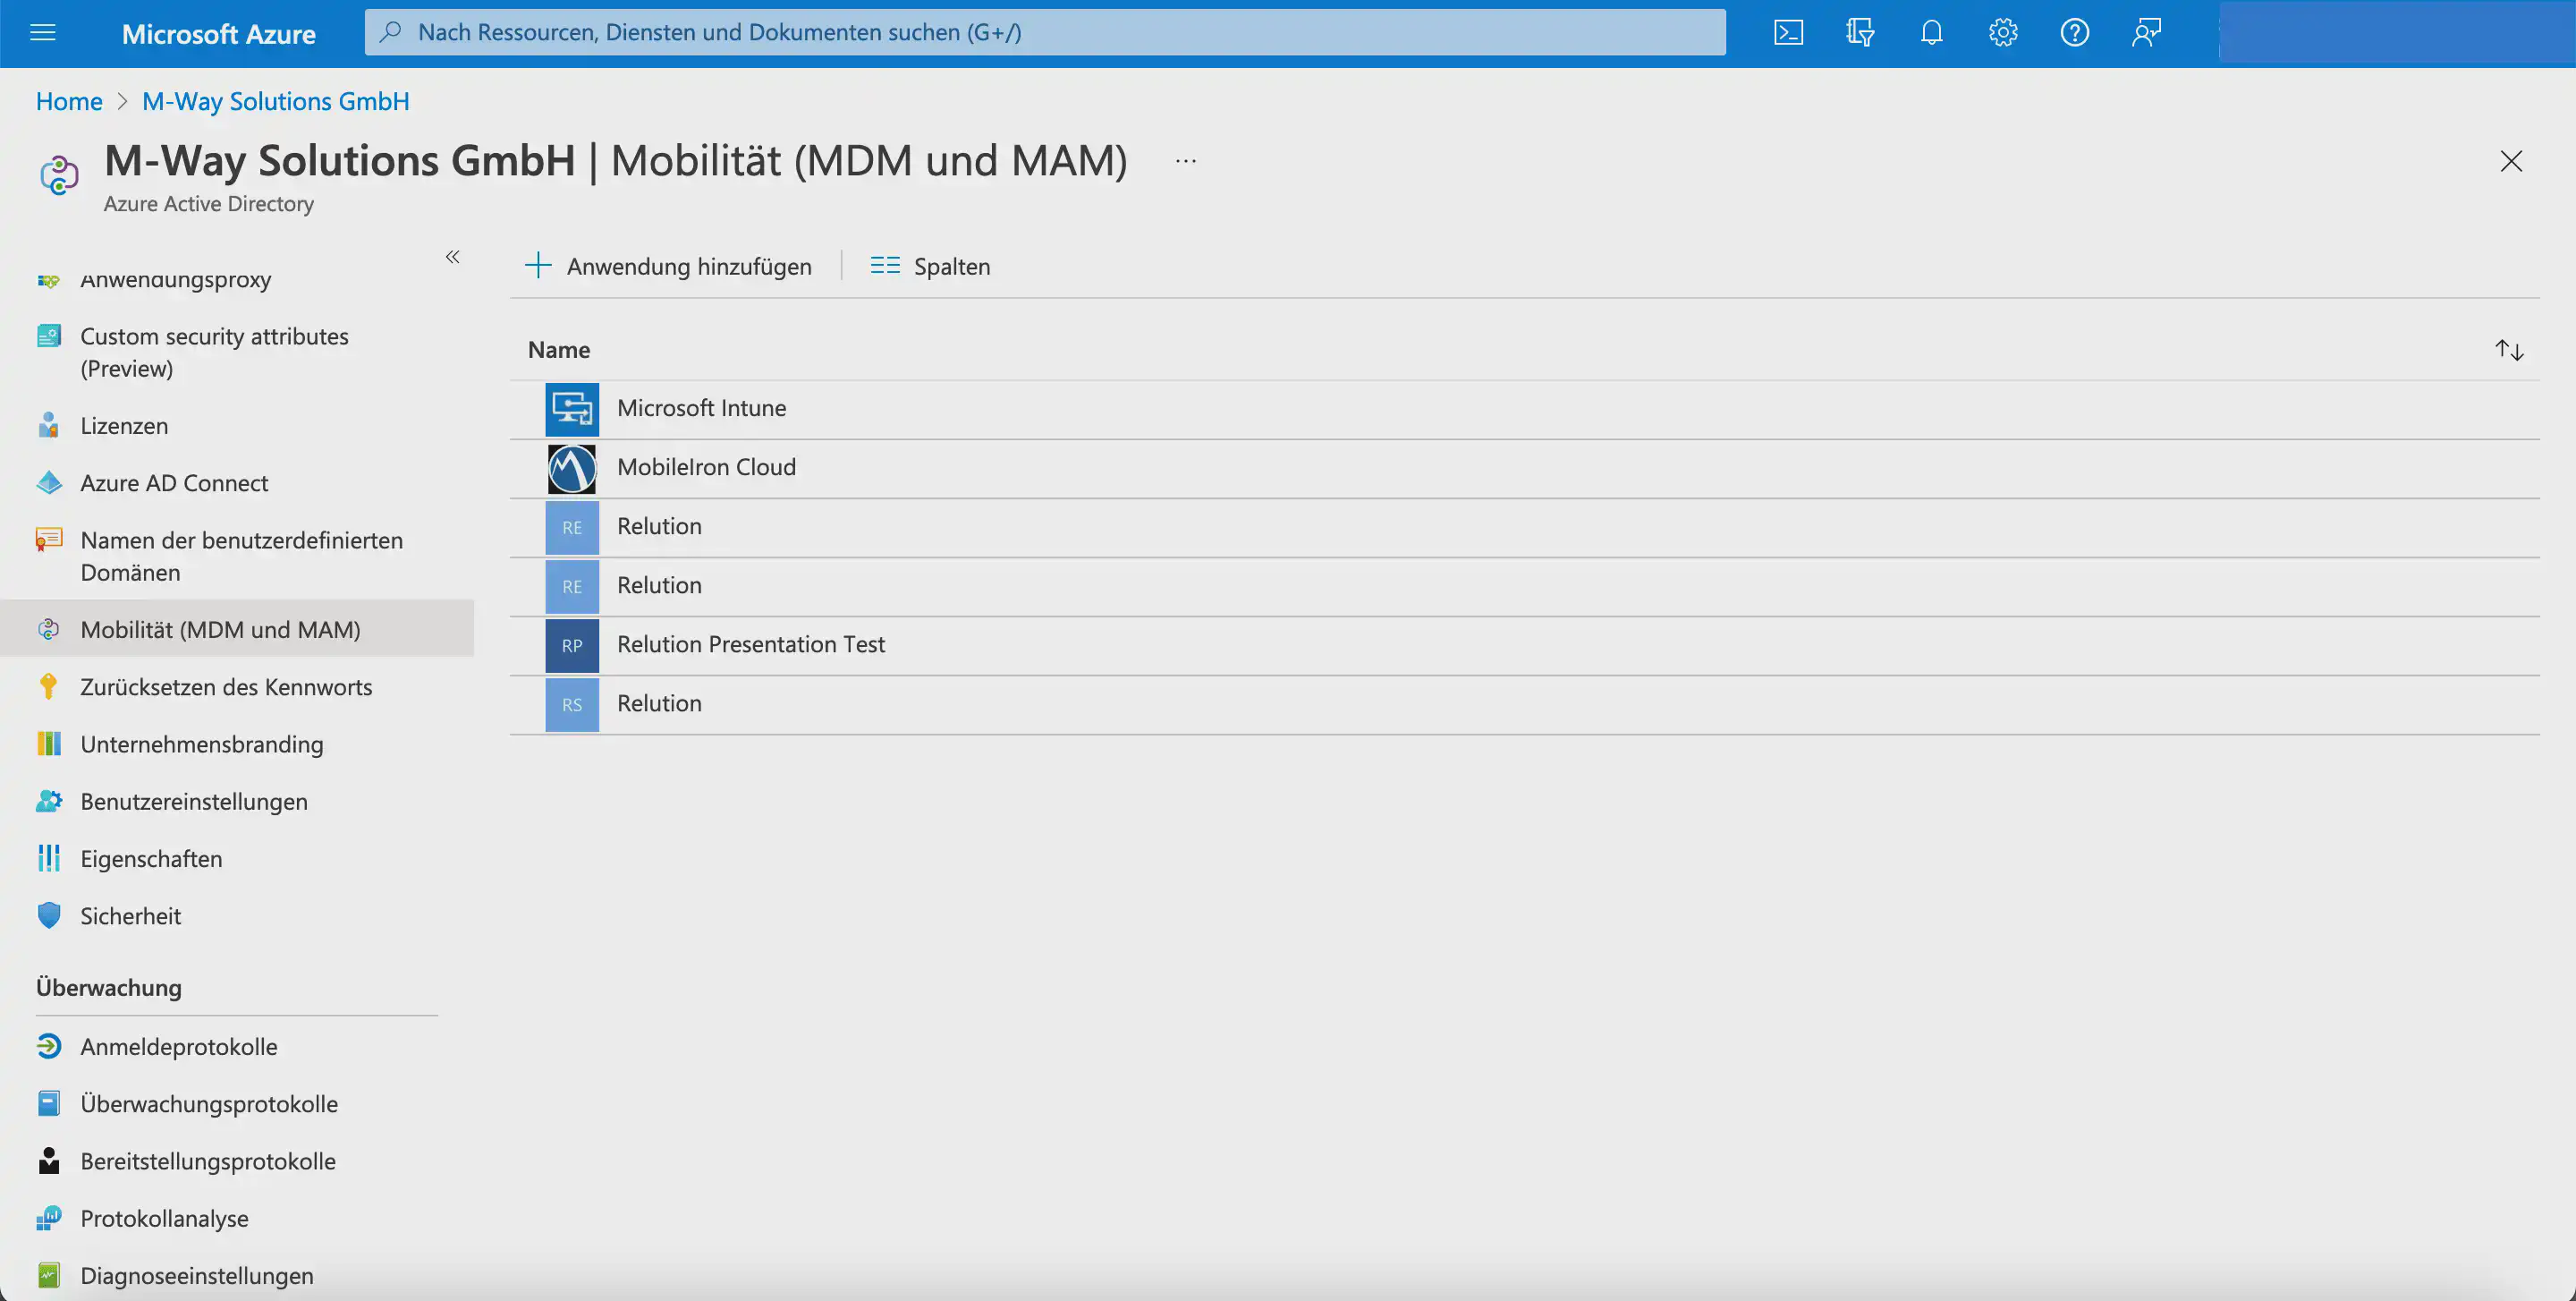
- Select the
On-premises MDM applicationtile in the lower right corner. - Enter a name.
- Click
Add.
The new MDM application is then configured using the information provided in the Relution guide:
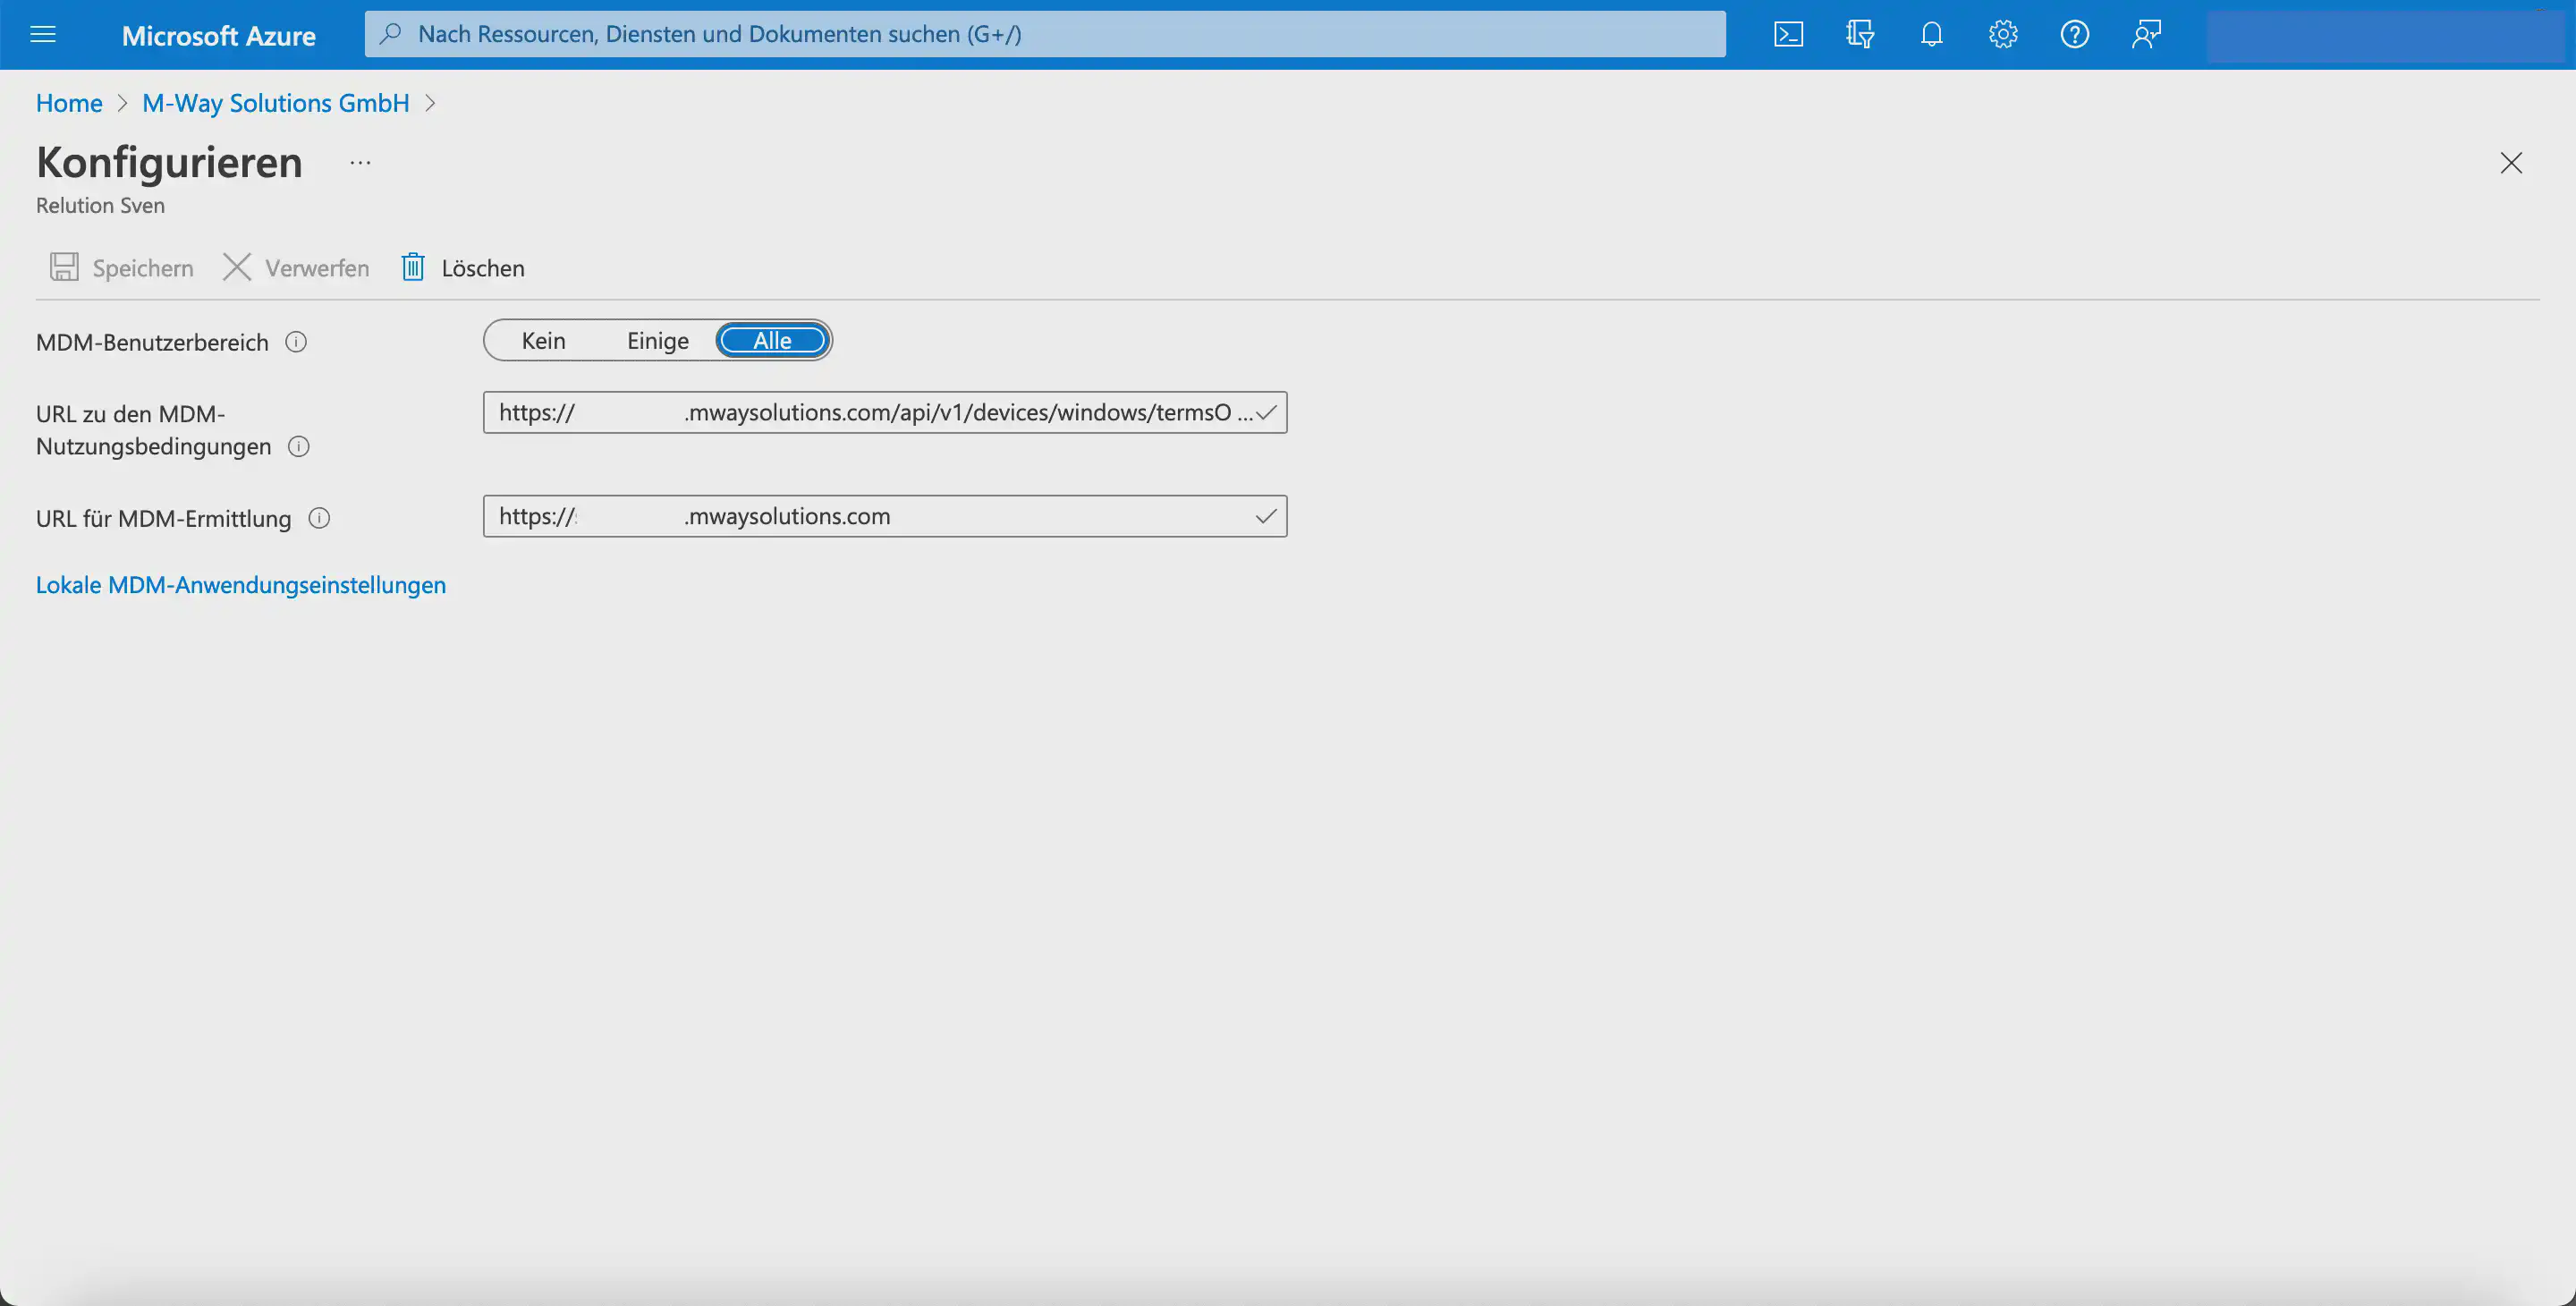
- Select the desired setting for
MDM user scope. - Enter the URL for the
MDM terms of usefrom Relution:
https://serverurl/api/device/v1/windows/termsOfUse
Microsoft checks this URL before every enrollment. No website is opened.
- Enter the
MDM discoveryURL:
https://serverurl/api/device/v1/windows/discover
- Click
Save.
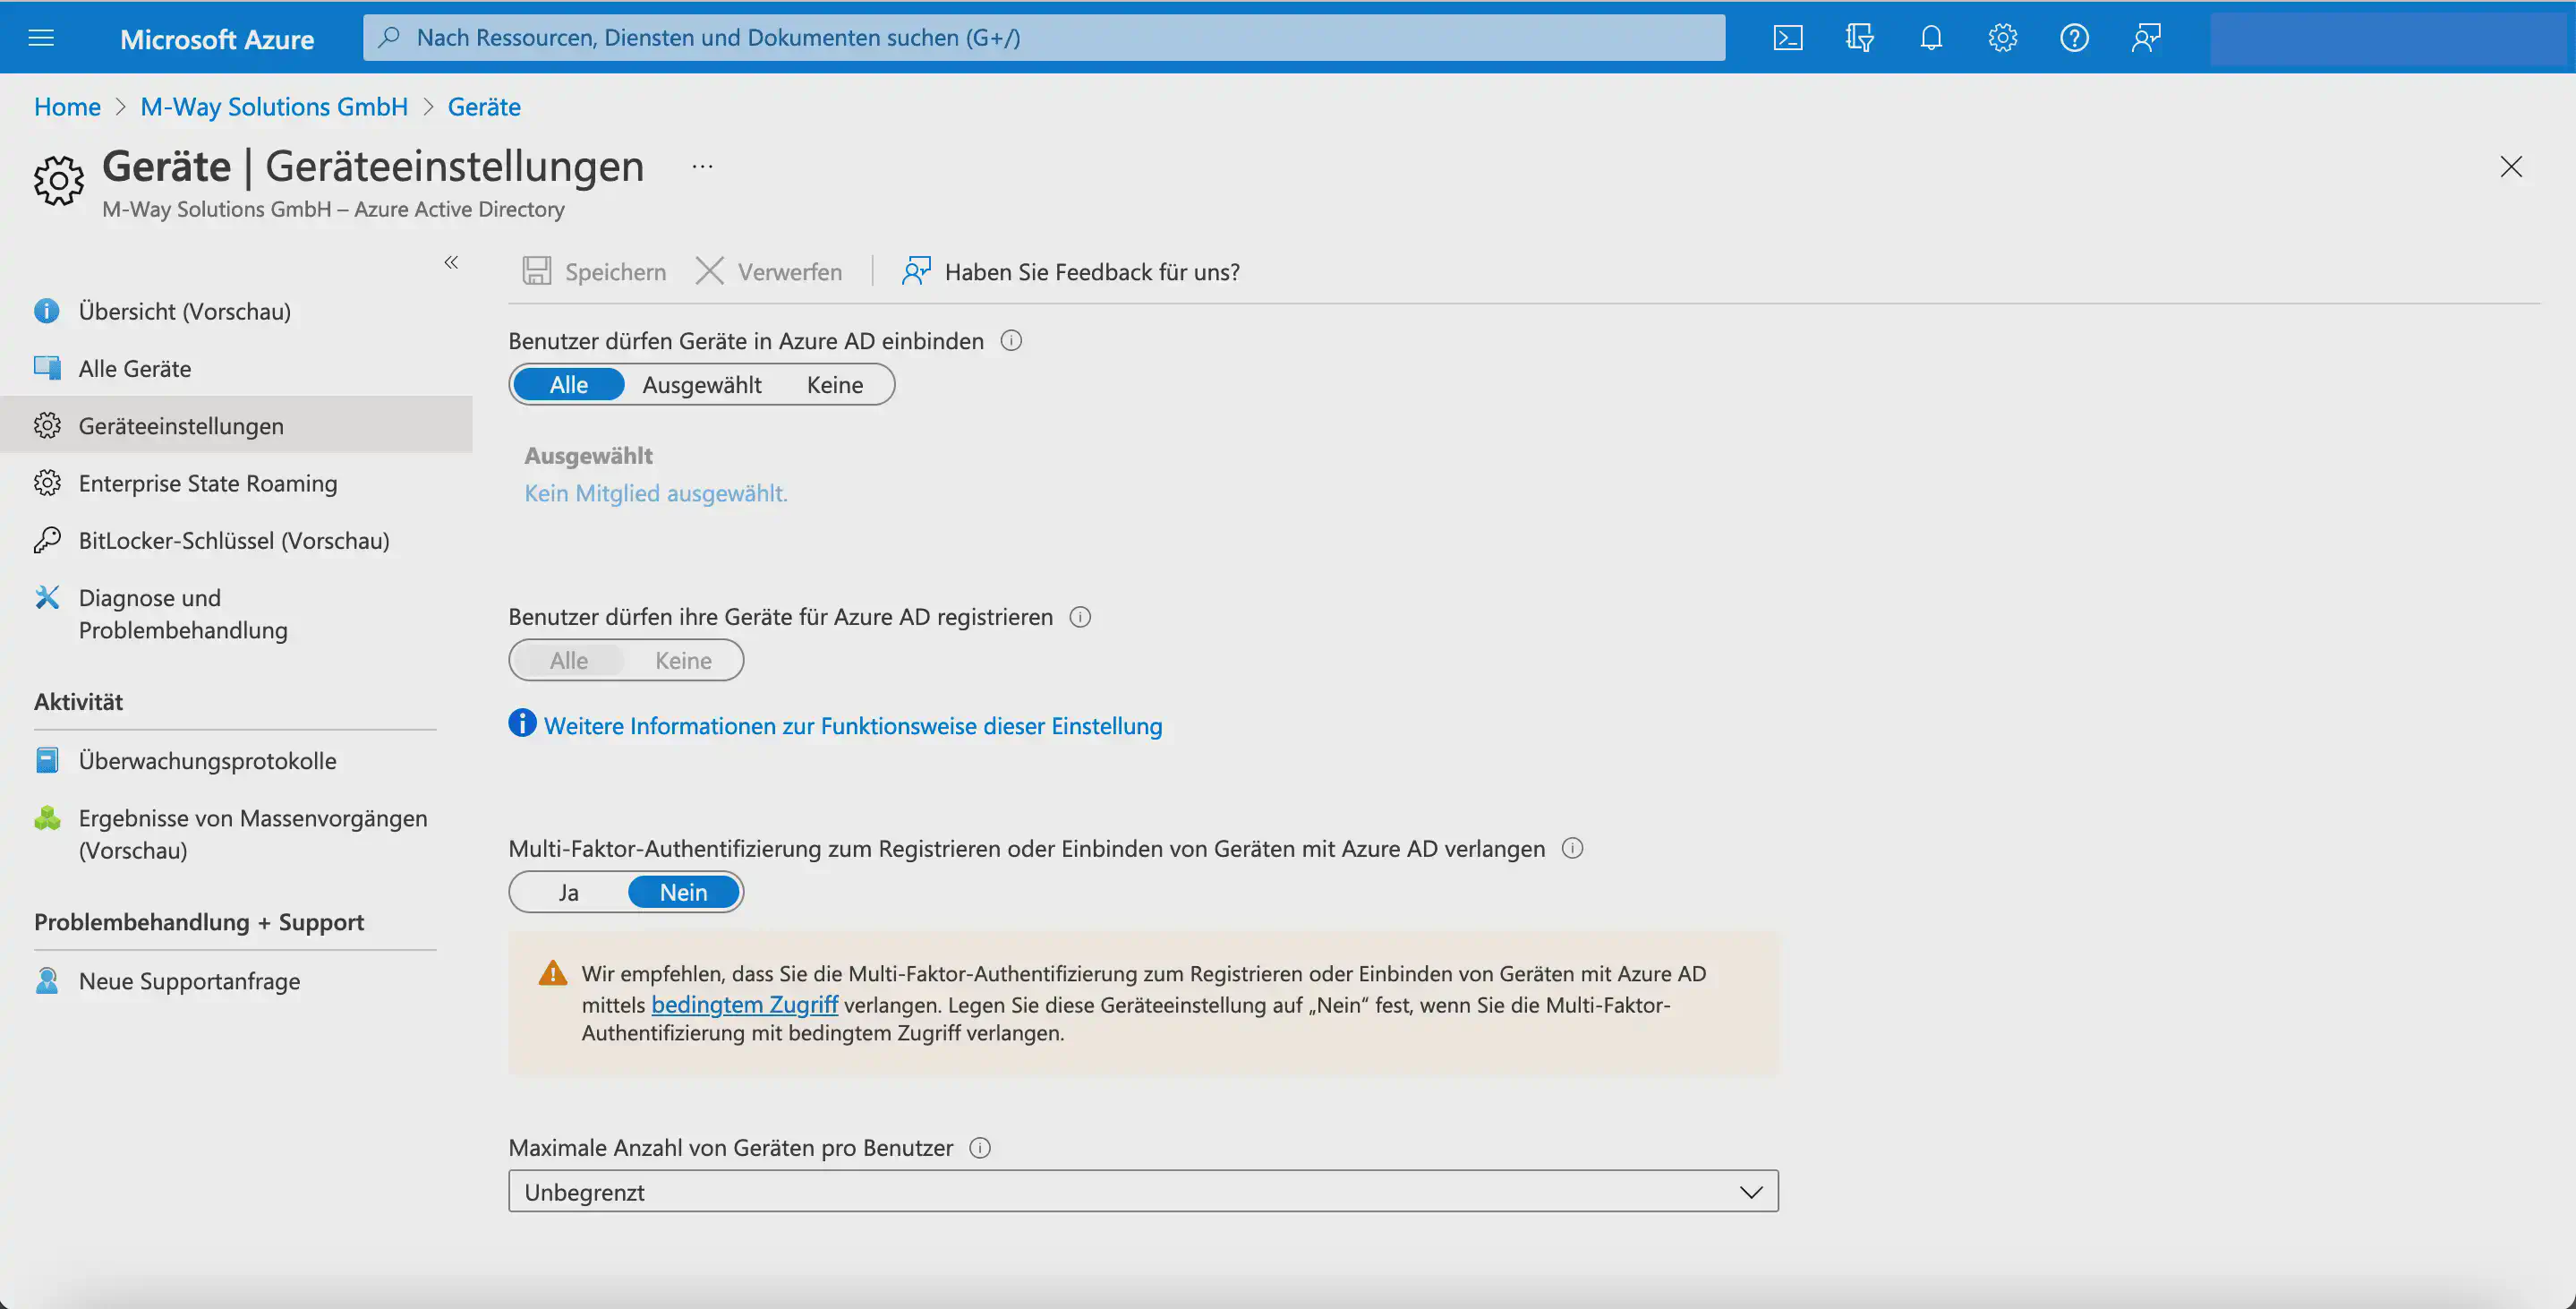
Check the Entra default settings and complete the setup
After you have linked Entra ID with Relution →, verify whether the following settings have been configured under Devices > Device settings to enable Entra Join. This step can be skipped for Windows Autopilot.
- All users may join devices to
Microsoft Entra ID. - All users may register their devices with
Microsoft Entra ID. - The maximum number of devices per user should be taken into account.
Add Windows 10/11 devices
These steps replace the previously required steps in Microsoft Store for Business.
New devices can be purchased and registered through a partner. In this case, the devices are automatically added to the Intune portal and to Microsoft Entra ID, so they do not need to be entered manually.
Devices that have already been used can be added manually. For this, a CSV
The file can be generated with the following script using PowerShell:
[Net.ServicePointManager]::SecurityProtocol = [Net.SecurityProtocolType]::Tls12
New-Item -Type Directory -Path "C:\HWID"
Set-Location -Path "C:\HWID"
$env:Path += ";C:\Program Files\WindowsPowerShell\Scripts"
Set-ExecutionPolicy -Scope Process -ExecutionPolicy RemoteSigned
Install-Script -Name Get-WindowsAutopilotInfo
Get-WindowsAutopilotInfo -OutputFile AutopilotHWID.csv
PowerShell must be run as Administrator.
The file must then be uploaded under Devices > enter Enrollment in the search > click the search result > scroll down on the right-hand side > Devices > Import.
The devices then appear in the device list and must be assigned to a configured profile.
Prepare the Out Of The Box Experience (OOBE) in Microsoft
Next, a profile must be created.
To do this, return to the feature search. Go to Devices > enter Enrollment in the search > scroll down on the right-hand side > click Deployment profiles.
- Click
Create profile. - Select
Windows PC. - Enter a name.
- Click
Next. - Click
Nextagain. - Select either
Add grouporAdd all devices. - Click
Next. - Click
Create.
The devices are now linked to the profile.
Synchronize stored Windows 10/11 devices with Relution
Under Devices > Auto enrollments, the Windows 10/11 devices can be added to Relution using the Synchronize button. At this point, the devices must not yet be enrolled.
Automatic enrollment through Windows Autopilot can only be carried out once the Windows 10/11 devices appear in the overview.
Automatic enrollment of Windows 10/11 devices in Relution
After the devices have been reset, or when they are started for the first time, the network connection is established during OOBE. As soon as this is done, the devices communicate with Microsoft Entra and download the Autopilot profile.
The Microsoft account sign-in screen then appears. After users enter their credentials, communication with Relution takes place. First, the terms-of-use endpoint is called, and then enrollment in Relution is performed.
If the users exist in Relution and auto enrollments are available for the devices, enrollment is completed. The Windows 10/11 devices then appear in the device inventory of the corresponding Relution organization and can be further configured using Windows policy configurations and actions.
Please do not delete the account on the device that was used to register the device.