Windows installation and enrollment
Introduction
This manual provides a detailed description of the process for setting up an opsi server to efficiently deploy Windows installations and automate device enrollment into Relution. The goal is to configure a functioning opsi server that can install Windows operating systems on client devices via netboot while seamlessly integrating them into Relution for centralized management.
The guide covers all essential steps, including installation and configuration of the opsi server, preparation of Windows and Windows Preinstallation Environment (WinPE) installation files. Additionally, it explains the process of automating Relution enrollment using local opsi products.
Glossary
| Term | Explanation |
|---|---|
| admin console | Refers to the UI which is included in the opsi server and runs on https://localhost:4447 |
| configed | Refers to the additional Java application which may run on any device to connect to the opsi server |
| client debug console | Refers to the opsi agent UI which runs on https://<opsi-client-IP>:4441 |
Setup opsi server
This section guides you through the process of setting up the opsi server, providing a detailed walkthrough of the necessary configurations, installation steps, and preparation of critical packages.
Server installation
It is recommended to use the Docker-based installation for setting up the opsi server on Linux environments. However, it is important to note that the Docker setup cannot be used on macOS devices due to compatibility issues with the integrated TFTP server. For macOS systems, the preconfigured VirtualBox option should be used instead.
Follow the instructions of the opsi-documentation below to setup the opsi-config server. After the installation the admin console is running on https://localhost:4447. Also download the Java application for the configed.
Documentation
Install required opsi-packages
To install opsi packages, go to the admin console and navigate to the Terminal tab. In the terminal, use the following command to install the required opsi packages:
opsi-package-updater -v install <package-name>
An overview of all available local and netboot products can be found in the opsi repository.
The following packages need to be installed:
| Package | Description |
|---|---|
| opsi-client-agent | Client installed on the device to execute commands |
| opsi-script | use by the client agent to execute opsi scripts |
| opsi-uefi-netboot | required for UEFI netboot to change boot order |
| opsi-winpe | creates a winpe on the device |
| hwaudit (optional) | Inventory tool which gathers information about the device |
Client registration
This section covers the process of registering devices that already have a Windows operating system installed with the opsi server. The opsi client agent is installed on the device to establish communication with the server, enabling centralized control and execution of actions.
For clients that do not yet have Windows installed, additional steps are required to initialize and install the operating system using netboot. In such cases, users should refer to the official opsi documentation below for detailed instructions on initial client setup.
The opsi client agent can be downloaded from https://<opsi-server-ip>:4447/public/opsi-client-agent/. After the client was installed on the device, the opsi server address and admin account credentials have to be entered.
Once the registration is complete, the client will appear in the device inventory of the configed. To check the connection between opsi server and client a pop-up message can be sent (top menu > Client > Send pop-up message).
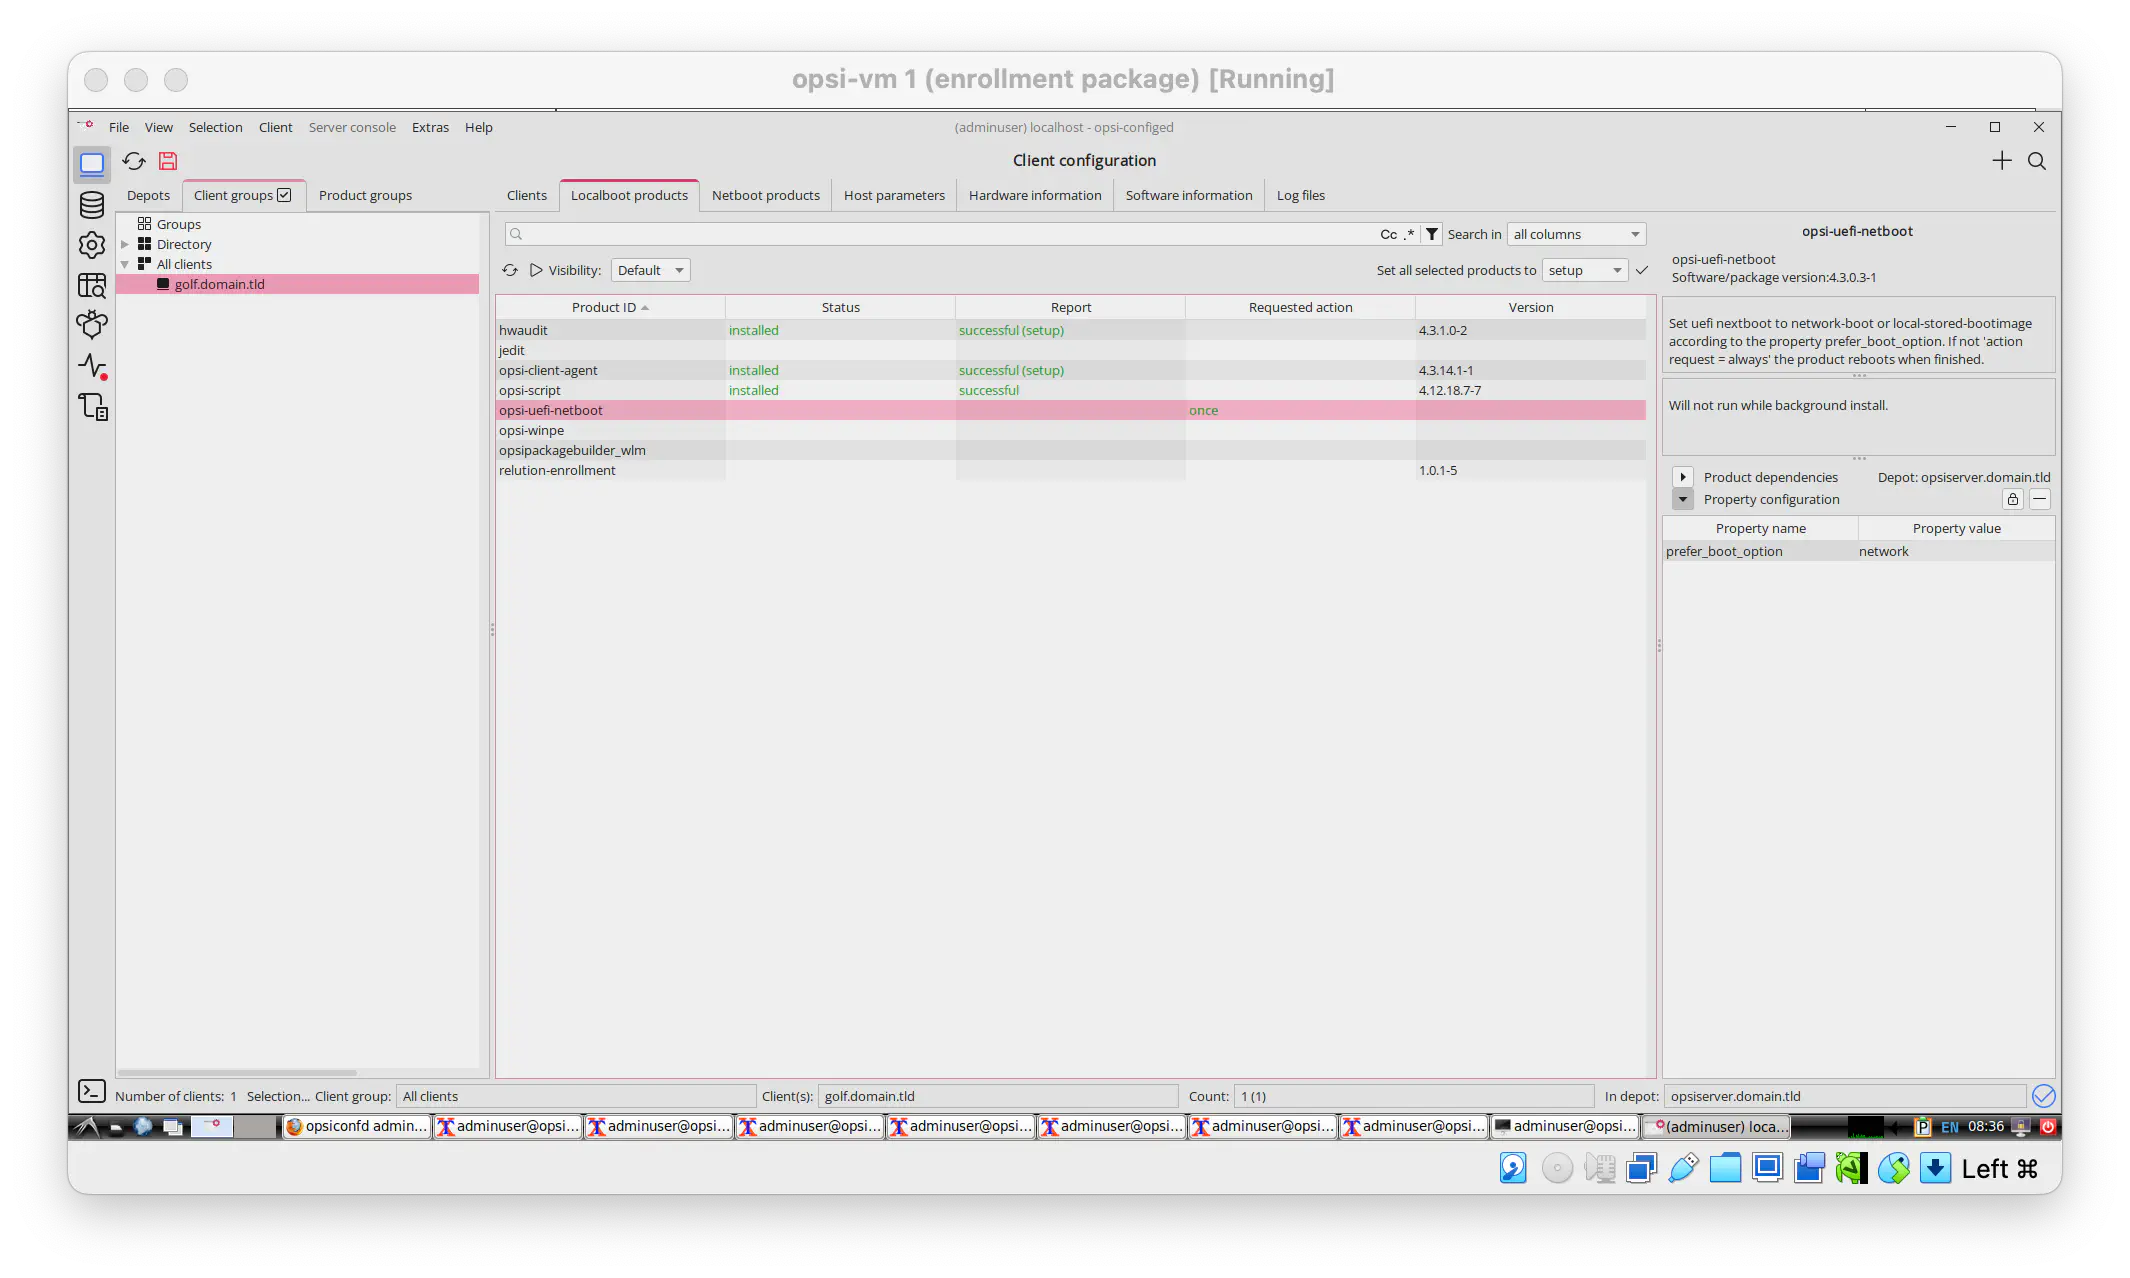
Install the UEFI netboot product on the device by setting the requested action to once.
The log files tab provides detailed information for troubleshooting installed opsi-client agent and linux-boot-image. This is helpful for debugging the installation of local and netboot products.
Documentation
Prepare Windows installation files
This section provides instructions for acquiring the necessary Windows ISO file, creating a compatible WinPE environment, and organizing these files into the required directory structure for netboot products. In this setup, Windows 11 was installed on the device.
Windows ISO and WinPE
To prepare the opsi server for deploying Windows installations, several key components are required. First, you need the Windows ISO file for the specific version you want to install, such as Windows 11. The ISO file can be downloaded from the official Microsoft website.
Next, a WinPE must be created. The WinPE must match the Windows image version you are deploying. This can be achieved by using the opsi-winpe package, which requires the installation of Windows ADK and the PE plugin. Alternatively, the WinPE can be created directly with Windows ADK, as described in the opsi documentation.
The documentation on netboot products describes two options to prepare a WinPE:
- Using
opsi-winpepackage (Windows ADK and the PE plugin need to be installed!) - Using Windows ADK
Setup directory structure for netboot product
Install the correct wrapper package for your Windows image from the opsi Netboot Repository via package manager e.g. opsi-local-image-win11-x64_4.3.0.2-13 for Windows 11.
A new directory will be added on your opsi server (e.g. /var/lib/opsi/depot/win11-x64). The Windows Image and the WinPE have to be placed in the correct directories (see Directory Tree overview for reference).
Install files
The contents of the Windows ISO have to be placed at the installfiles directory.
WinPE
The WinPE needs to be placed in the winpe directory.
Extract all files from the subdirectories (fwfiles, media, mount) and place it on root level. As there may be issues with the detection of the
setup.exealso place the directories here.
In the end you have all files and all directories of the WinPE at the root level in this directory:
/var/lib/opsi/depot/win11-x64/winpe/
├── fwfiles
├── media
├── mount
├── bg-bg
├── Boot
├── bootmgr
├── bootmgr.efi
├── cs-cz
├── da-dk
├── de-de
├── EFI
├── el-gr
├── en-gb
├── en-us
├── es-es
├── es-mx
├── et-ee
├── fi-fi
├── fr-ca
├── fr-fr
├── hr-hr
├── hu-hu
├── it-it
├── ja-jp
├── ko-kr
├── lt-lt
├── lv-lv
├── nb-no
├── nl-nl
├── pl-pl
├── pt-br
├── pt-pt
├── ro-ro
├── ru-ru
├── sk-sk
├── sl-si
├── sources
├── sr-latn-rs
├── sv-se
├── tr-tr
├── uk-ua
├── zh-cn
└── zh-tw
Documentation
Configure DHCP server
To configure a DHCP server for PXE boot, specific options need to provided that supply PXE boot clients with the information they need to locate the TFTP server and download the bootloader file. These are commonly defined as DHCP options 66 (TFTP server) and 67 (bootloader file).
If your router does not provide an UI to set these options e.g. if you are using a Linux or Windows DHCP server the following options have to be added to the dhcpd.conf file:
next-server <opsi-server-IP>;
filename "opsi/opsi-linux-bootimage/loader/opsi-netboot.efi";
Start netboot
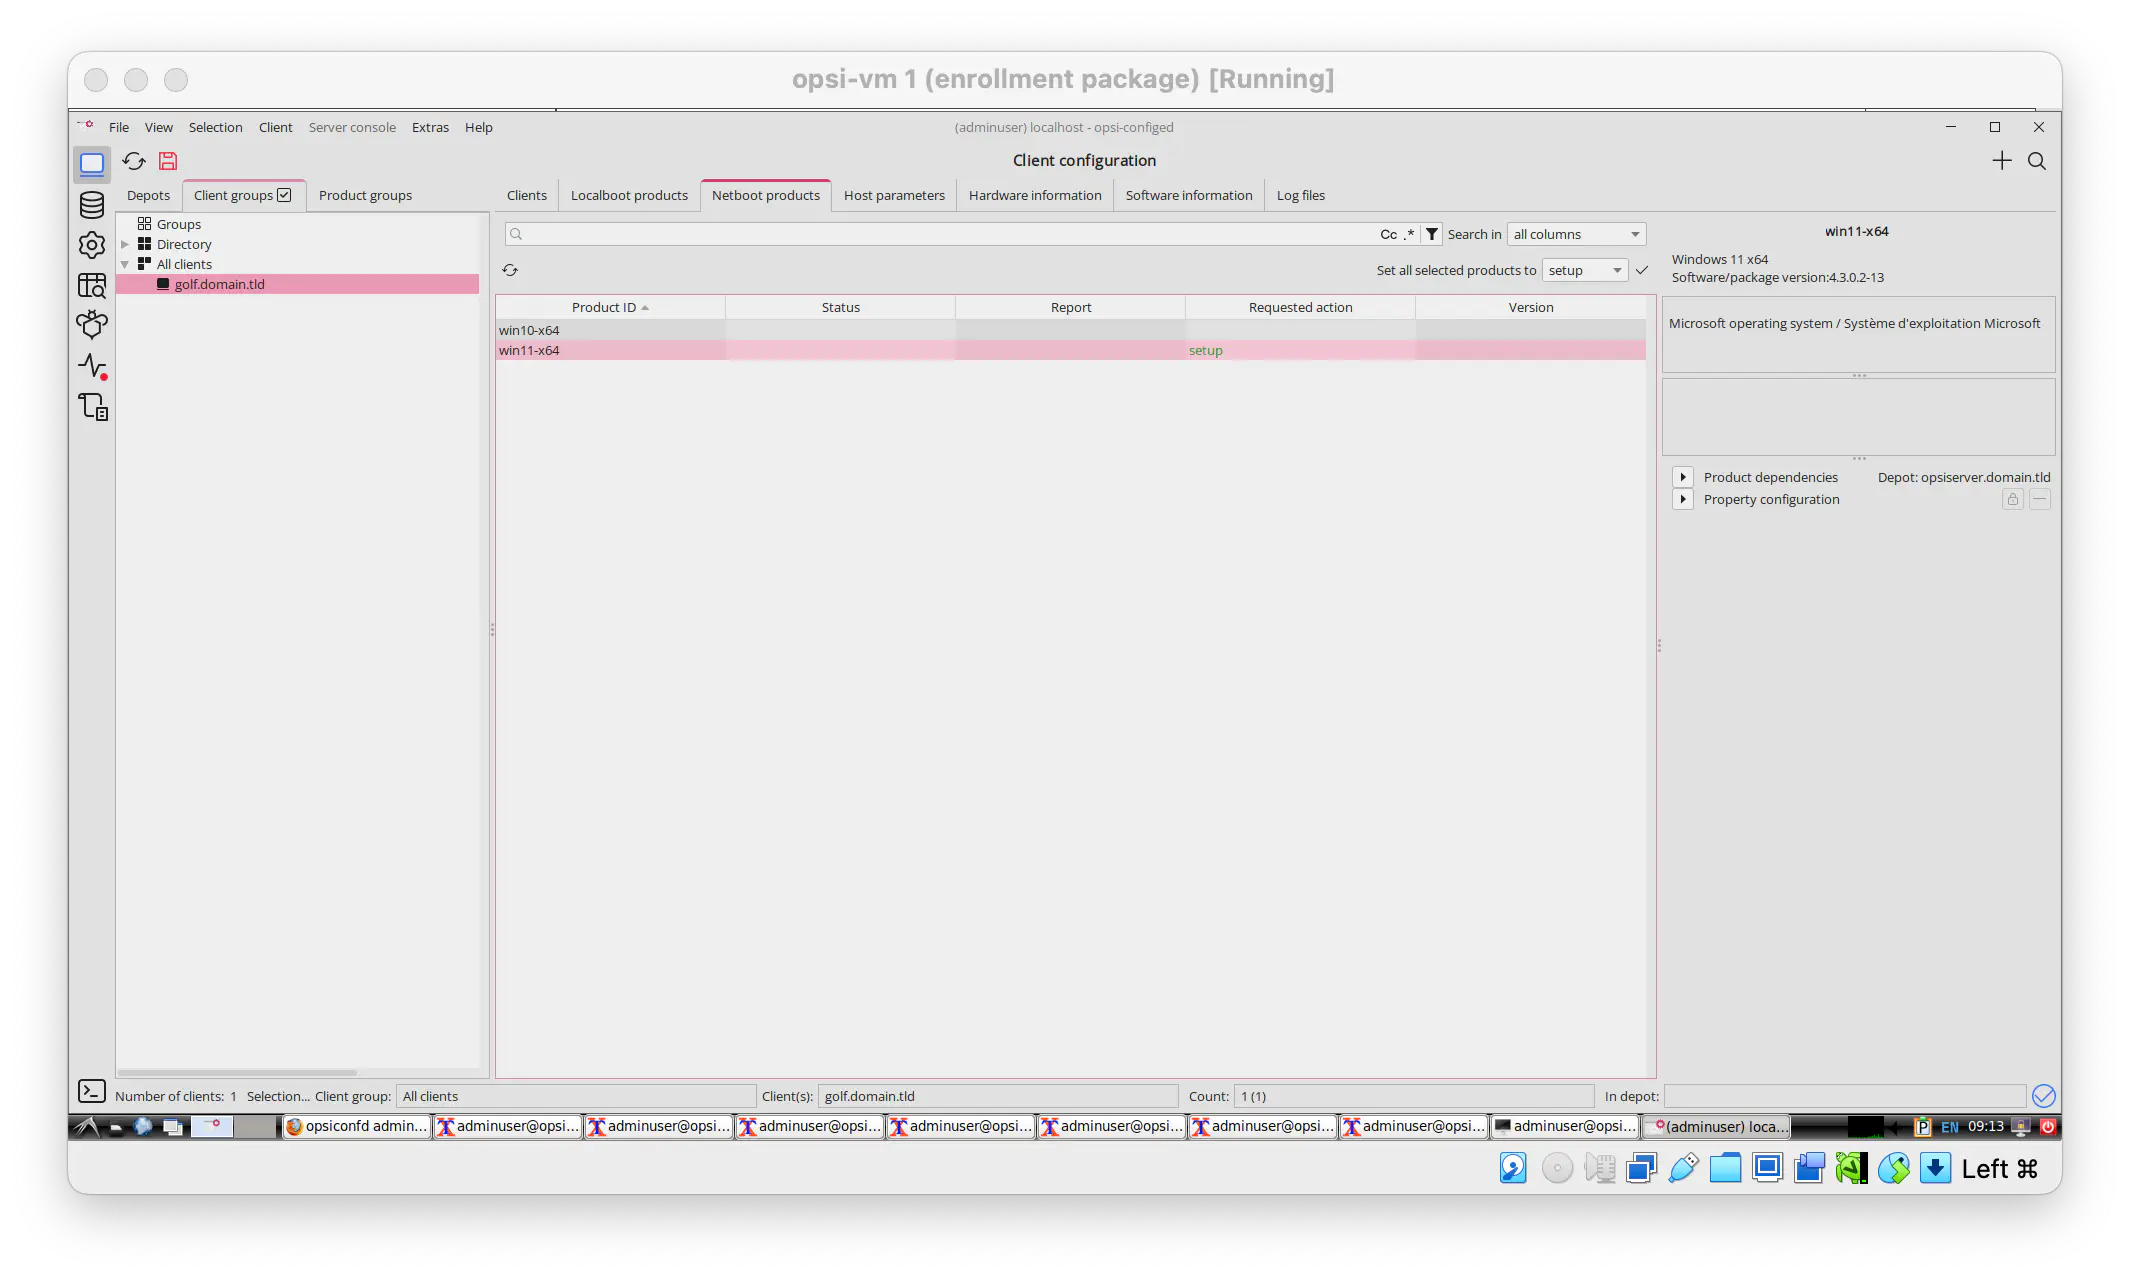
To initiate the installation of a netboot product, navigate to the netboot product tab in the configed interface. Set the requested action for the selected product to setup and click the save icon located in the top-left corner.
Once the action is sent, you can monitor the process by checking the logs in the configed client details and the client debug console. These logs will indicate whether the opsi client has successfully received and processed the action.
After completing these steps, the Windows client will check for netboot sources on the next reboot, initiating the installation process.
For troubleshooting you can run the following commands to view the TFTP traffic on the opsi server:
sudo tcpdump -i lo0 port 69
journalctf -f
Documentation
For Windows 11 installations you need to ensure that the device supports TPM 2.0. Check in thee BIOS menu if the option is enabled. Sometimes is it required to turn it off and on or to reset it on the next reboot.
Relution enrollment
This section outlines the process of enrolling devices into the Relution platform using the relution-enrollment local boot product. This product automates the installation of a provisioning package via PowerShell, ensuring seamless integration of devices into Relution.
Prepare provisioning package
A provisioning package must be prepared according to the instructions for Windows bulk enrollment.
The package must to be named relution so the opsi-script can detect the correct file.
Install Relution-enrollment opsi package
The relution-enrollmentpackage is available as experimental version at the public opsi-repository.
Download the relution-enrollment_<package-version>.opsi file using the wgetcommand and run the following command to install the opsi-package so it gets available within the configed as localboot product.
opsi-cli package install relution-enrollment-<package-version>.opsi
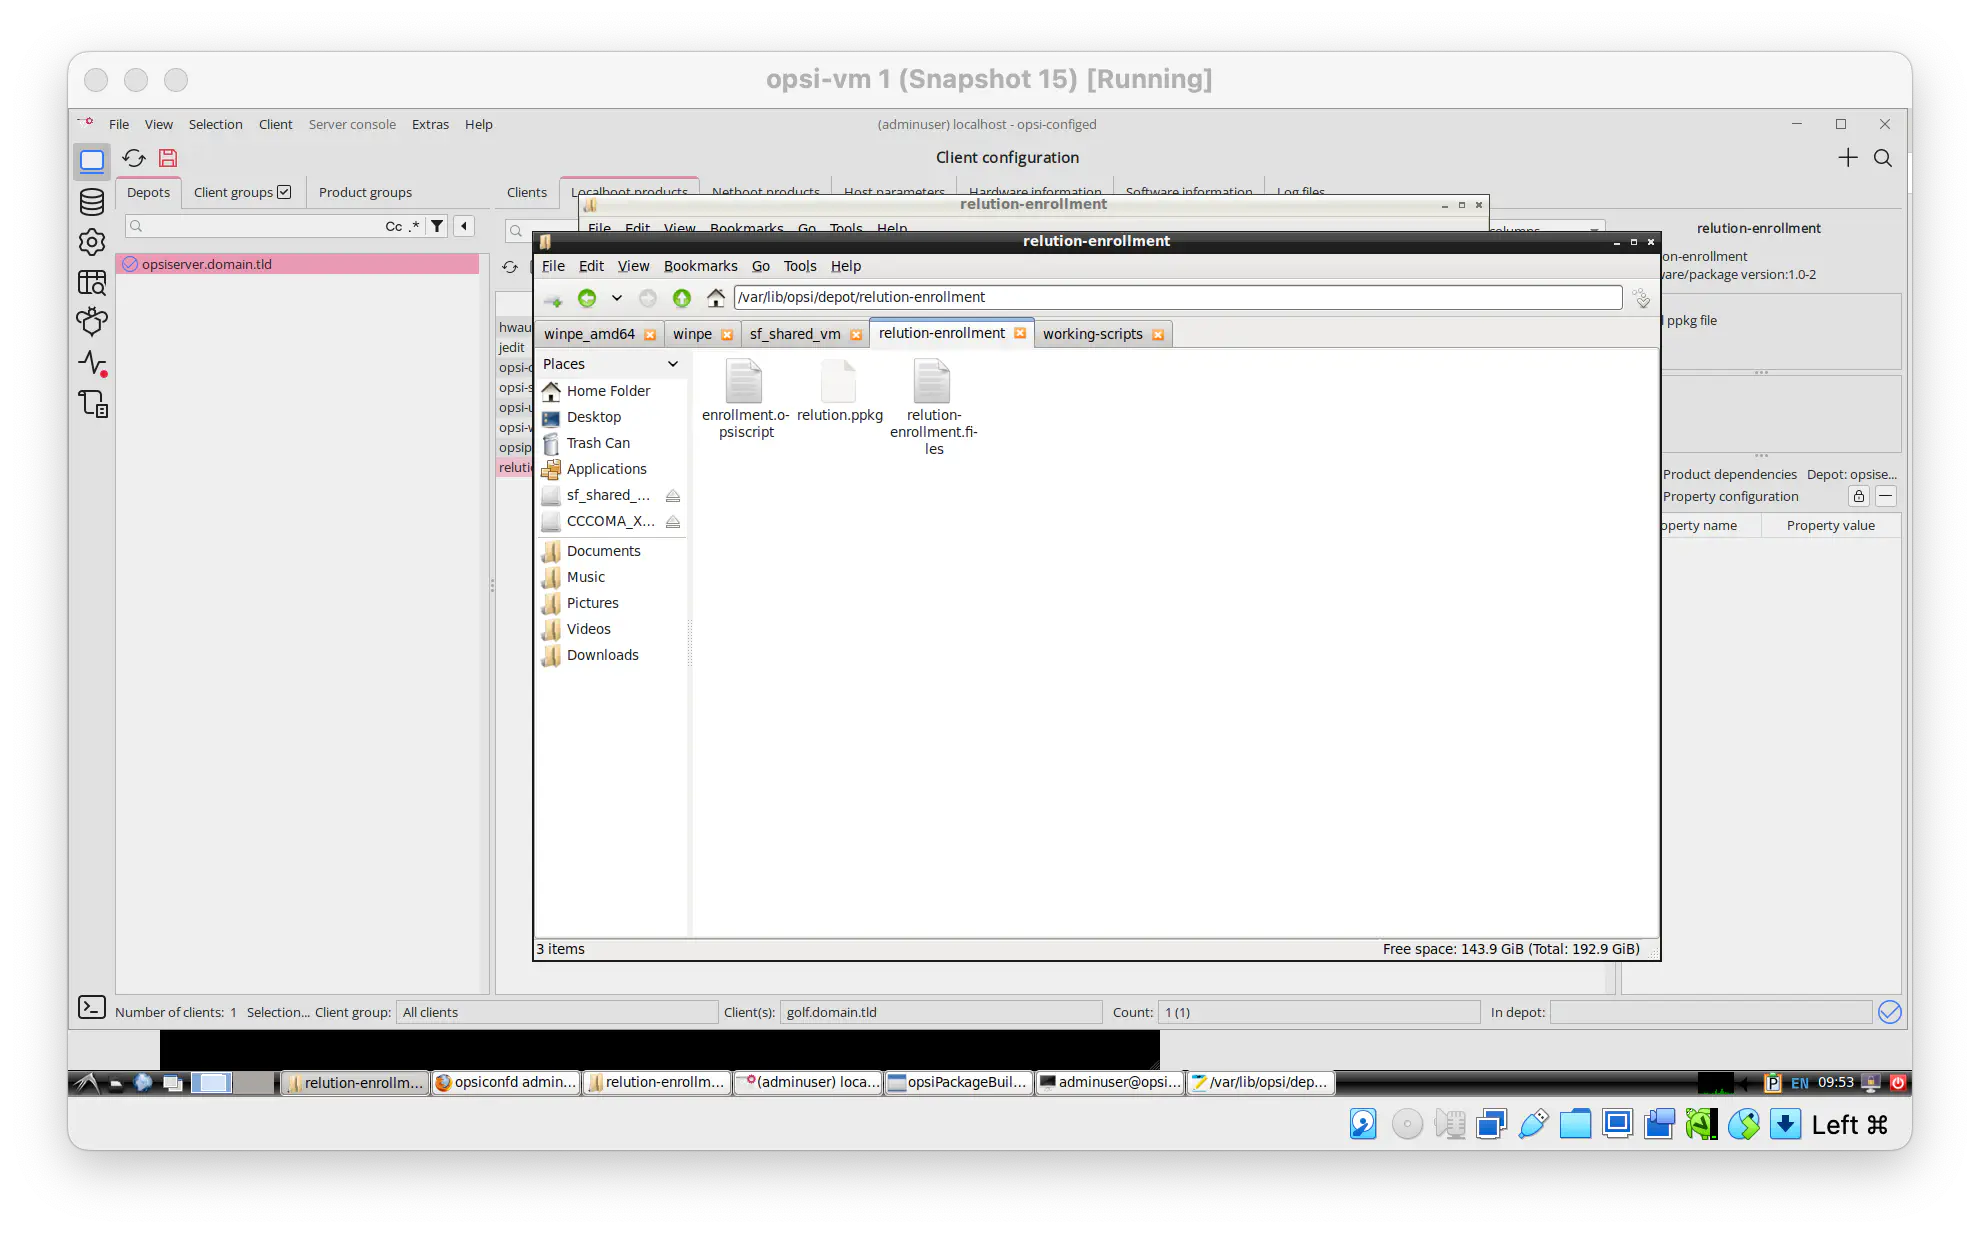
After the installation, the package is available in the depot folder (var/lib/opsi/depot). Place the generated provisioning package here and run opsi-set-rights in this directory.
/var/lib/opsi/depot/relution-enrollment/
├── enrollment-opsiscript
├── relution.ppkg
├── relution-enrollment.files
Install product
To install the package, select the client and navigate to the Localboot products tab. For the relution-enrollment product set the requested action to once. Save the state and trigger an on_demand action (Menu > Client > Trigger opsiclientd event > on_demand).
As the install provisioning package PowerShell command always marks the action as successful, check the logs for any errors.
Error “Package installation failed, error code -2147024713 (800700B7)” indicates that a package with the same id is already installed.
If the provisioning profile was installed already, it needs to be removed first.

Common issues
This section highlights common issues encountered during the opsi server setup and netboot installation and provides solutions or references to relevant documentation for troubleshooting.
- Unable to get geometry for disk ‘/dev/nvme0n1’
- Set password for root user by setting host parameter
netboot.linux-bootimage.cmdline.pwh - When the error occurs press
stg + alt + F3/F4/F5to switch to the active terminal - Enter the credentials for root and your password
- Run
sgdisk --zap-all /dev/nvme0to delete the partition - Switch to the other terminal and retry the netboot
- See documentation on netboot products
- Set password for root user by setting host parameter
- opsi winPE is empty: move all files from the winPE sub directories (e.g. media) to the root
- WinPe init does not work